Office Phone Booths Assembly Manuals
Follow the instructions and assemble your office phone booth fast and easy.
*Assembly/Disassembly services might be available
Have a quick look at the video below and check out how to assemble one Soho booth.
Our range of acoustic office phone booths offers something for every situation – from fully equipped premium pods to affordable solutions for tight spaces.

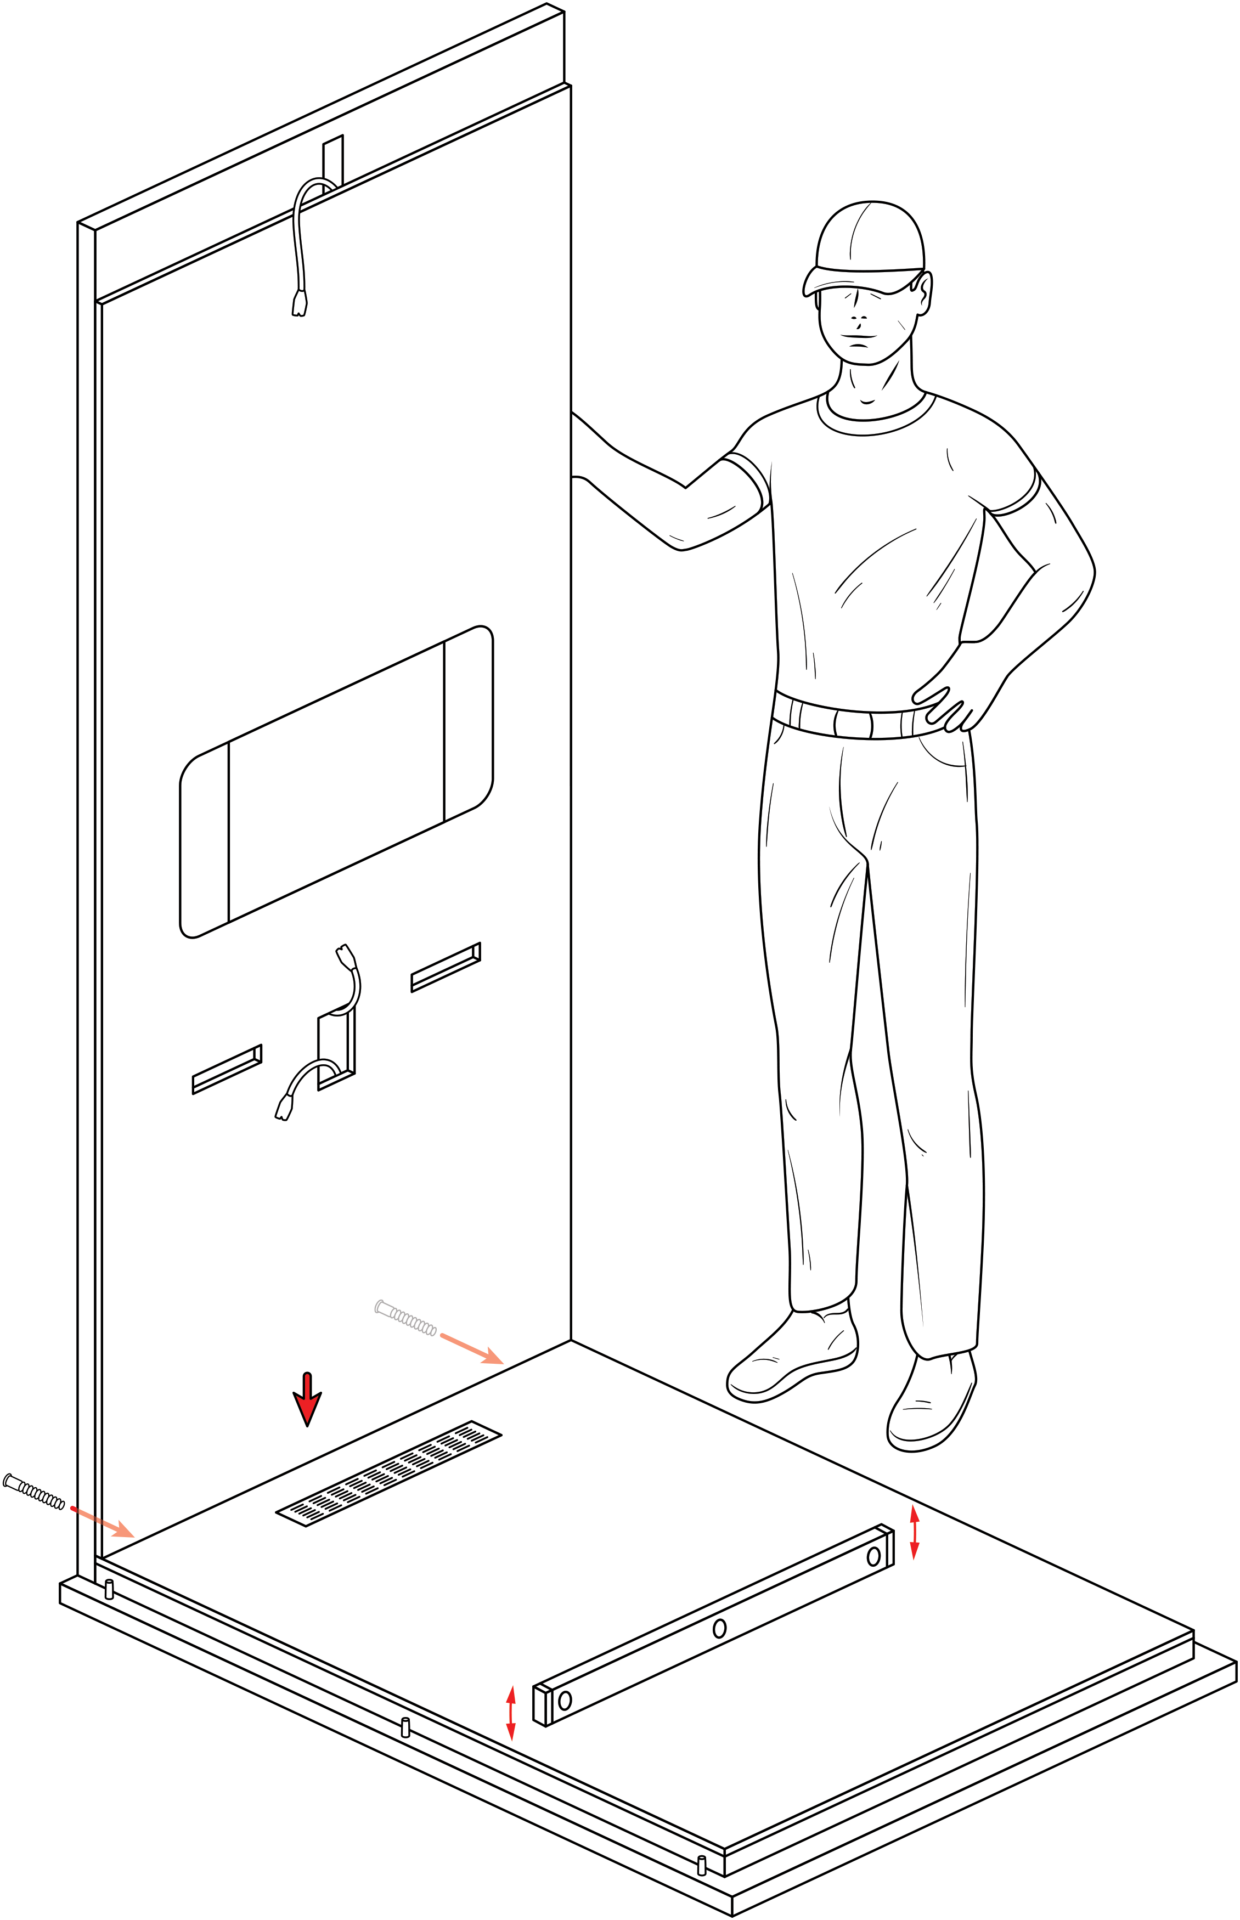
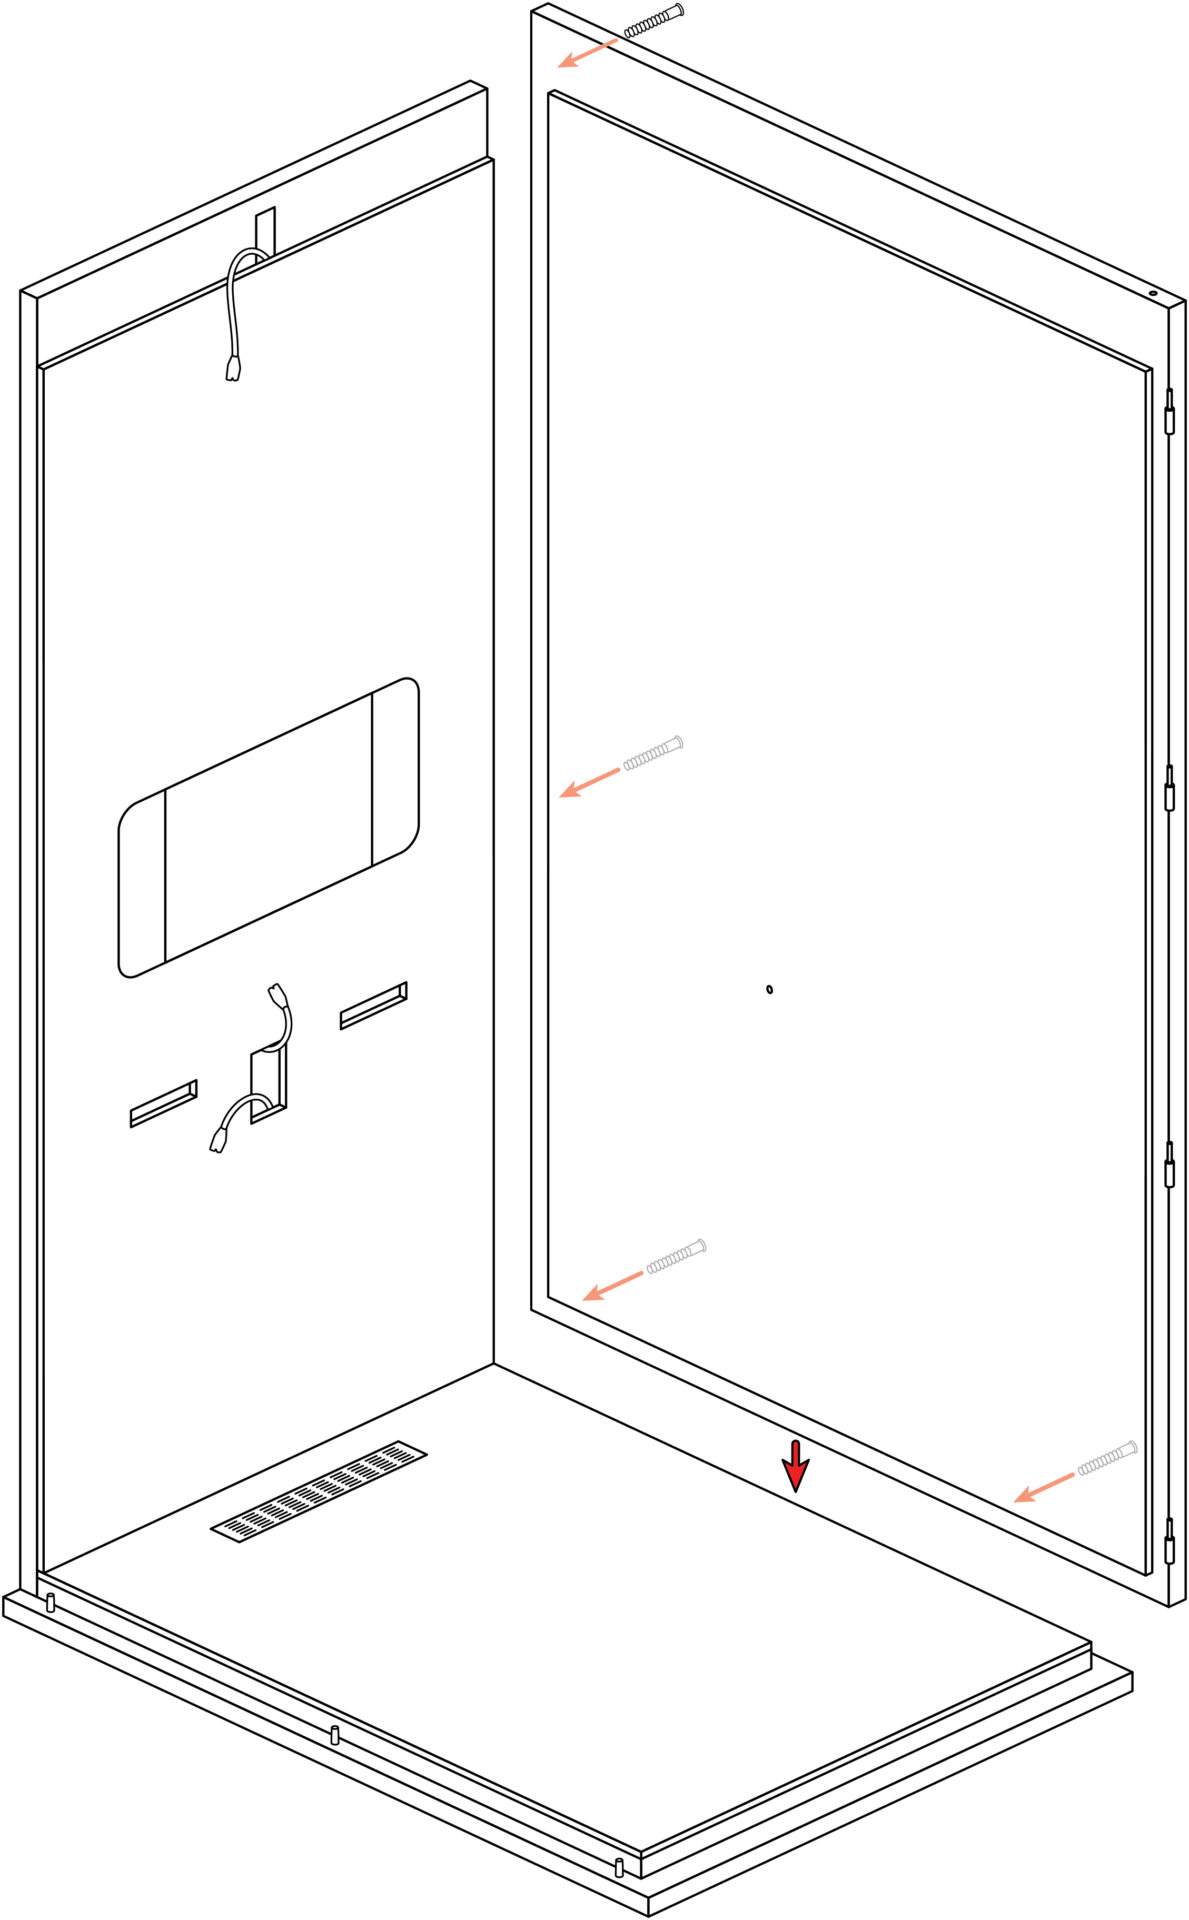
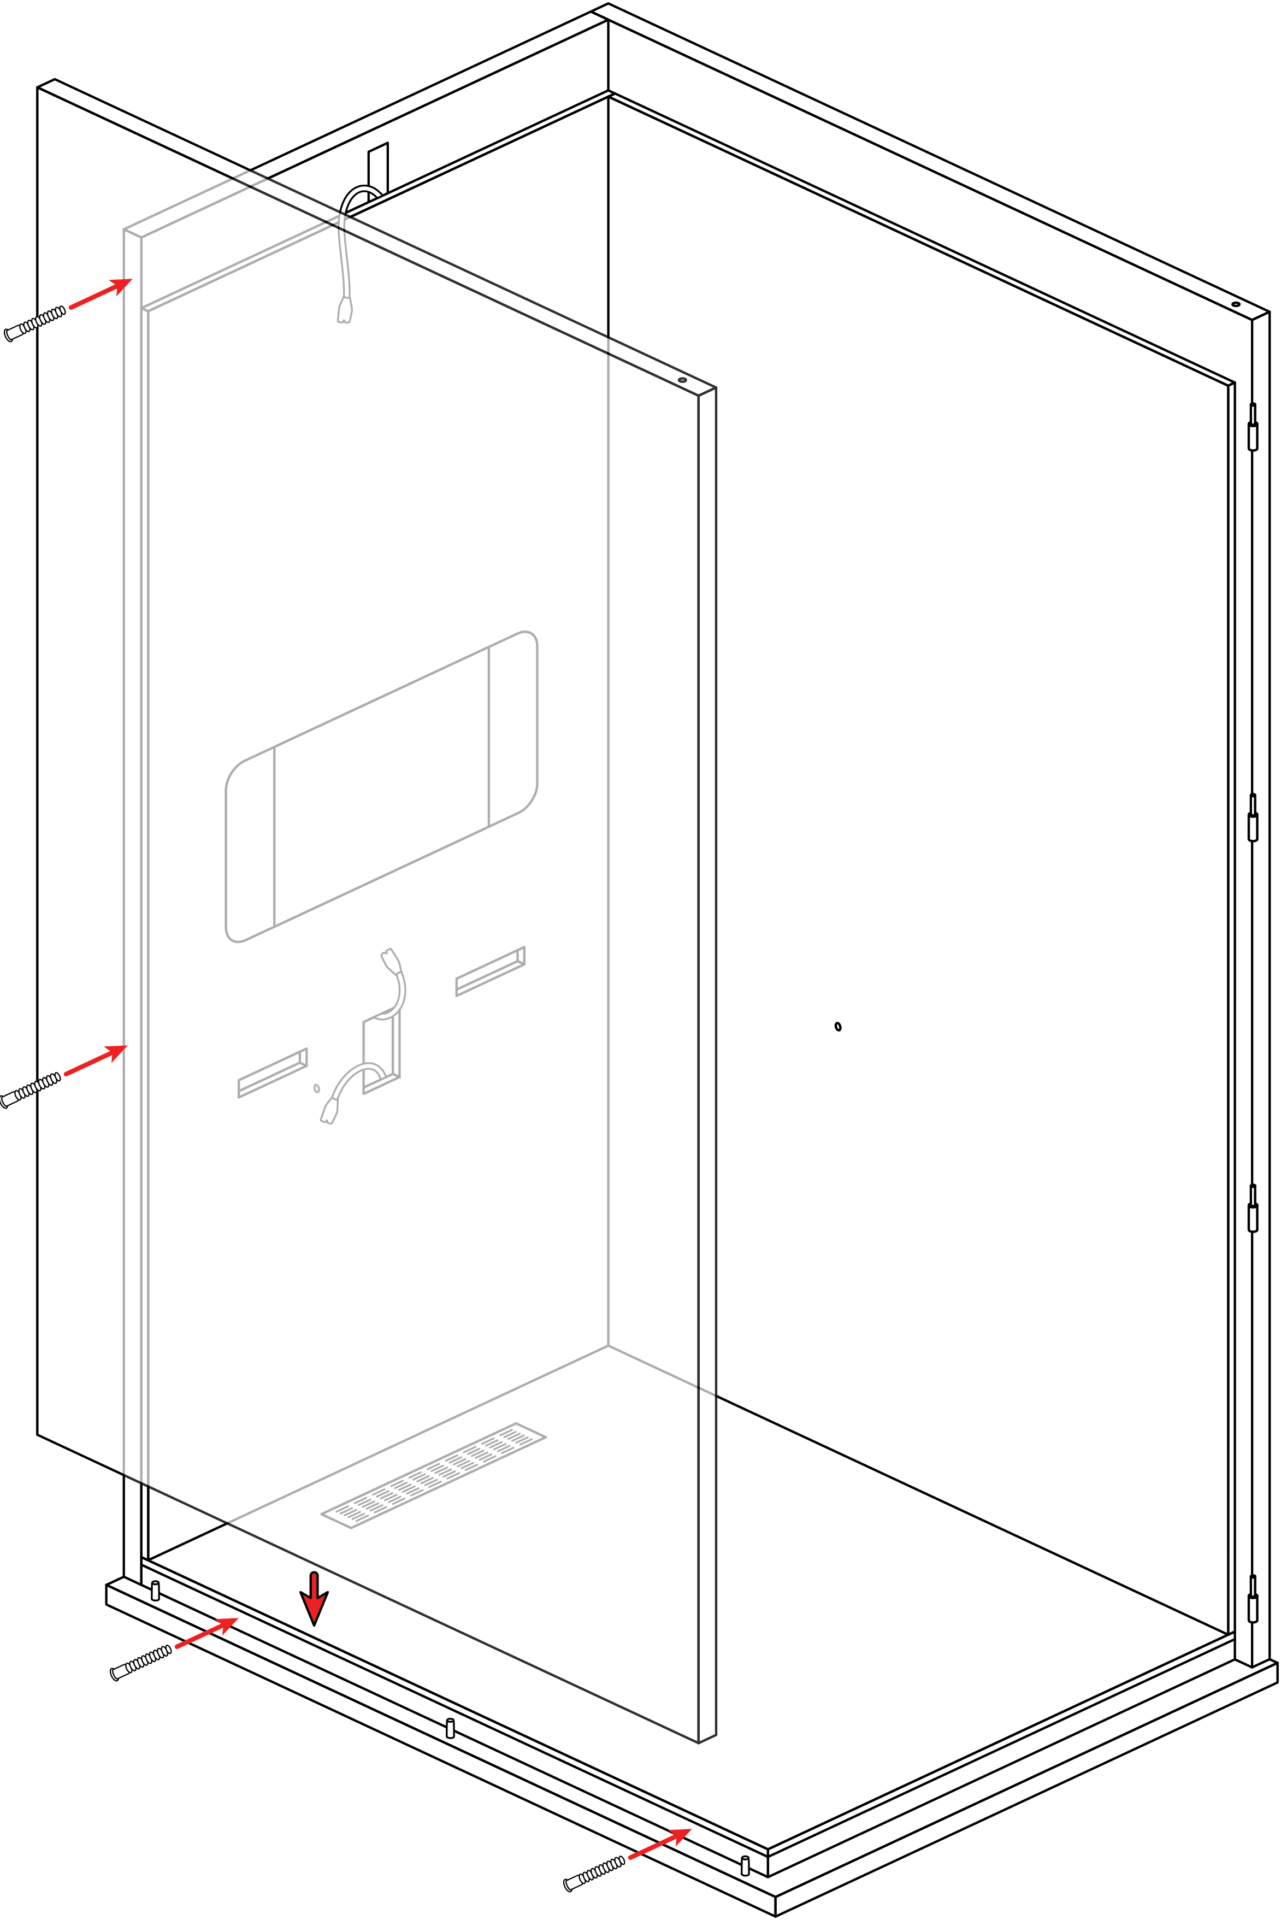
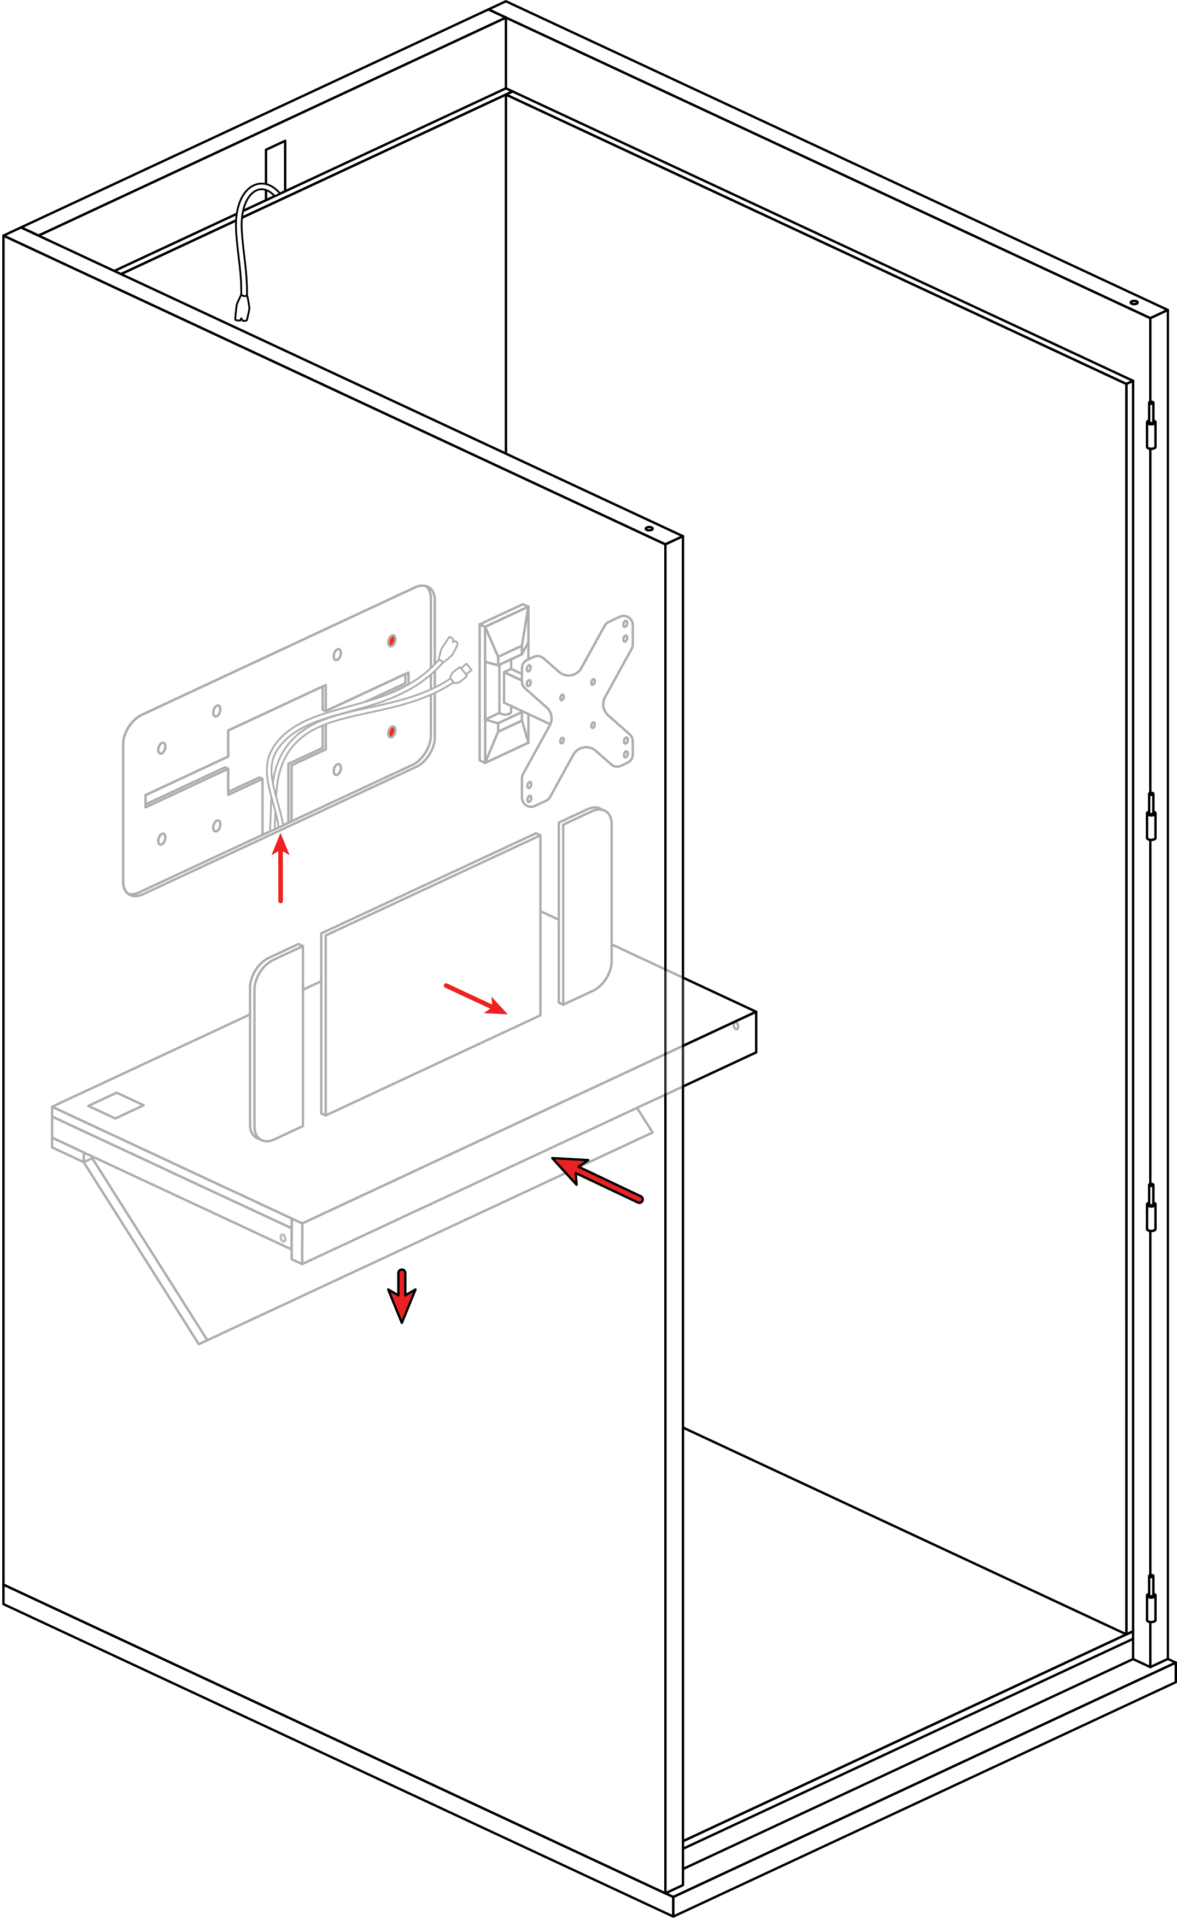
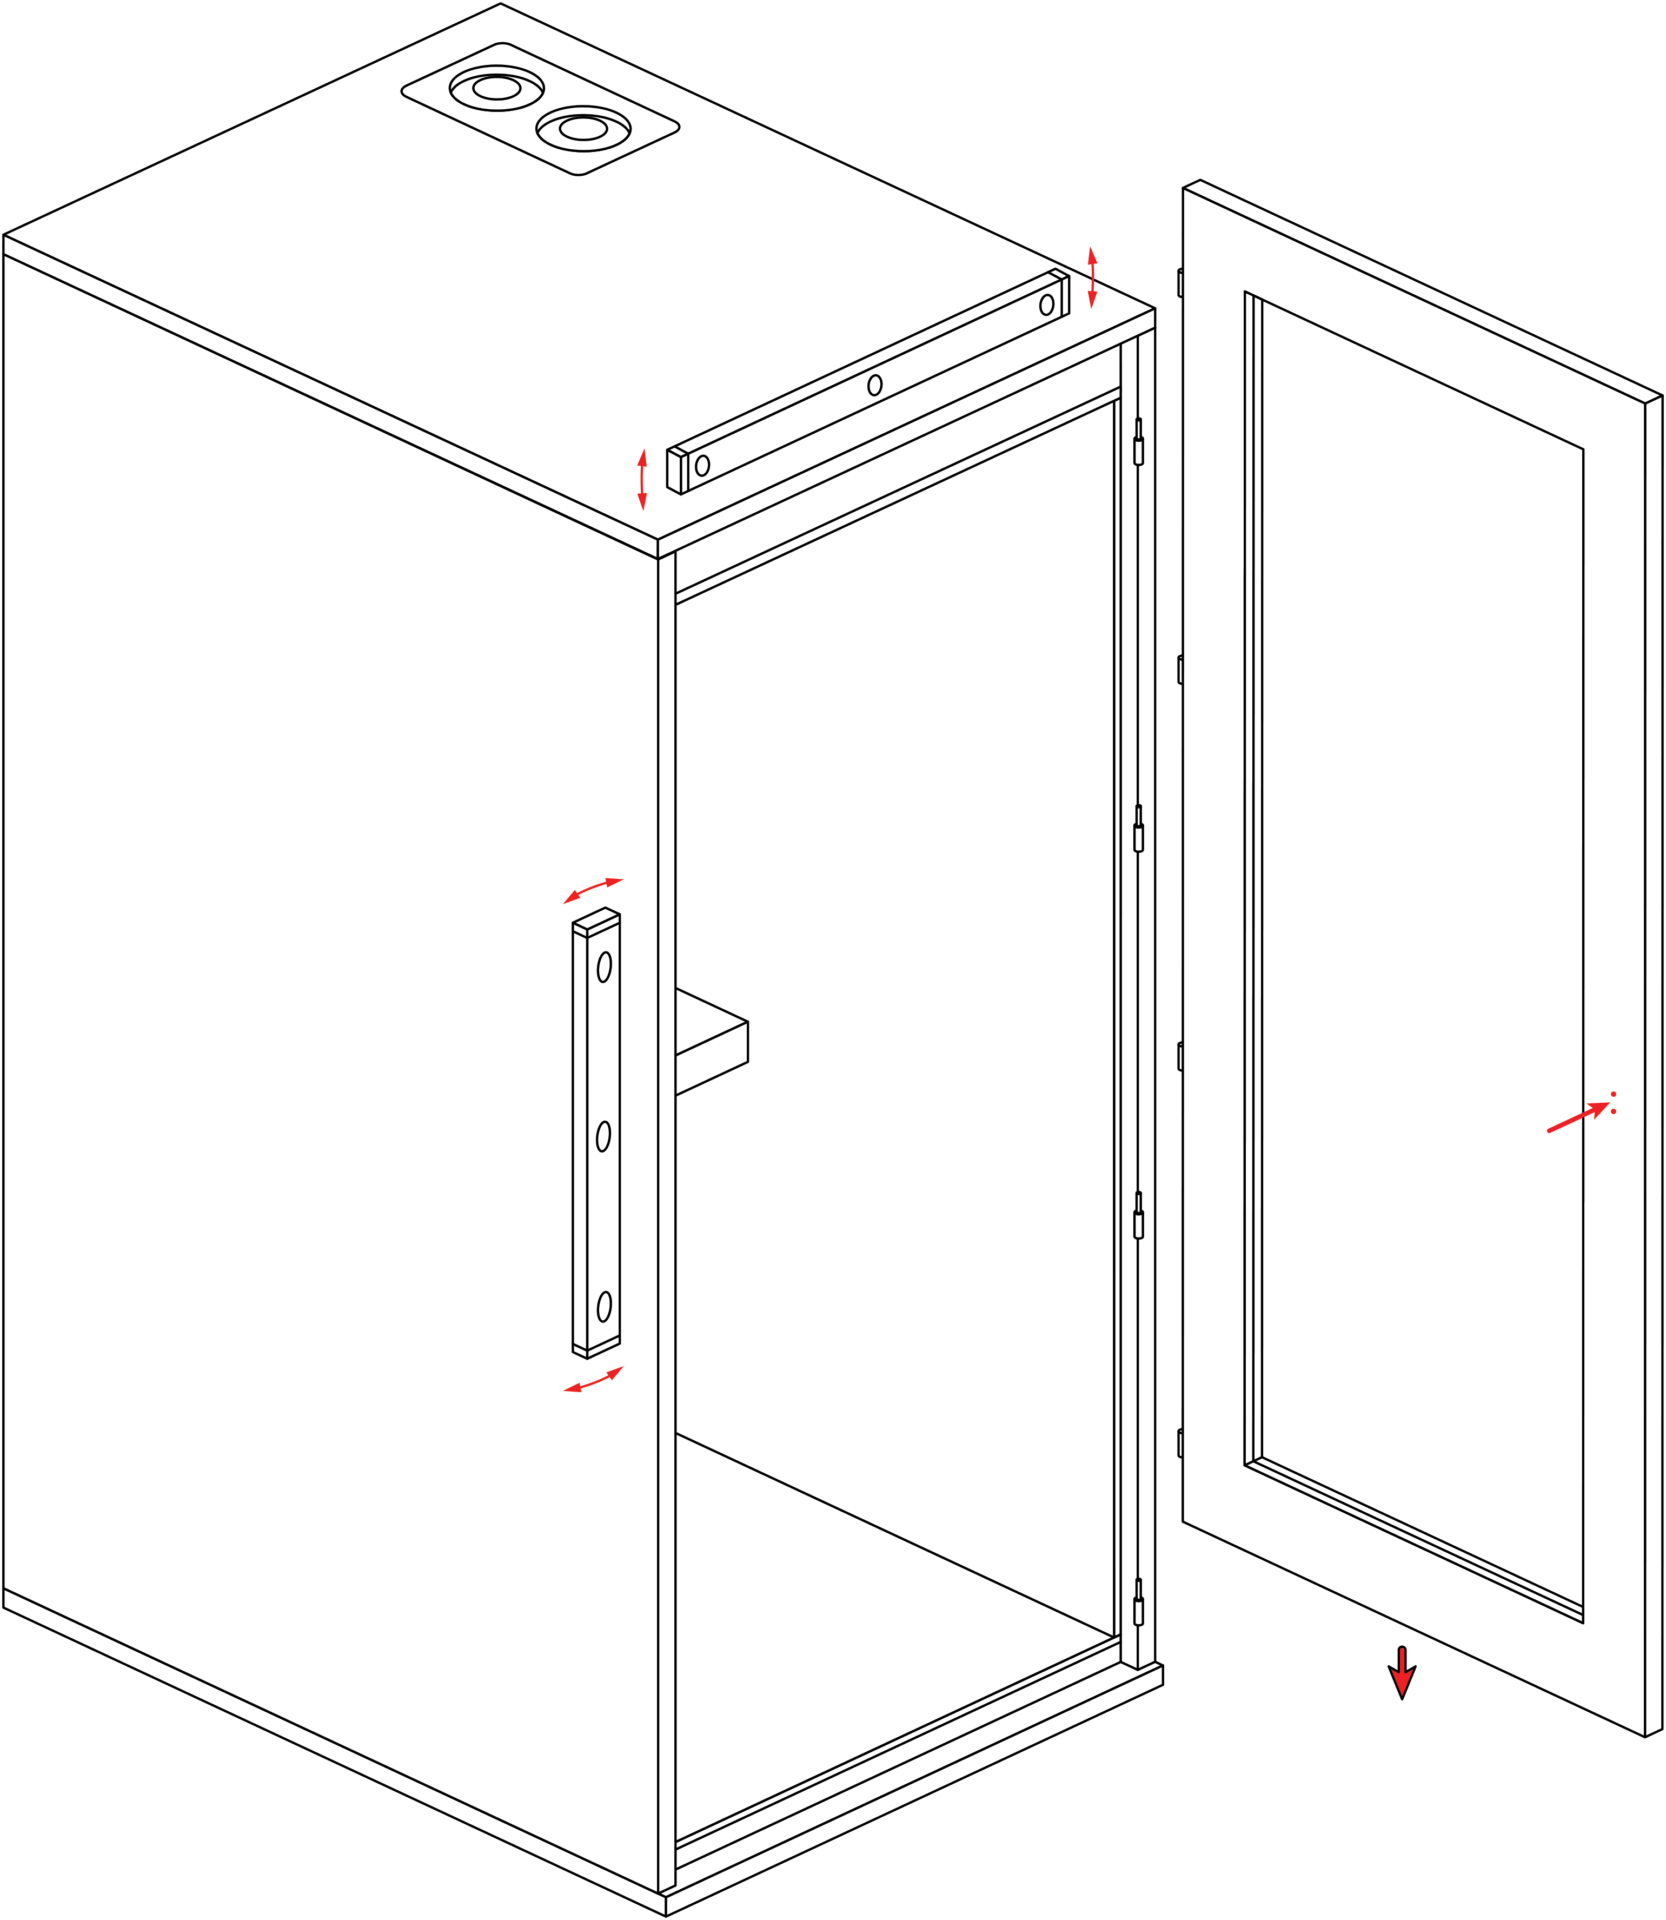
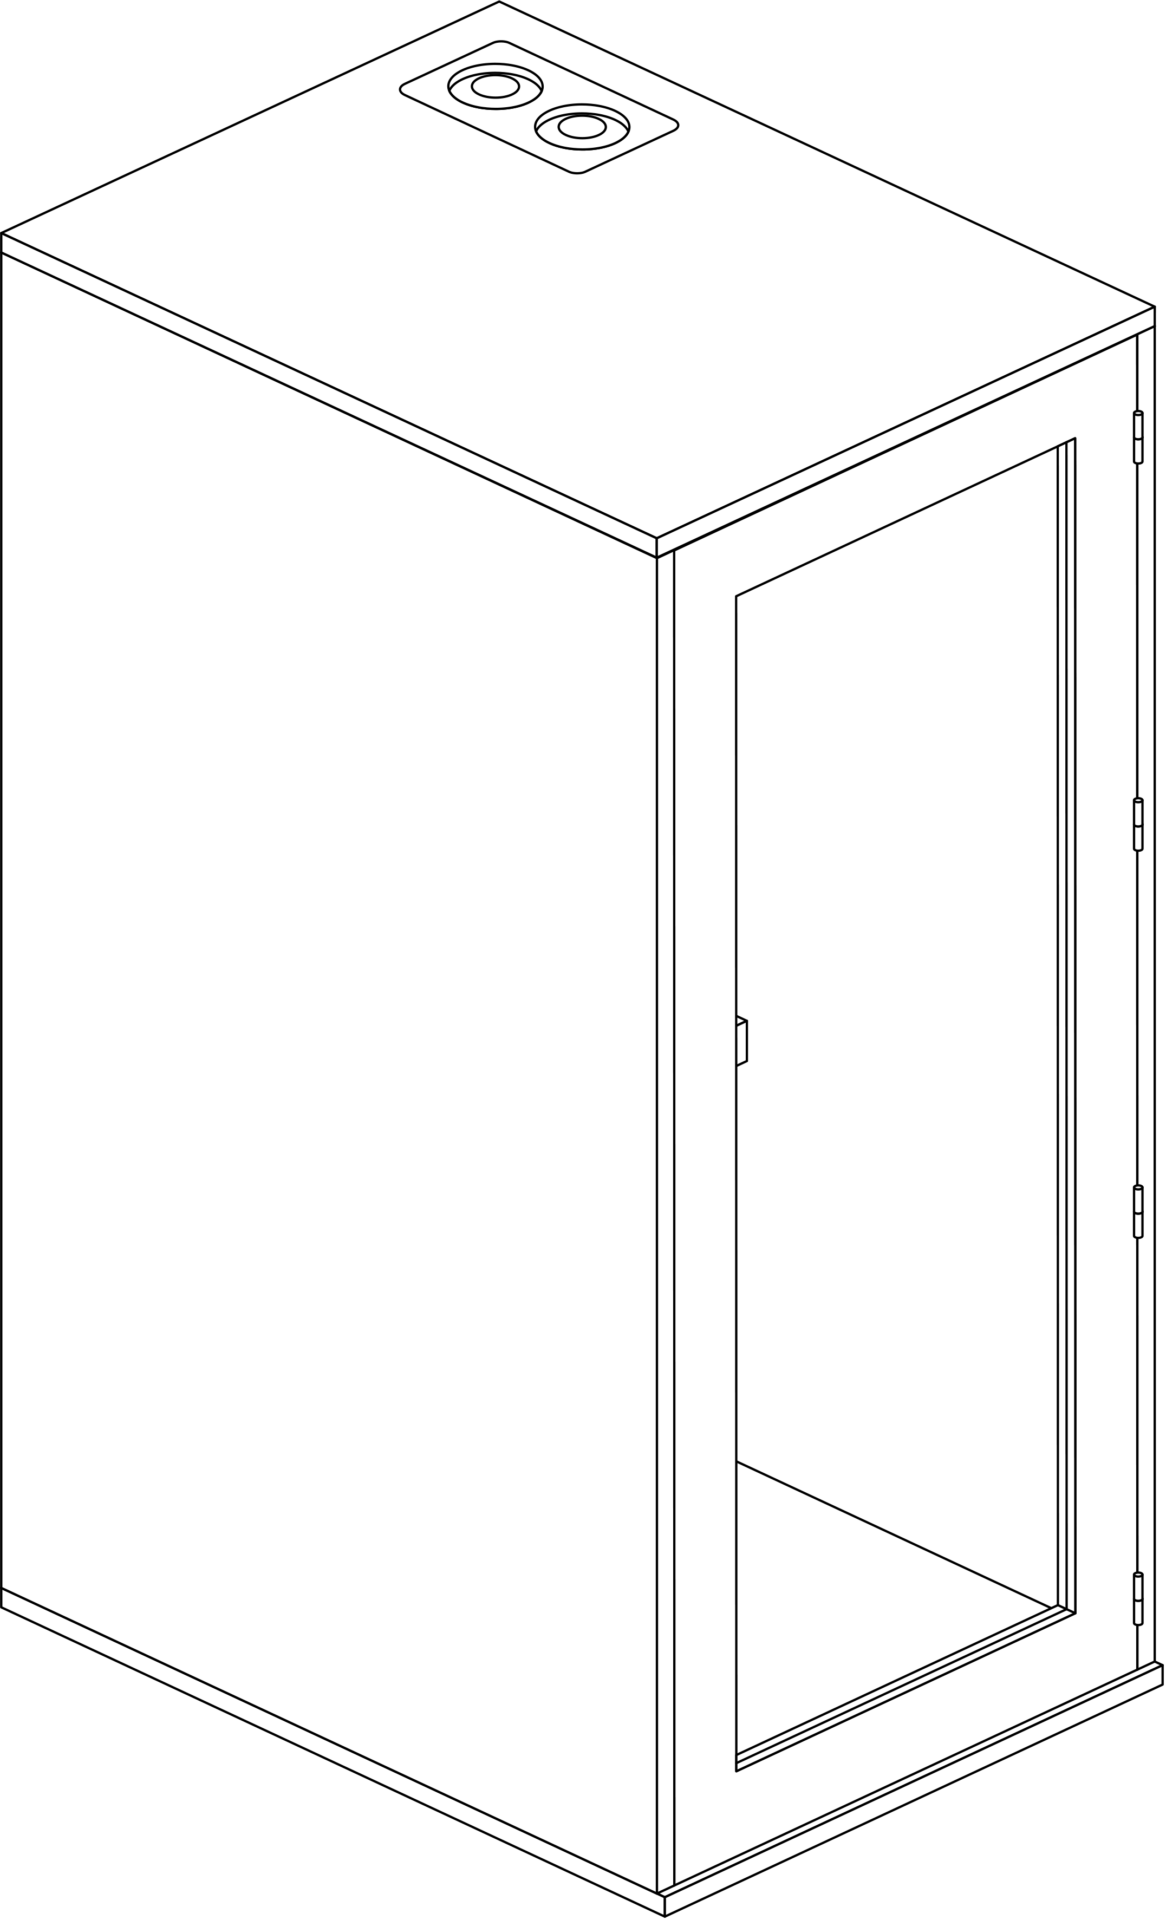
SOHO
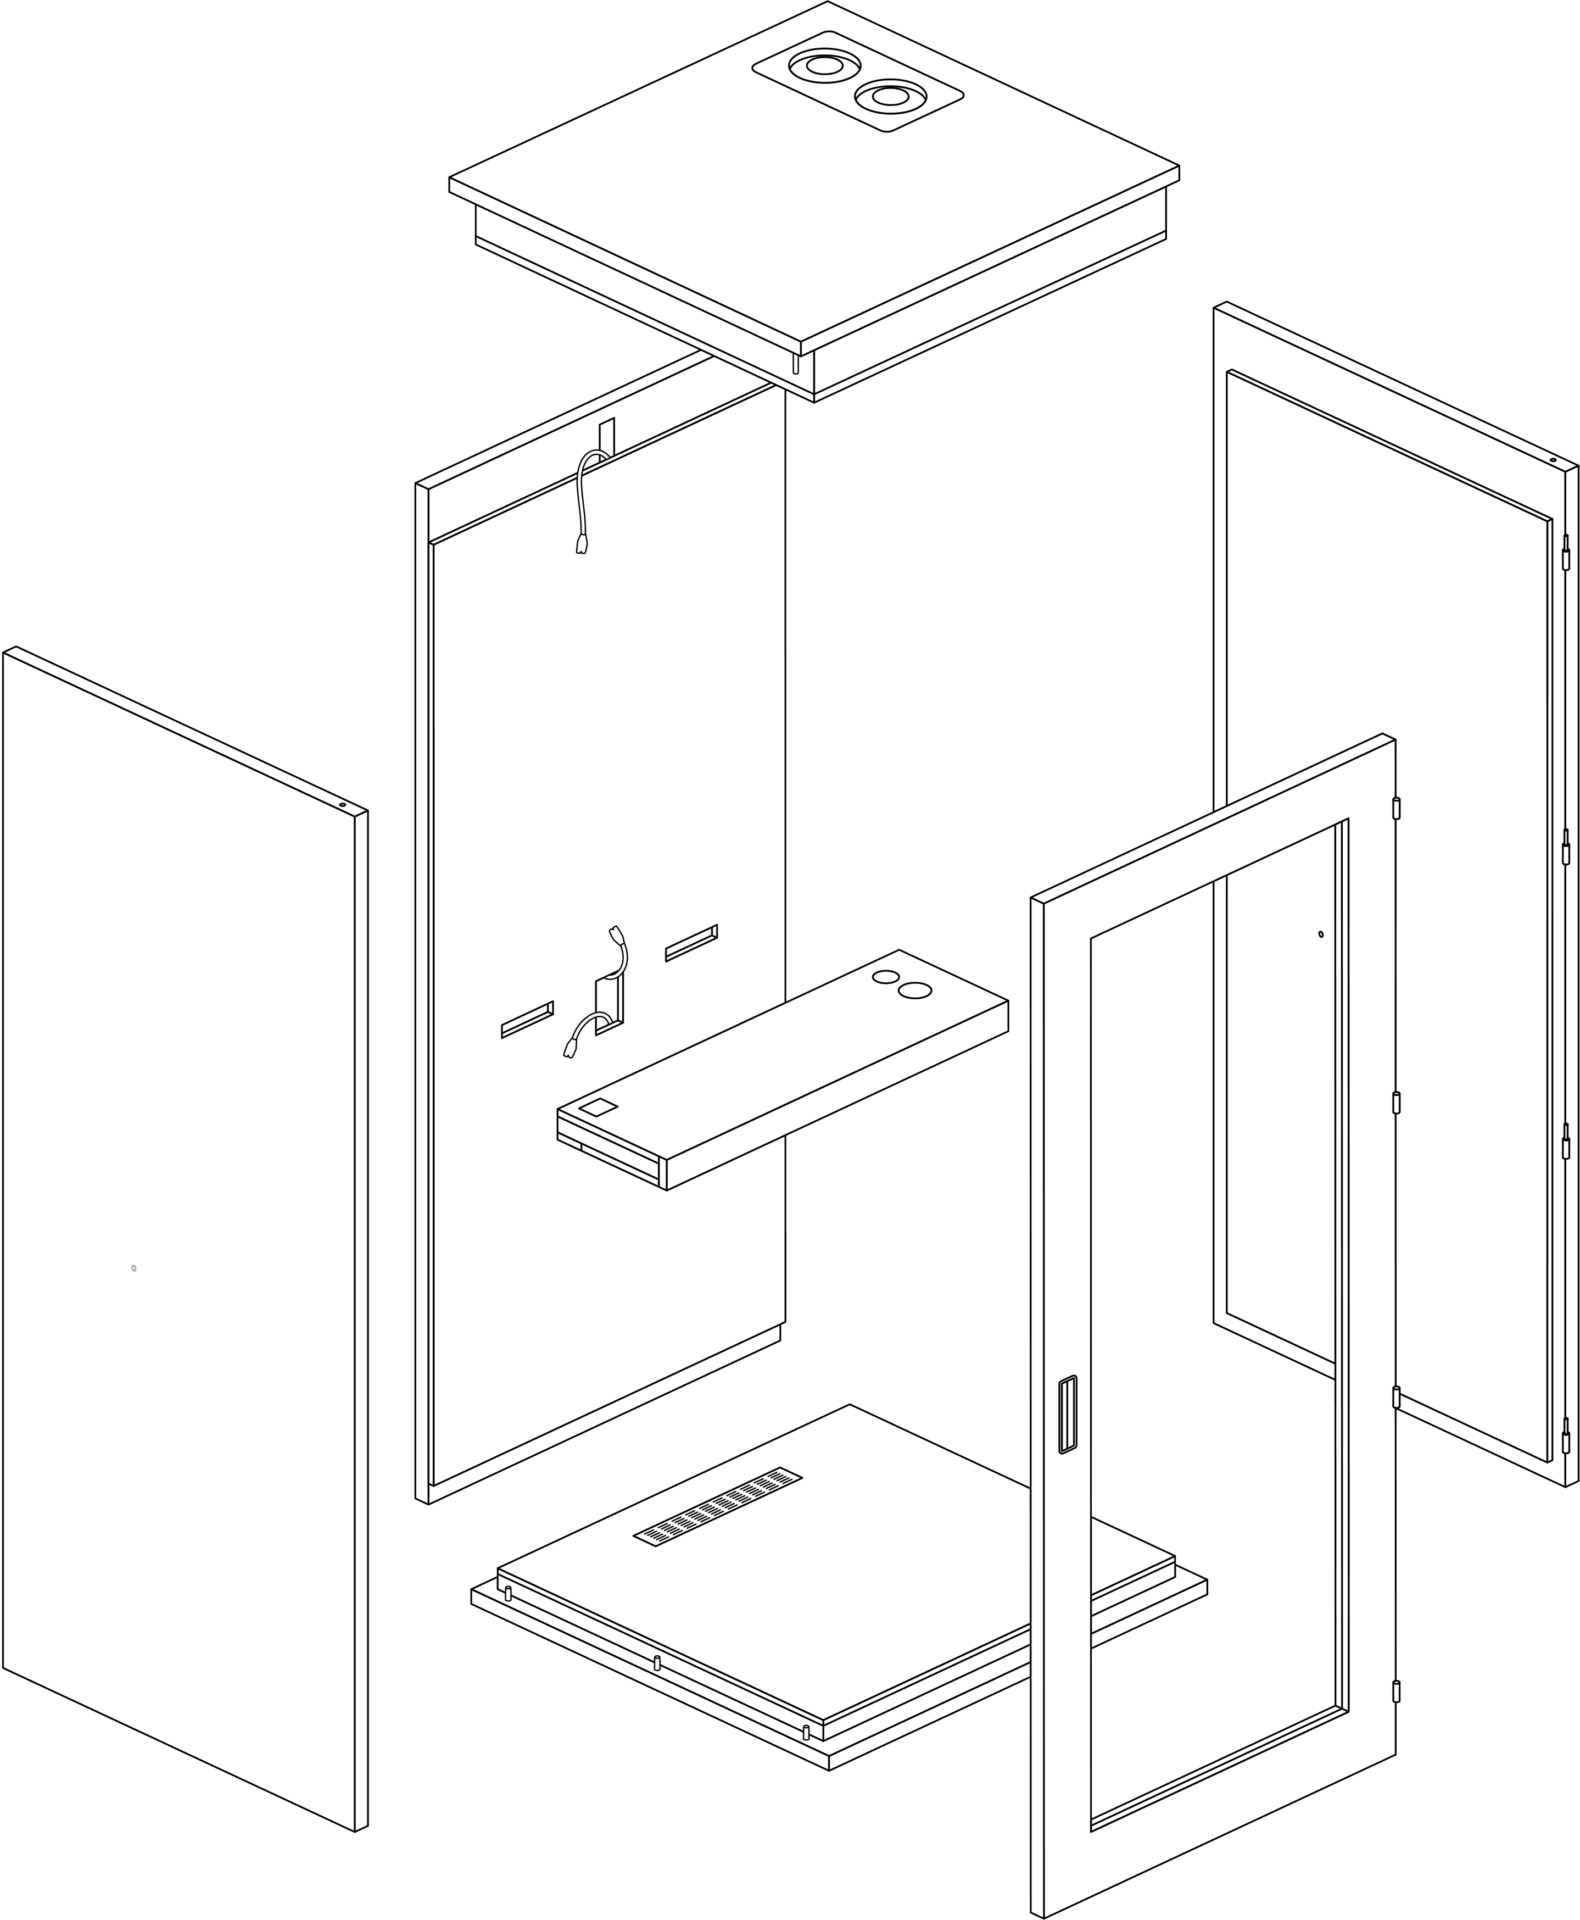
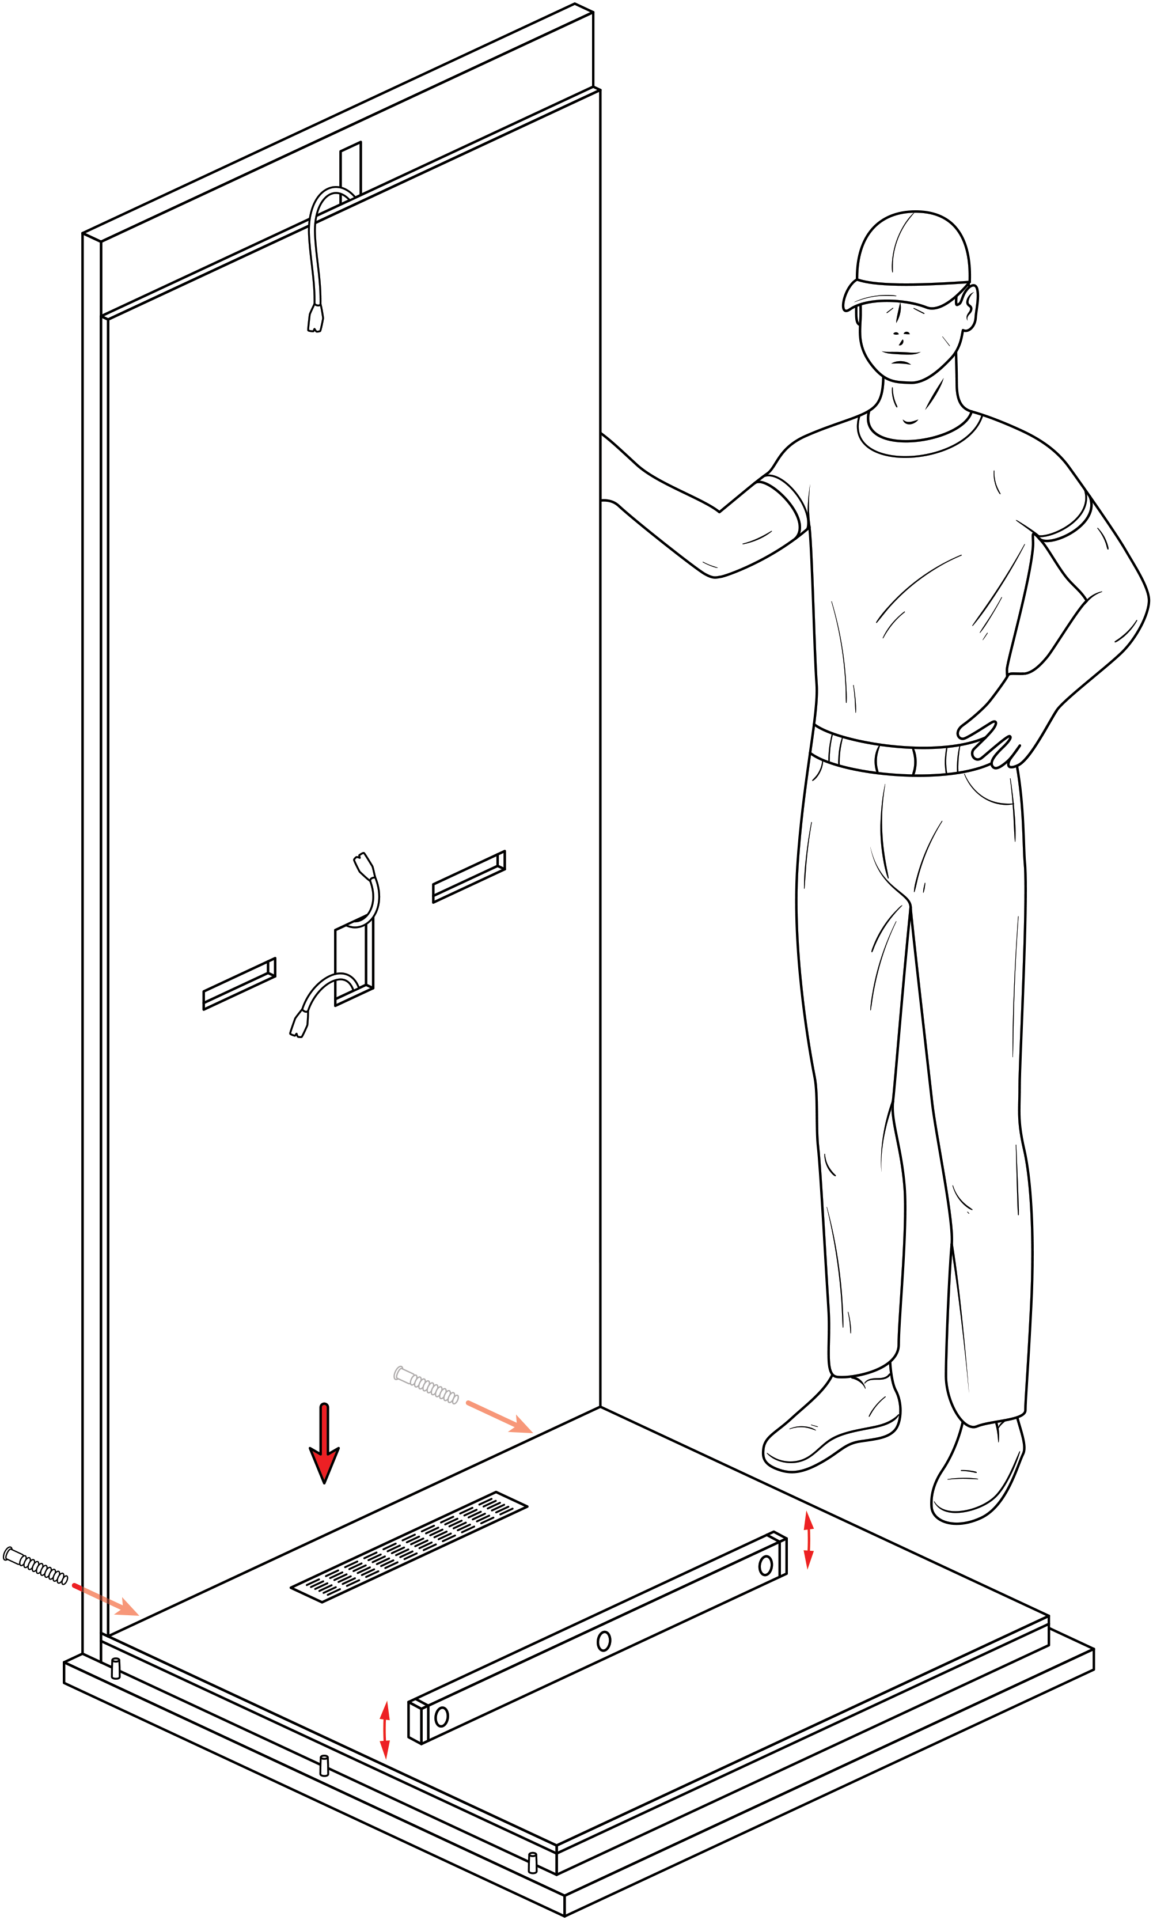
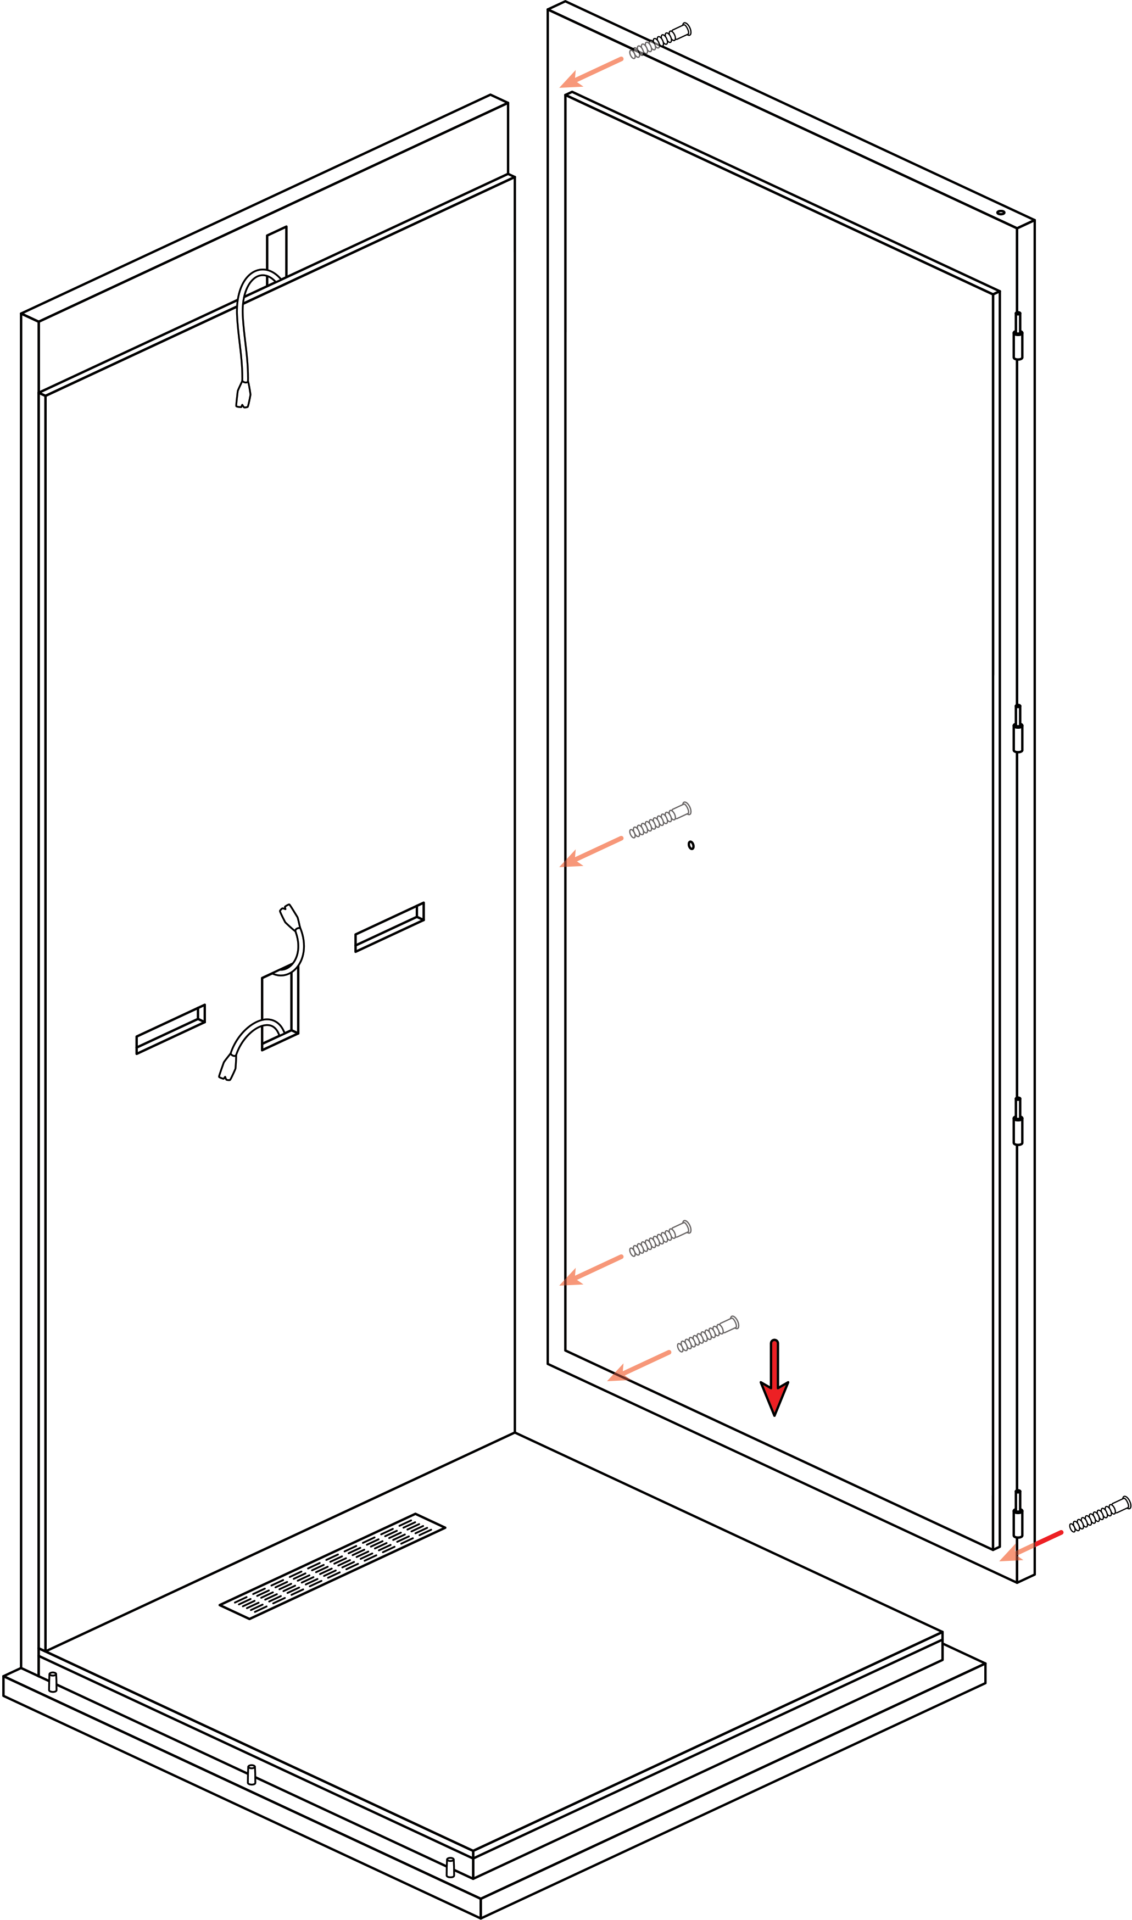
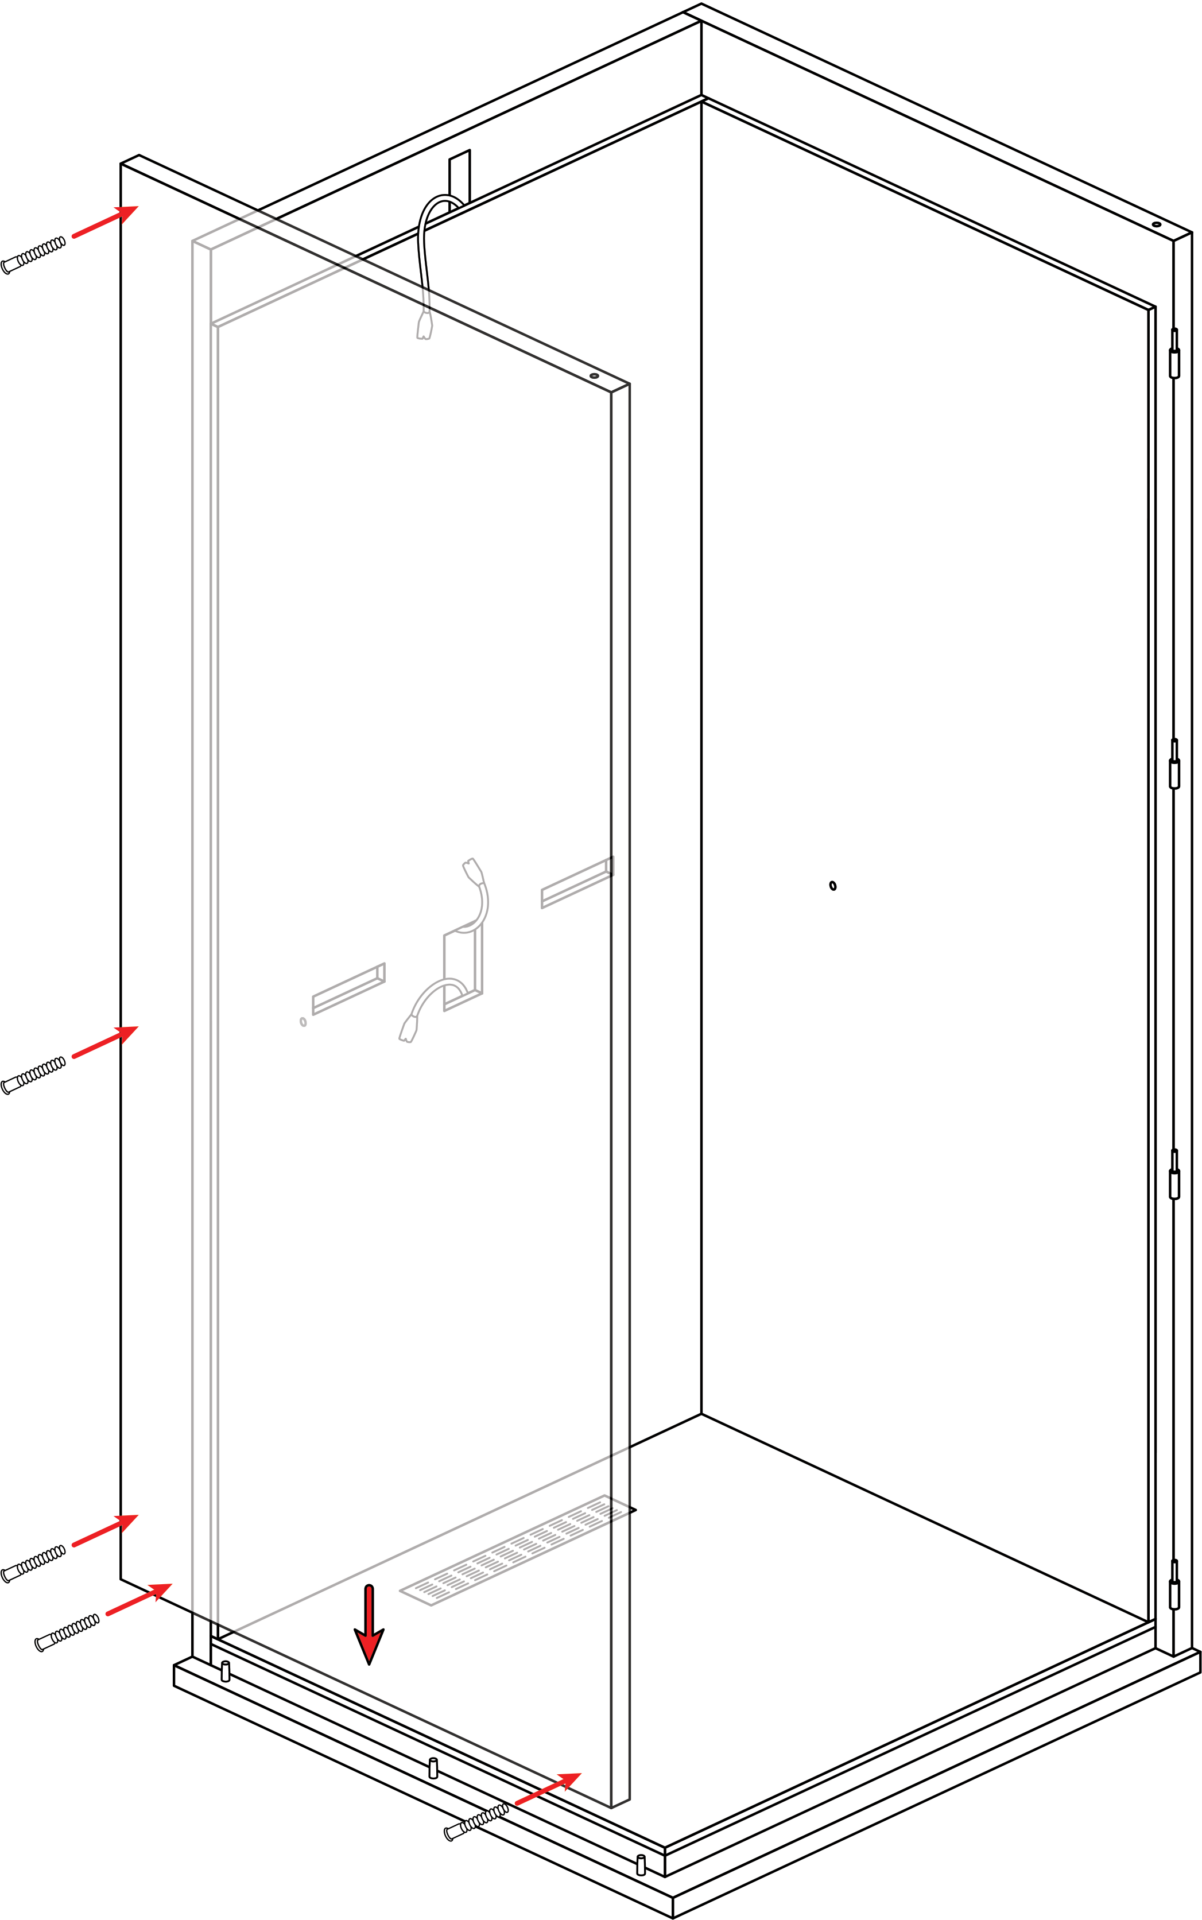
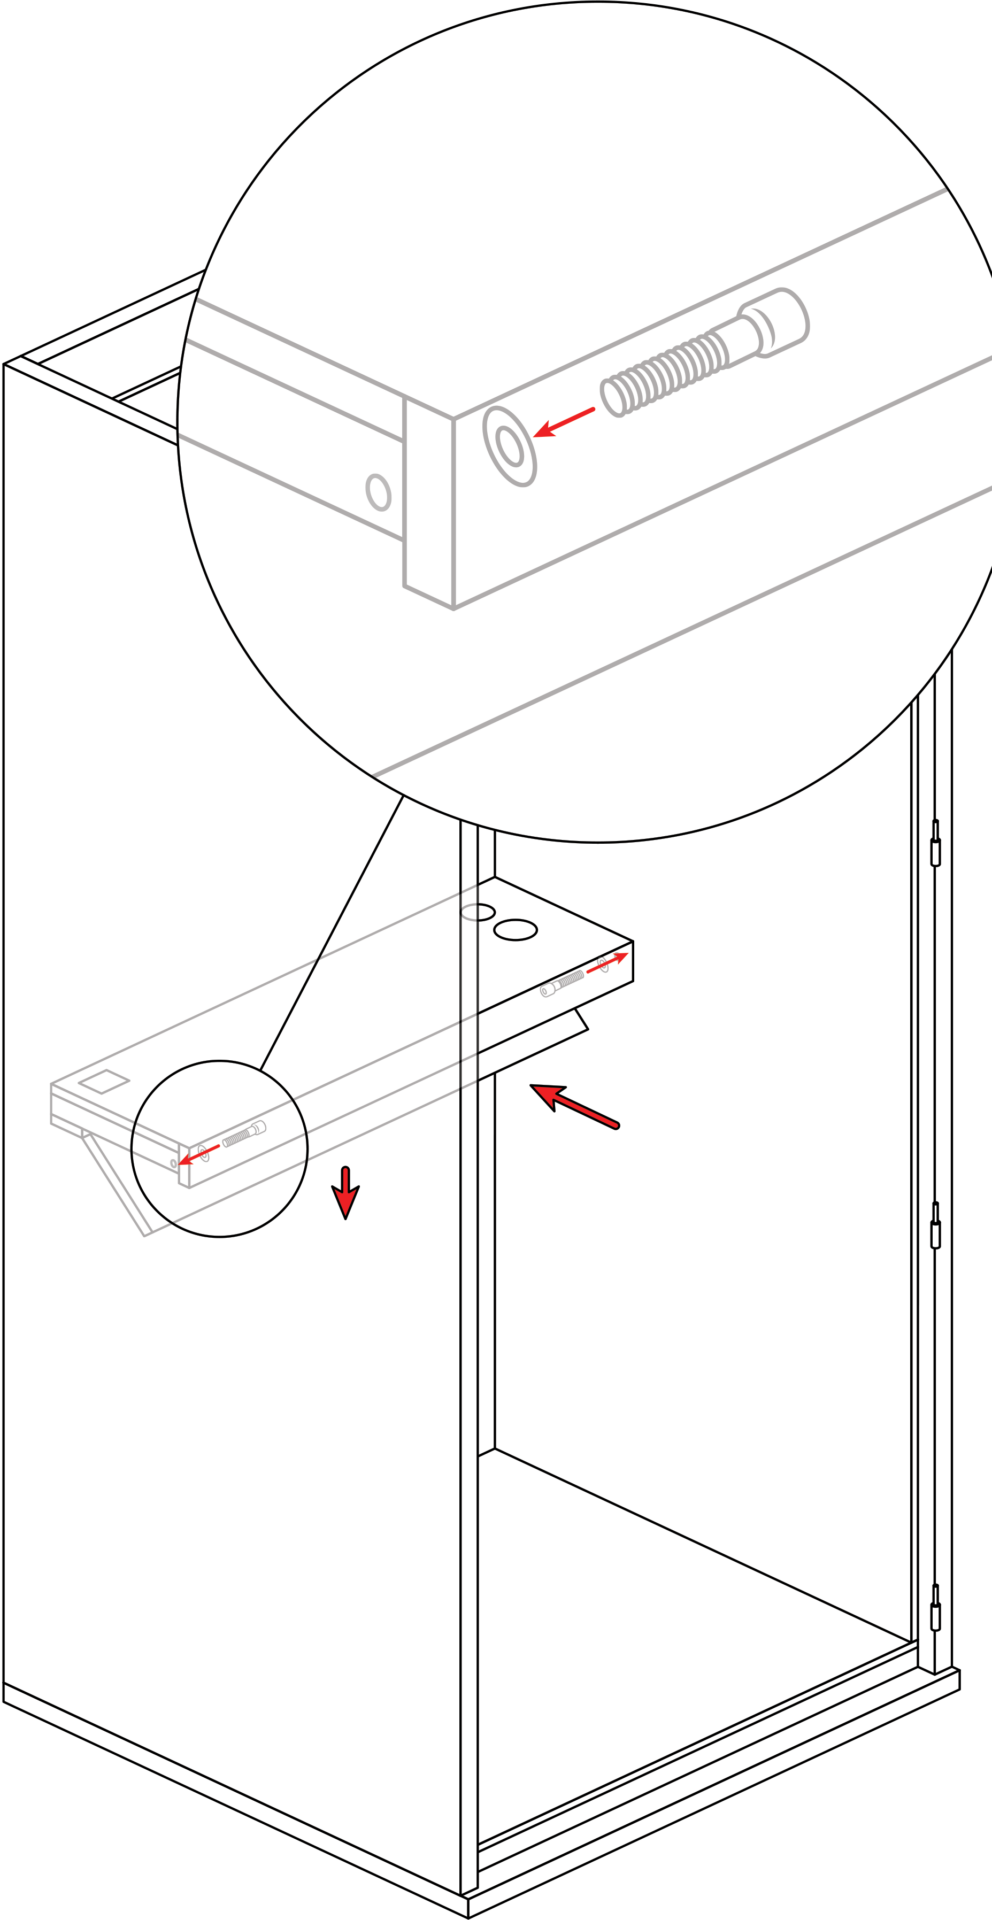
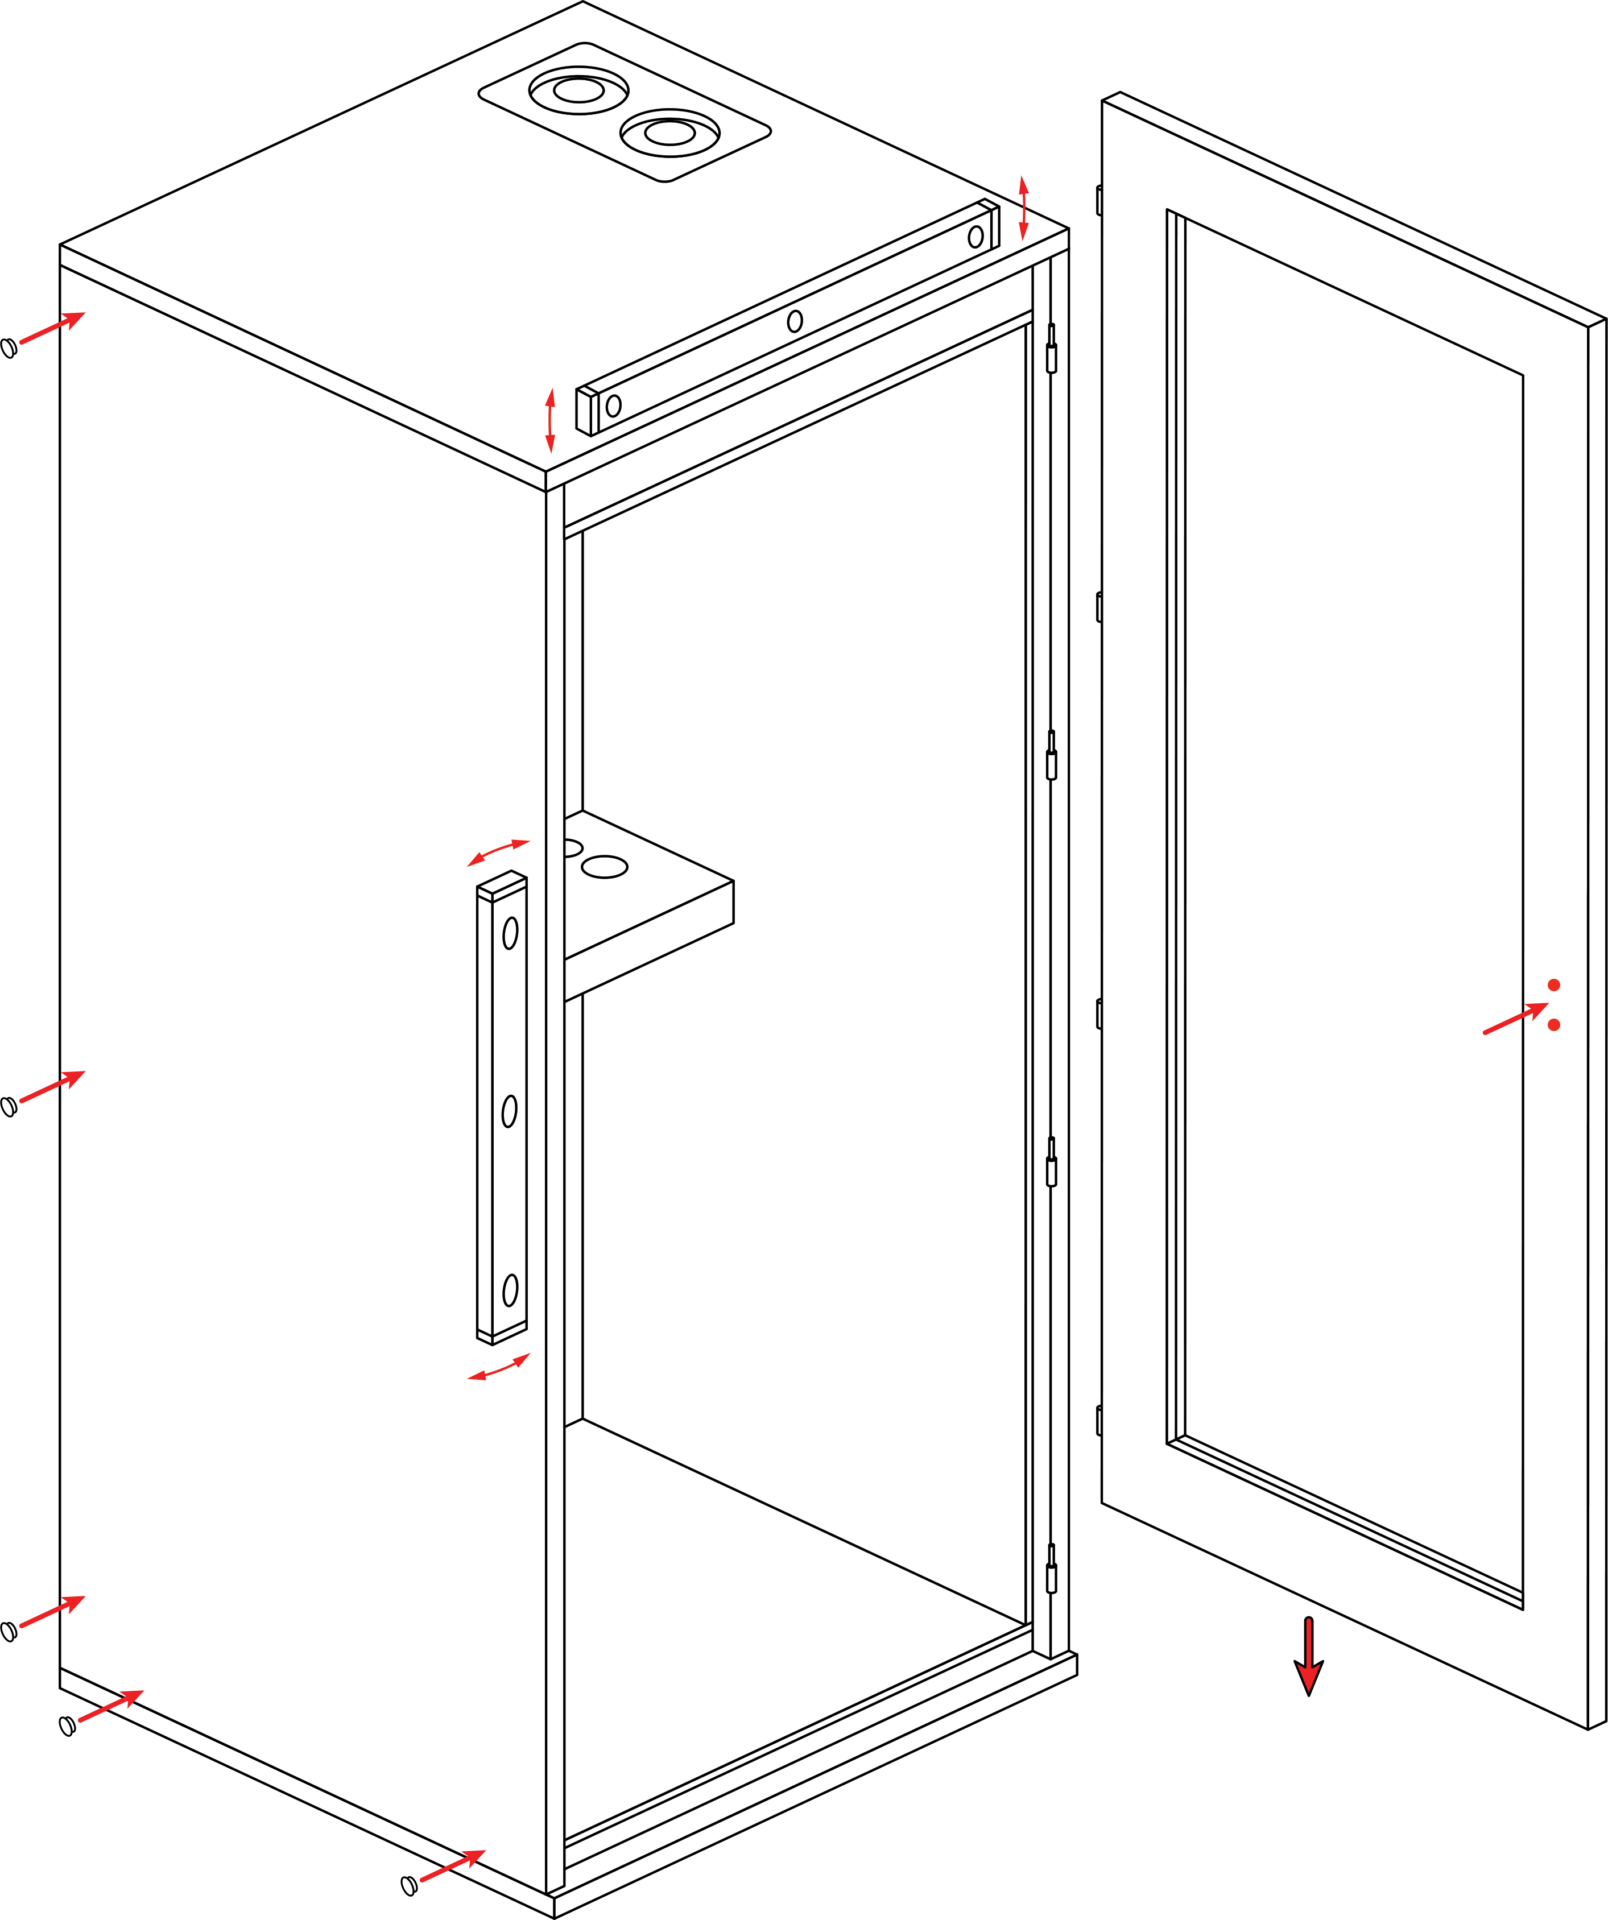
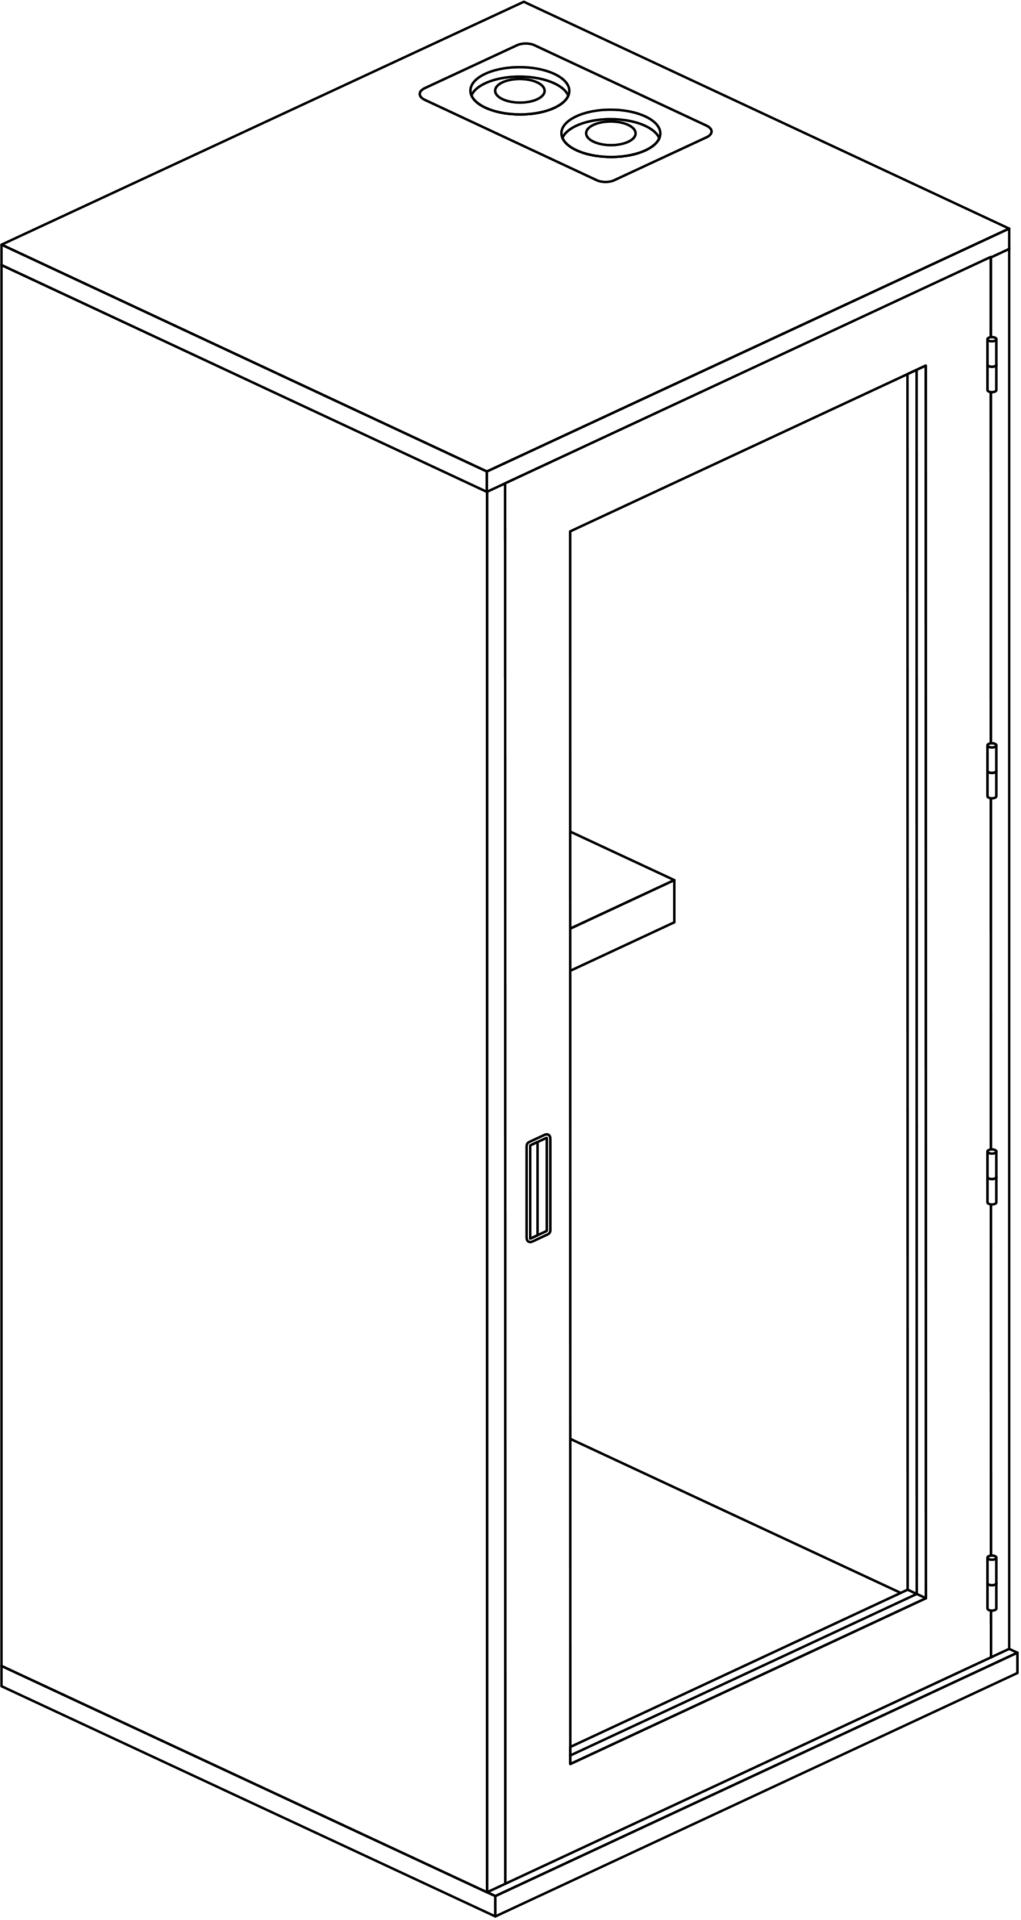
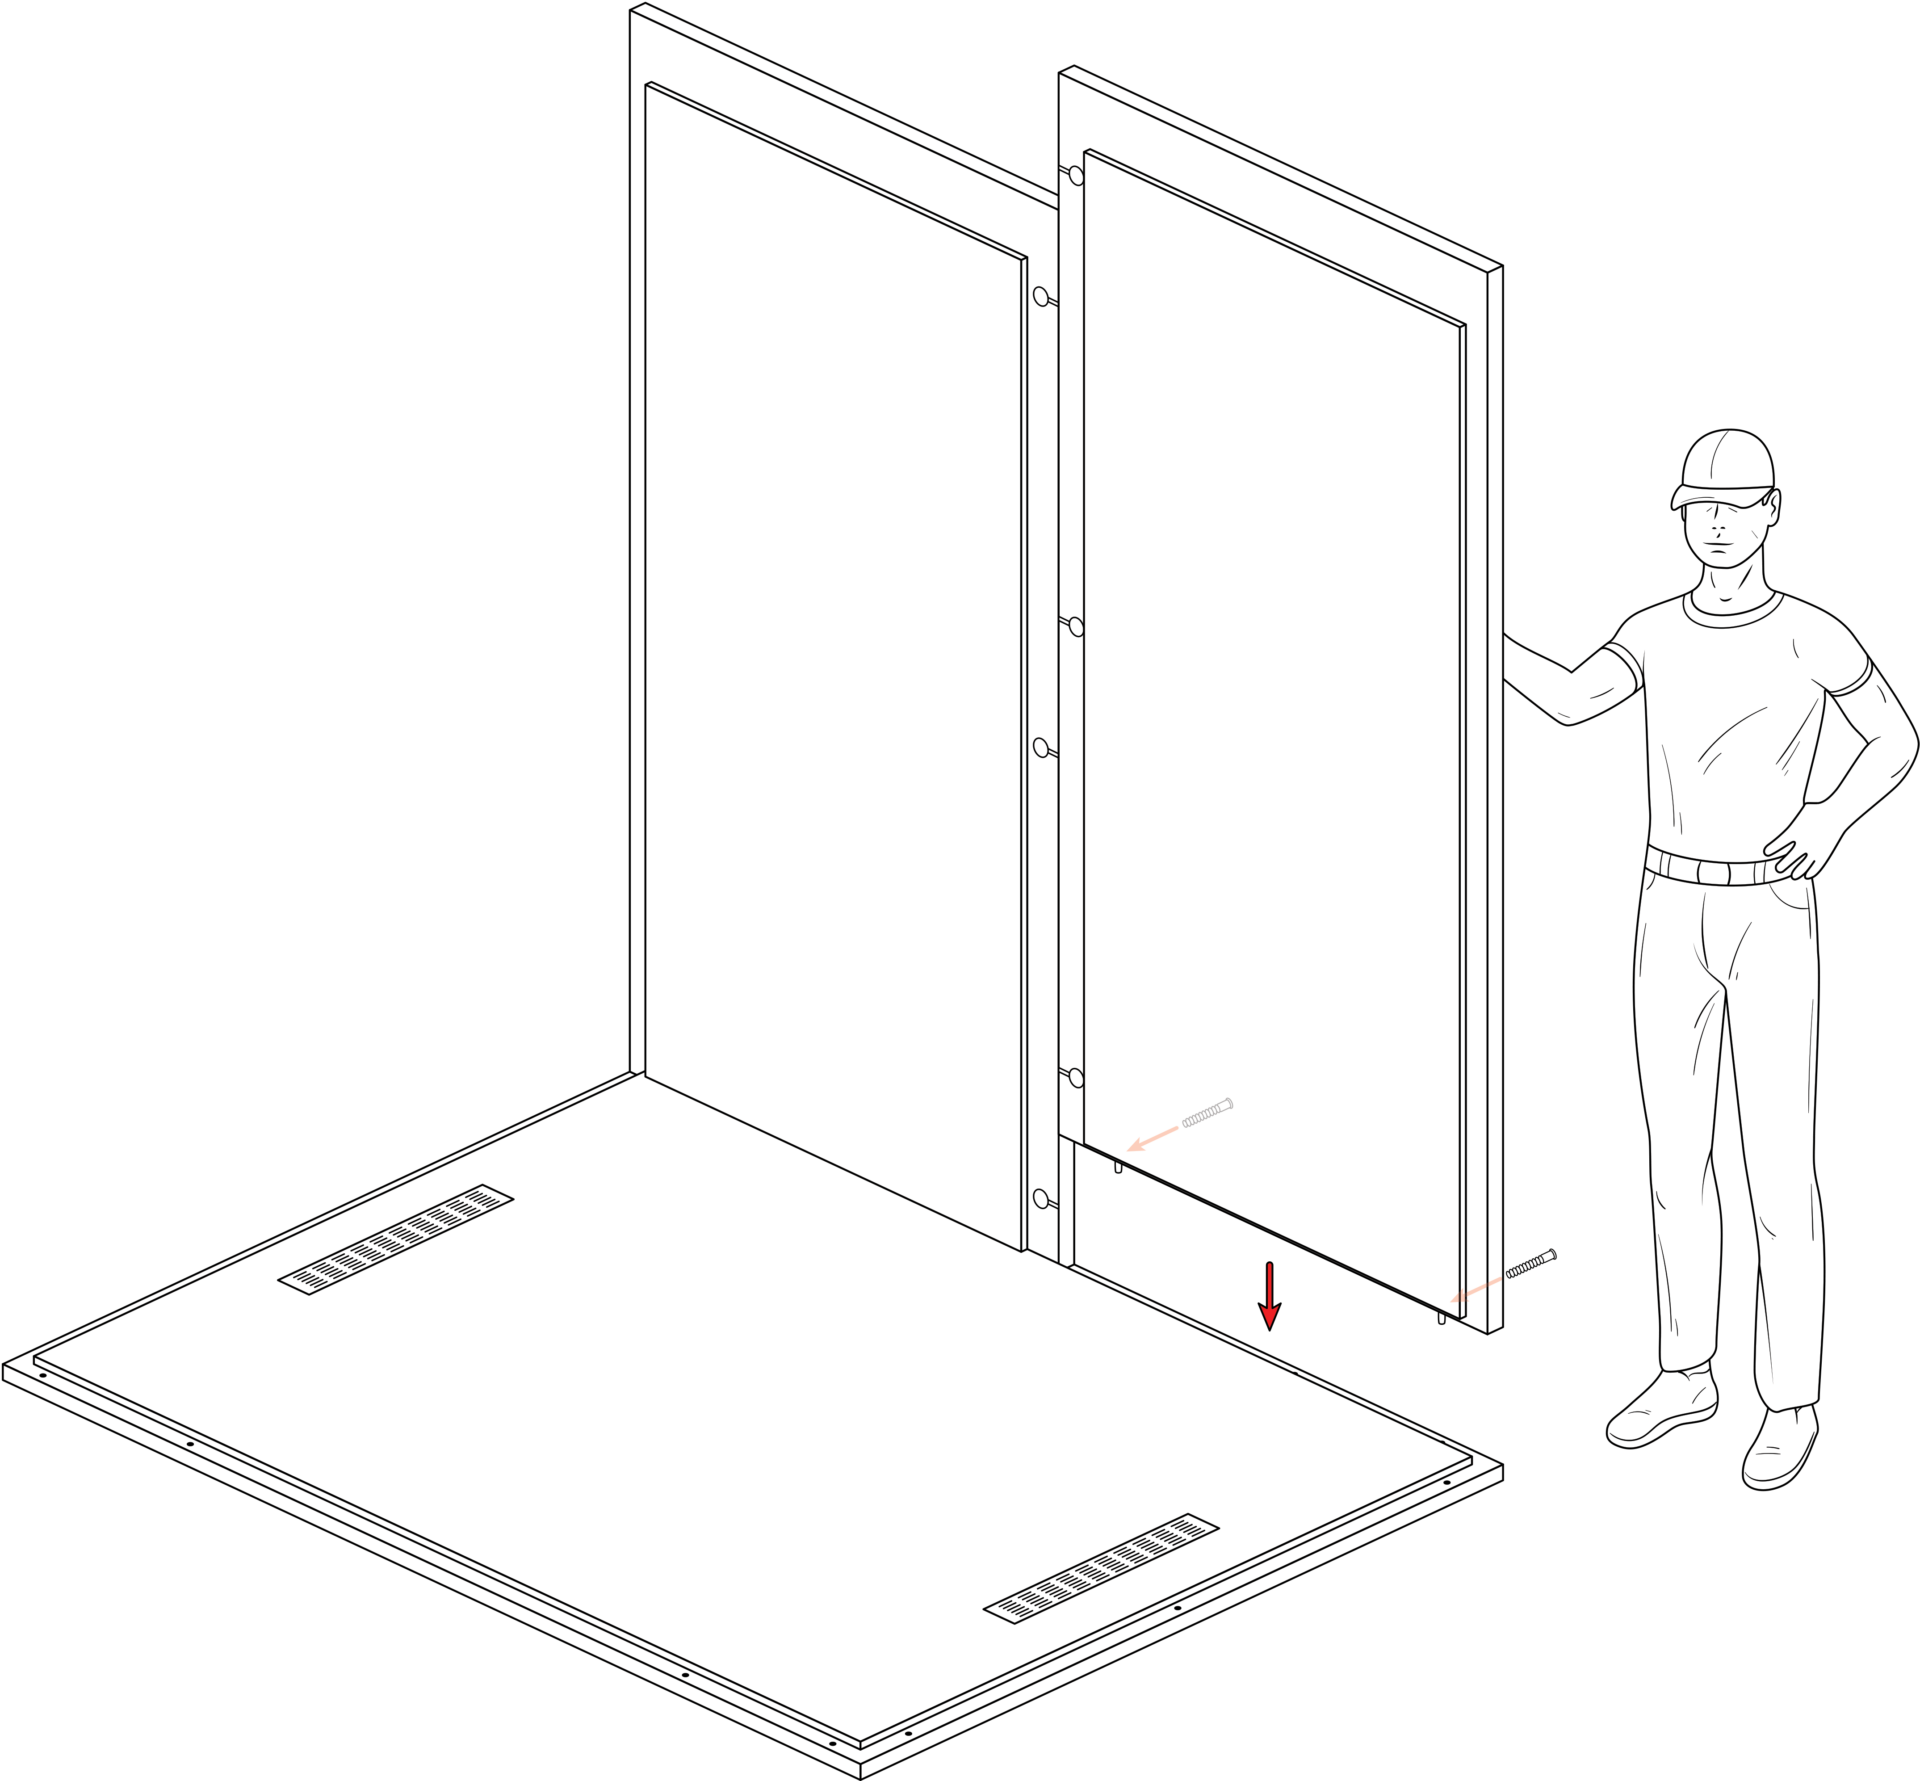
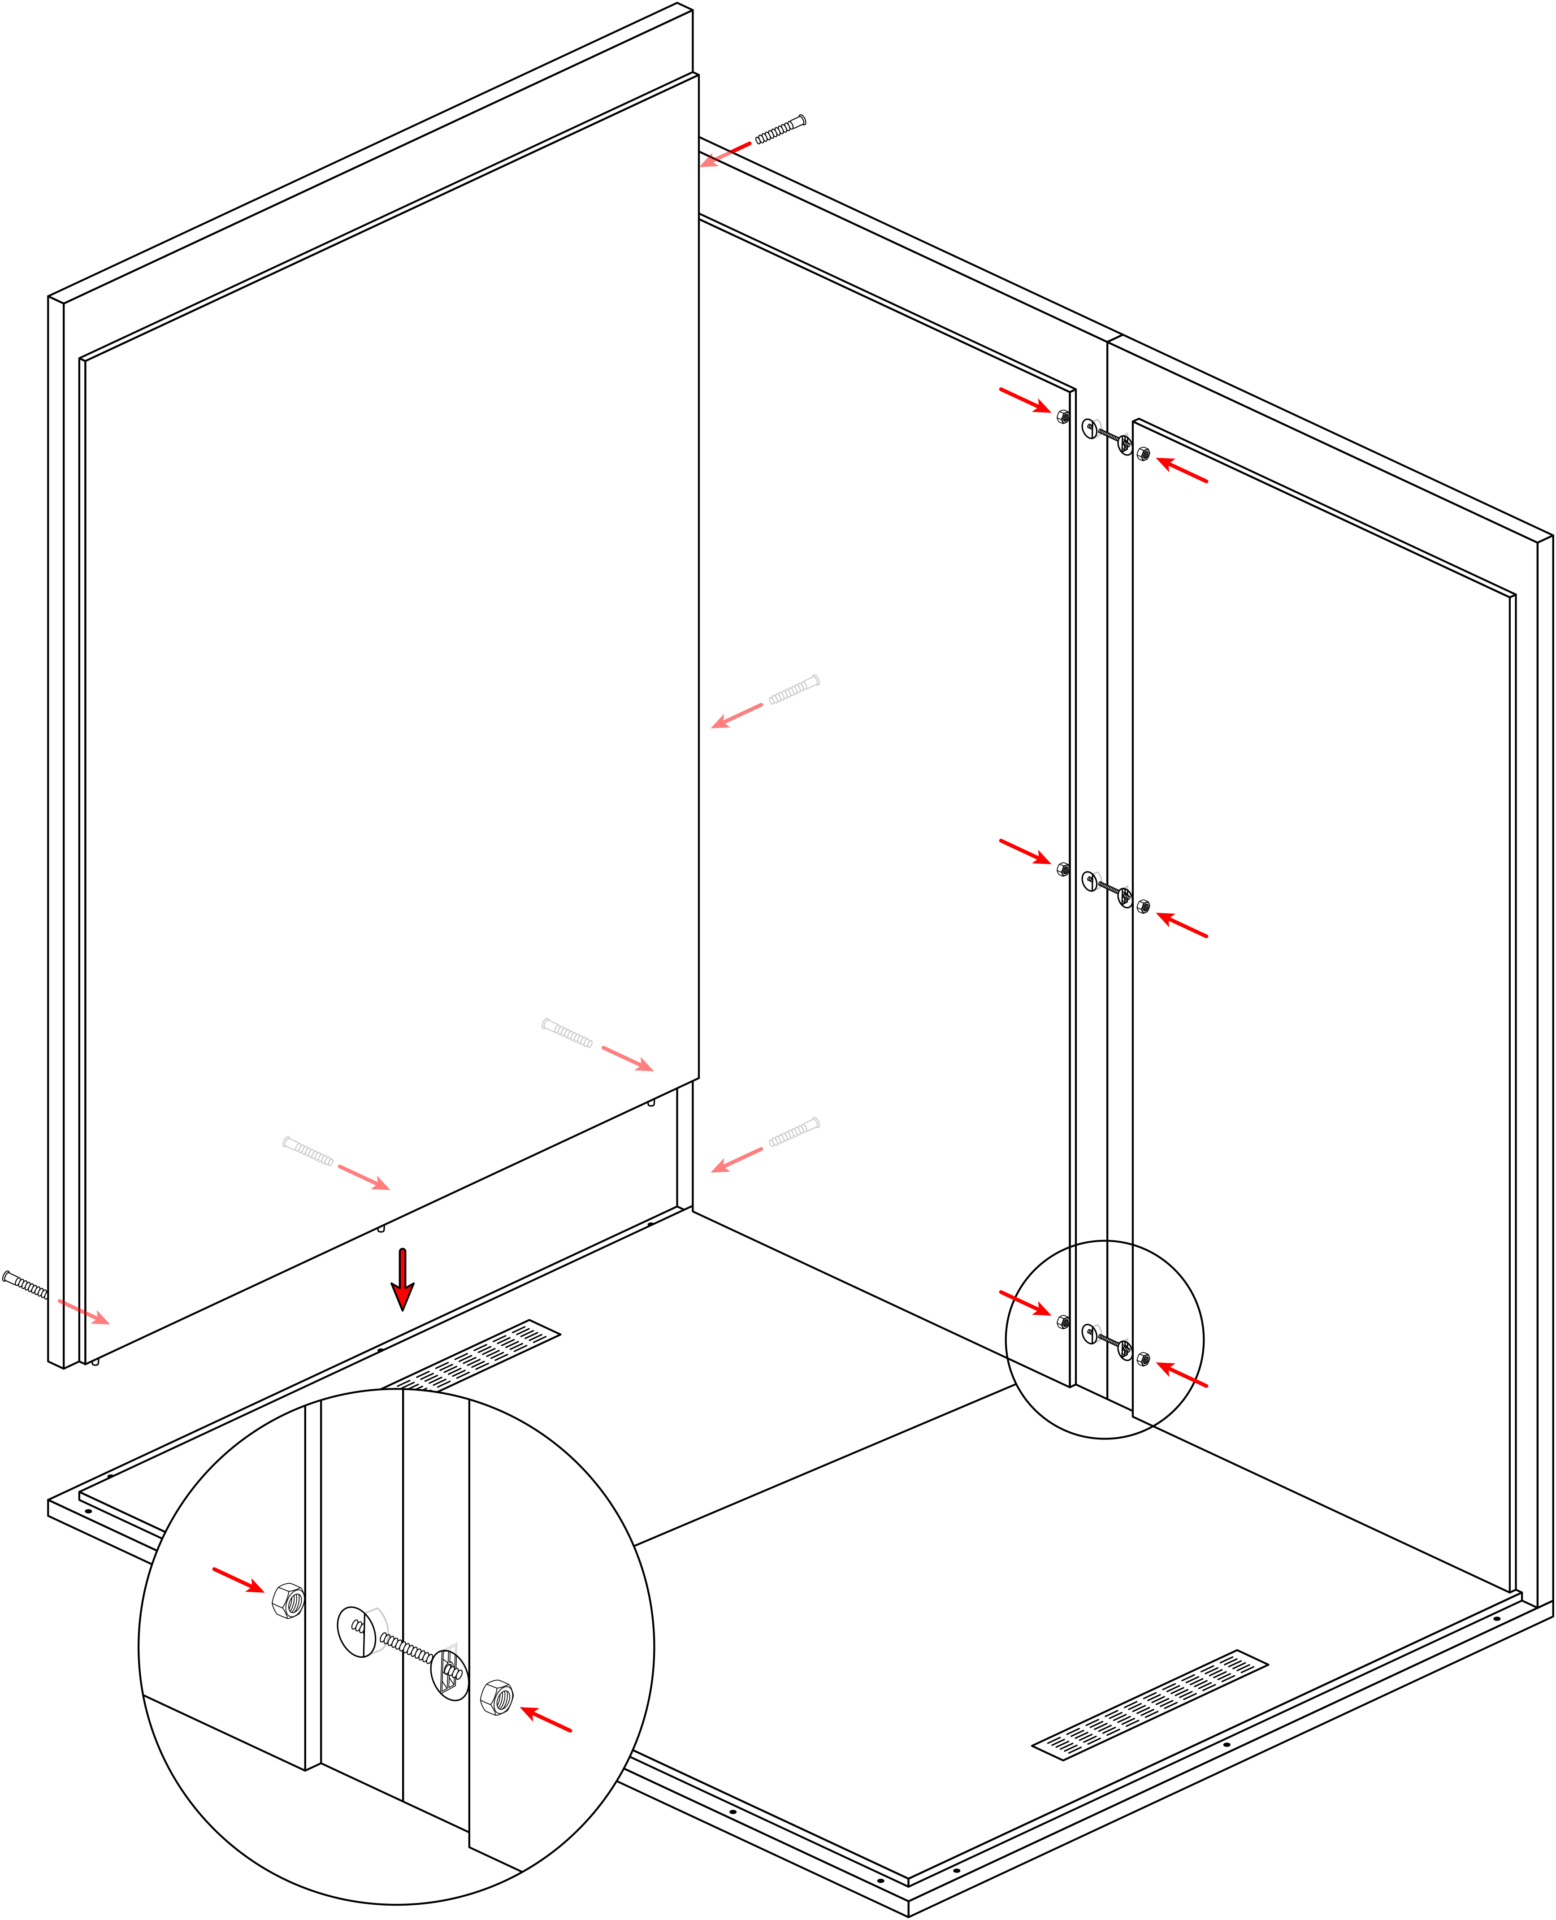
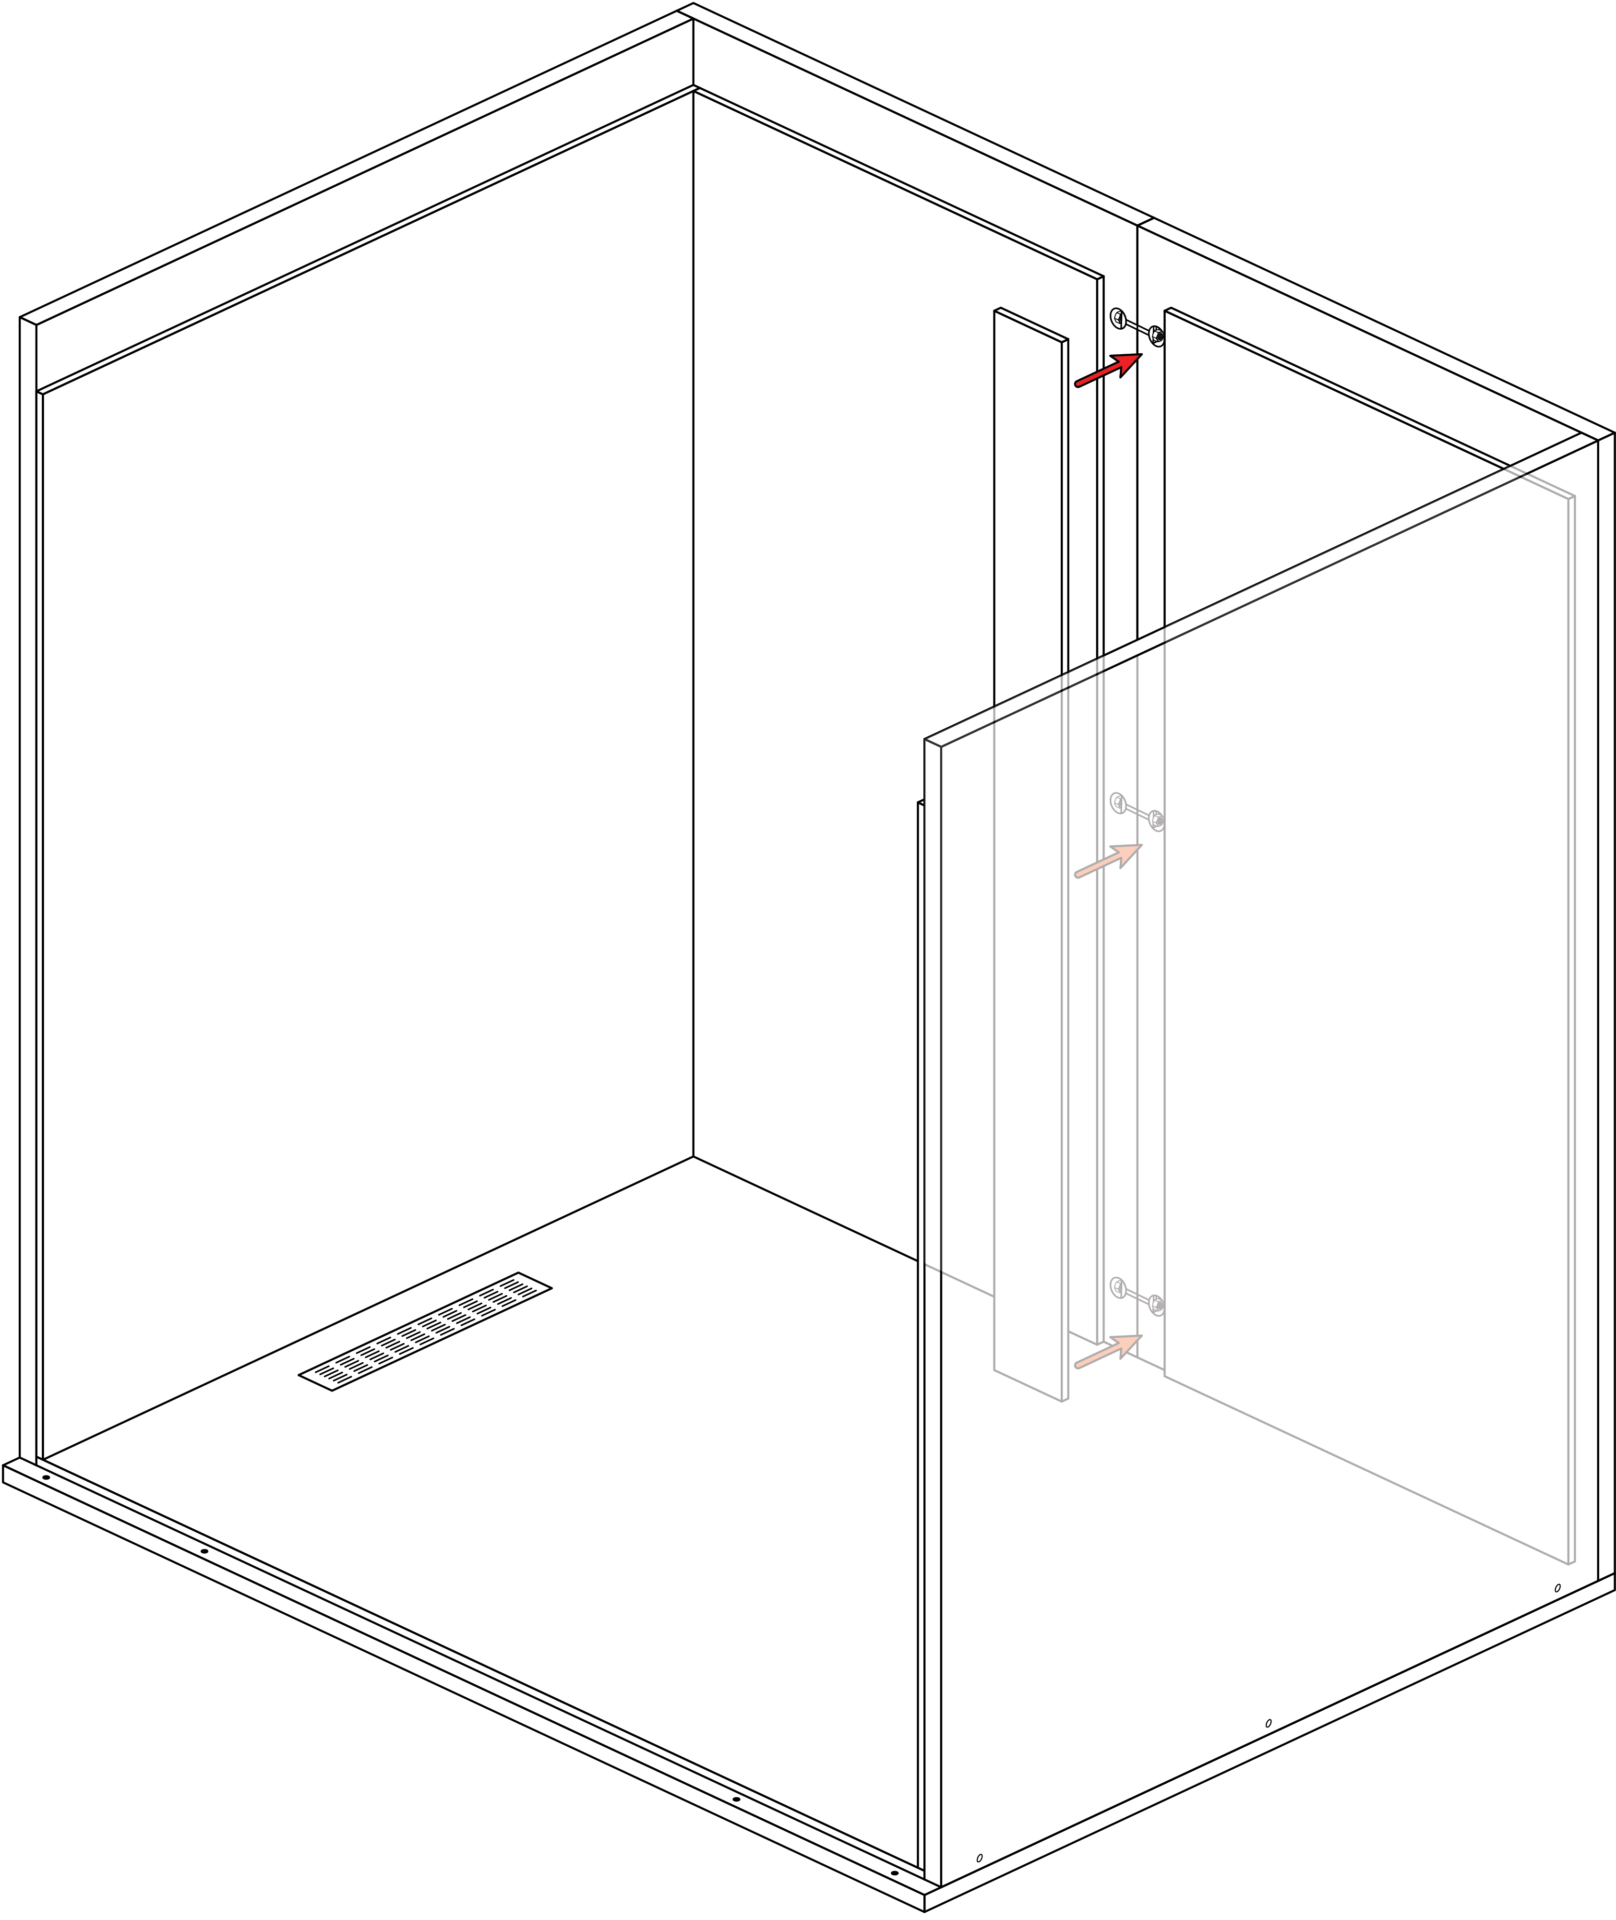
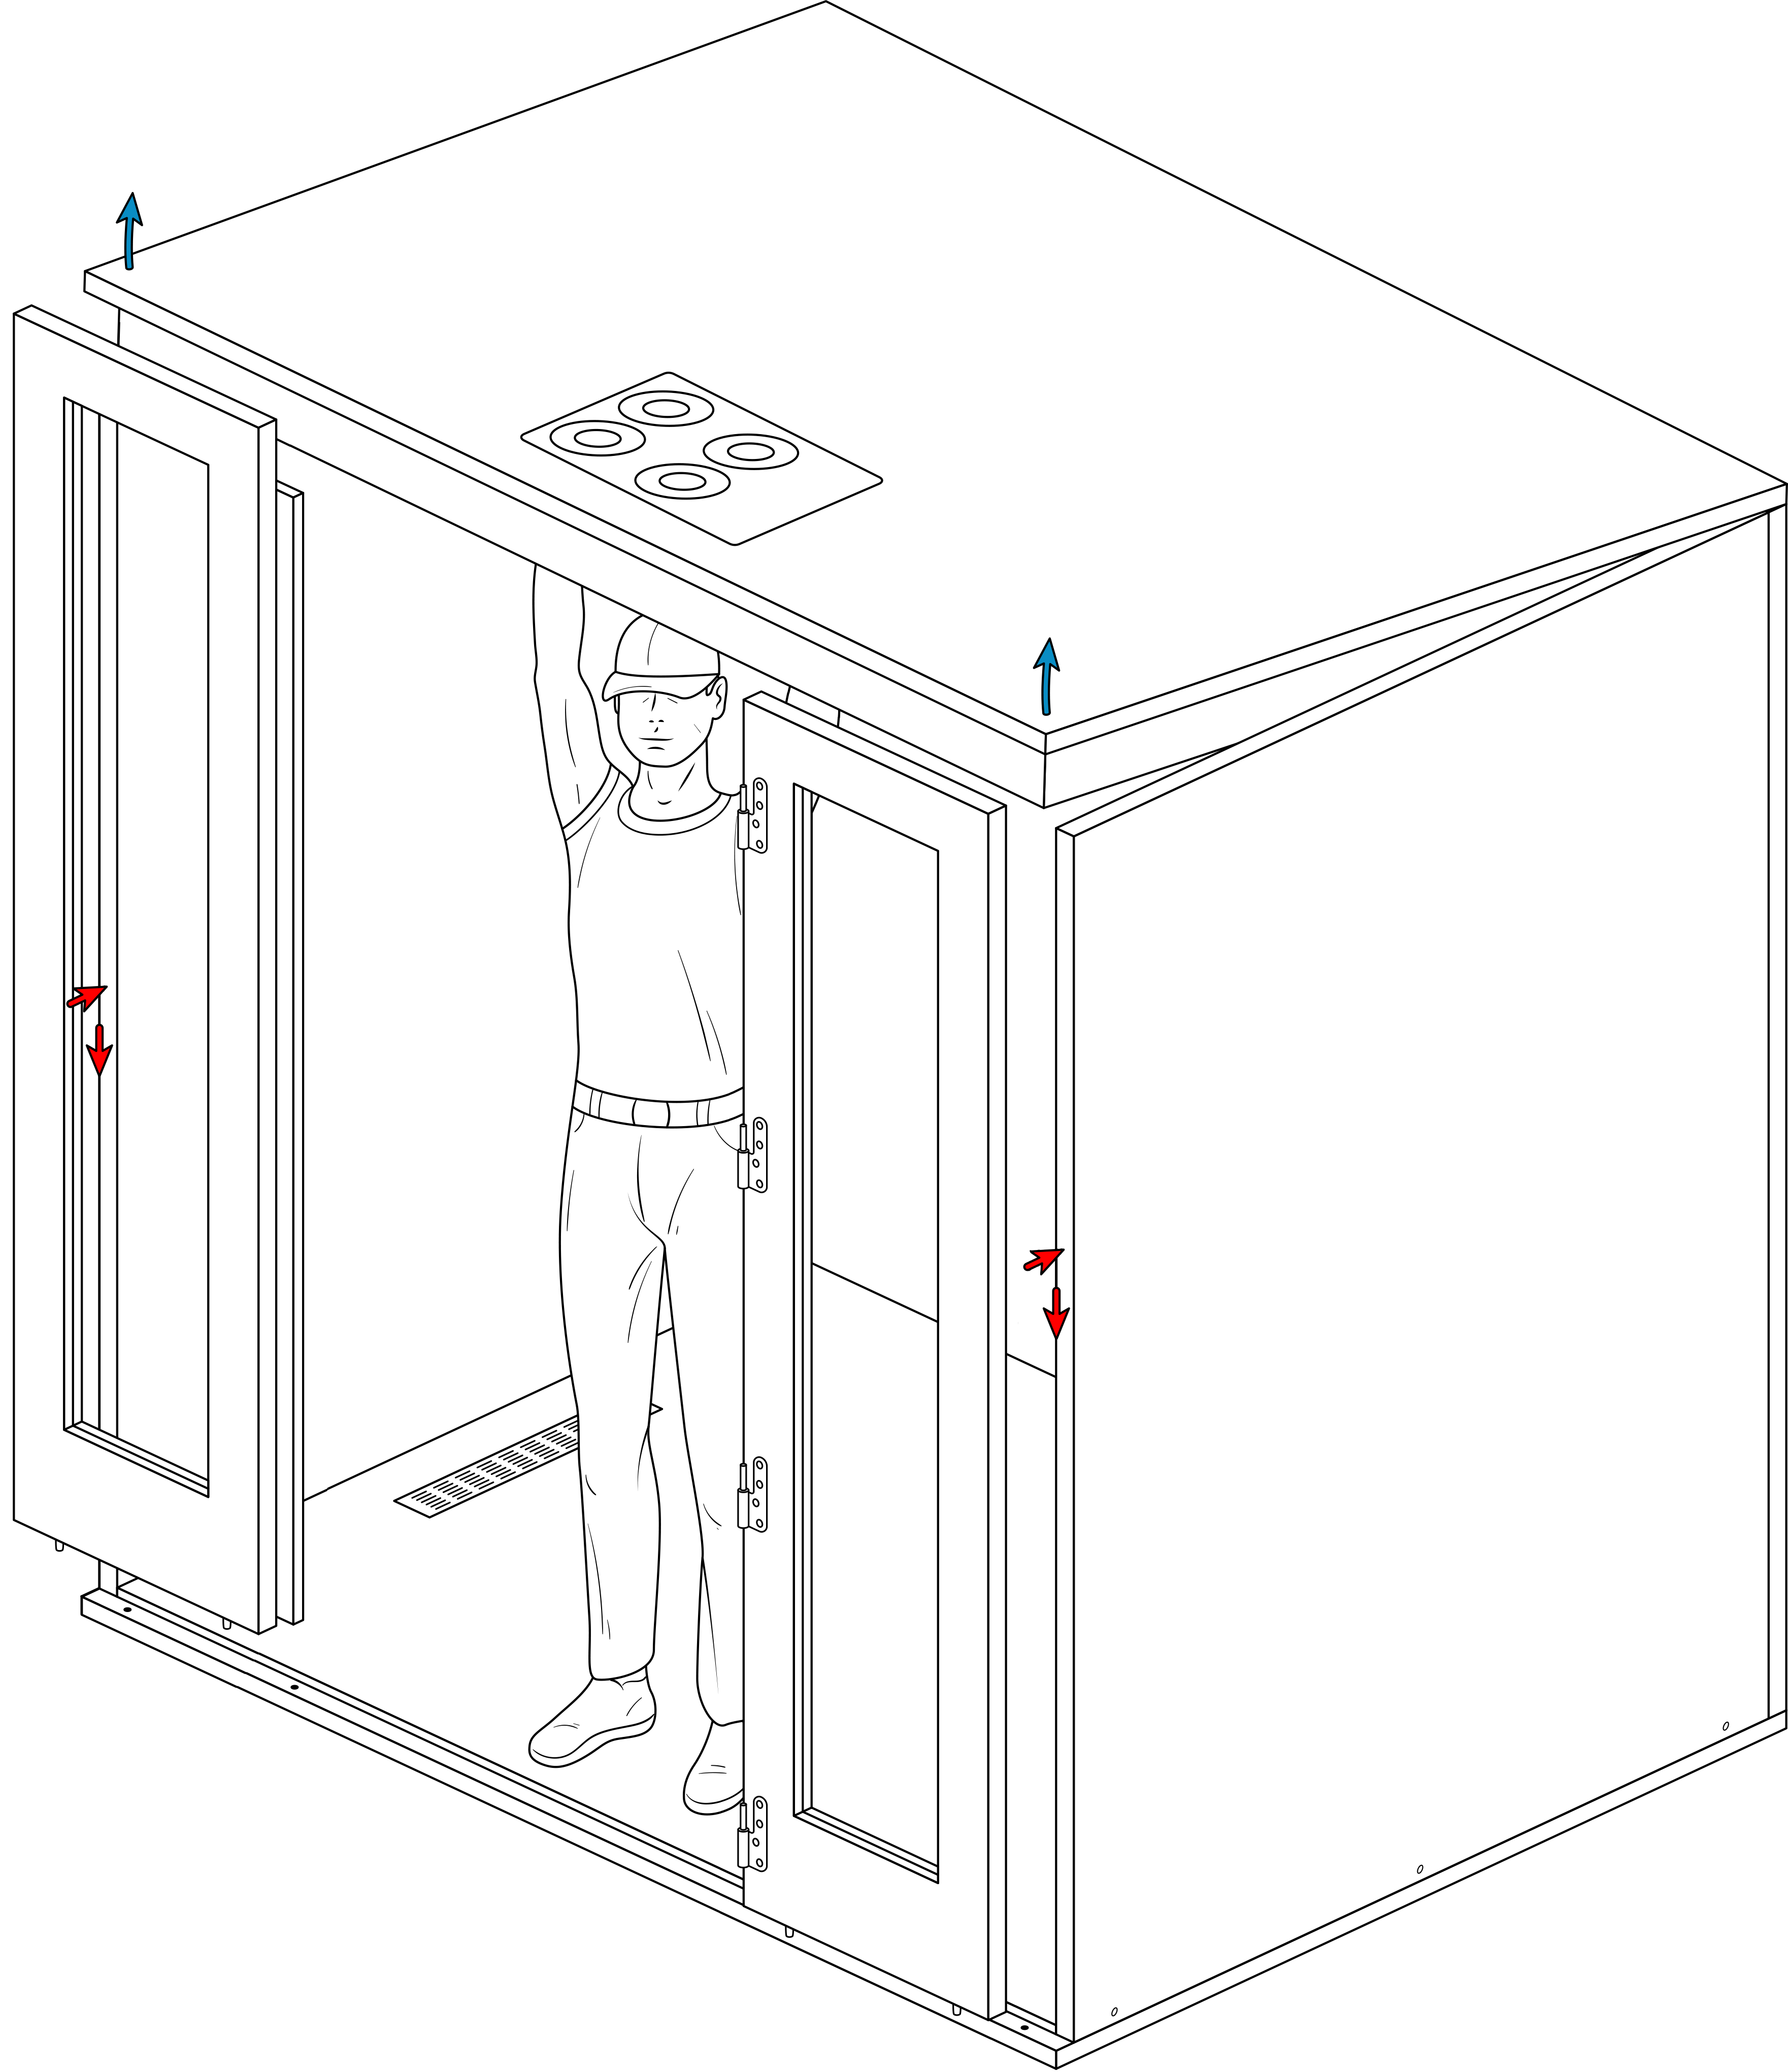
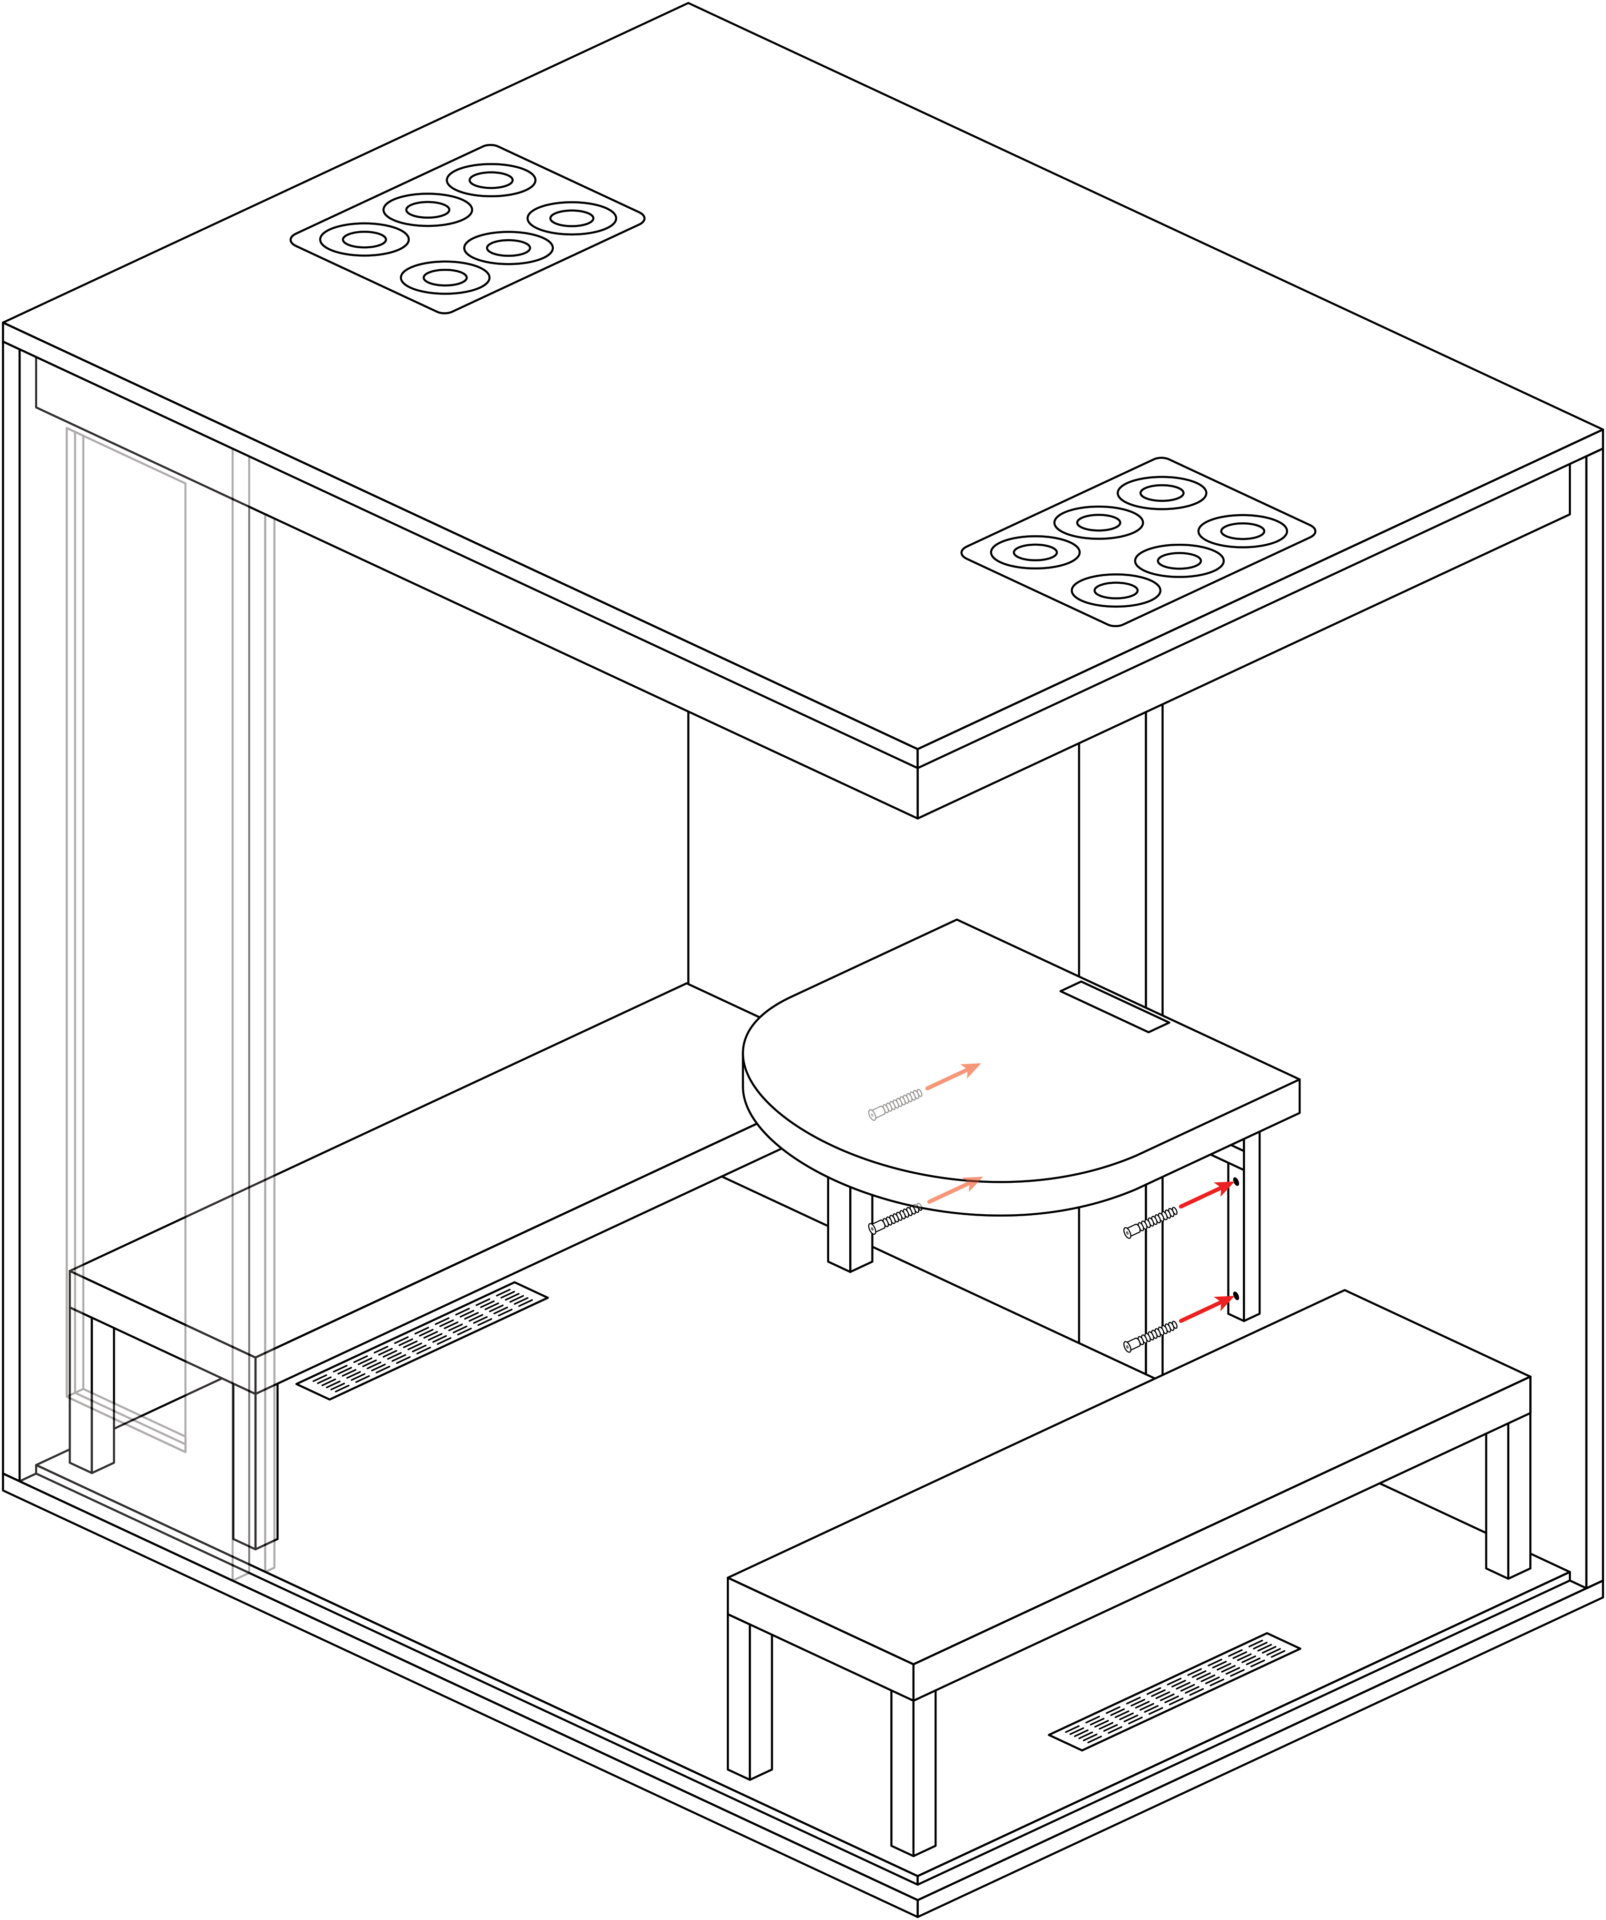
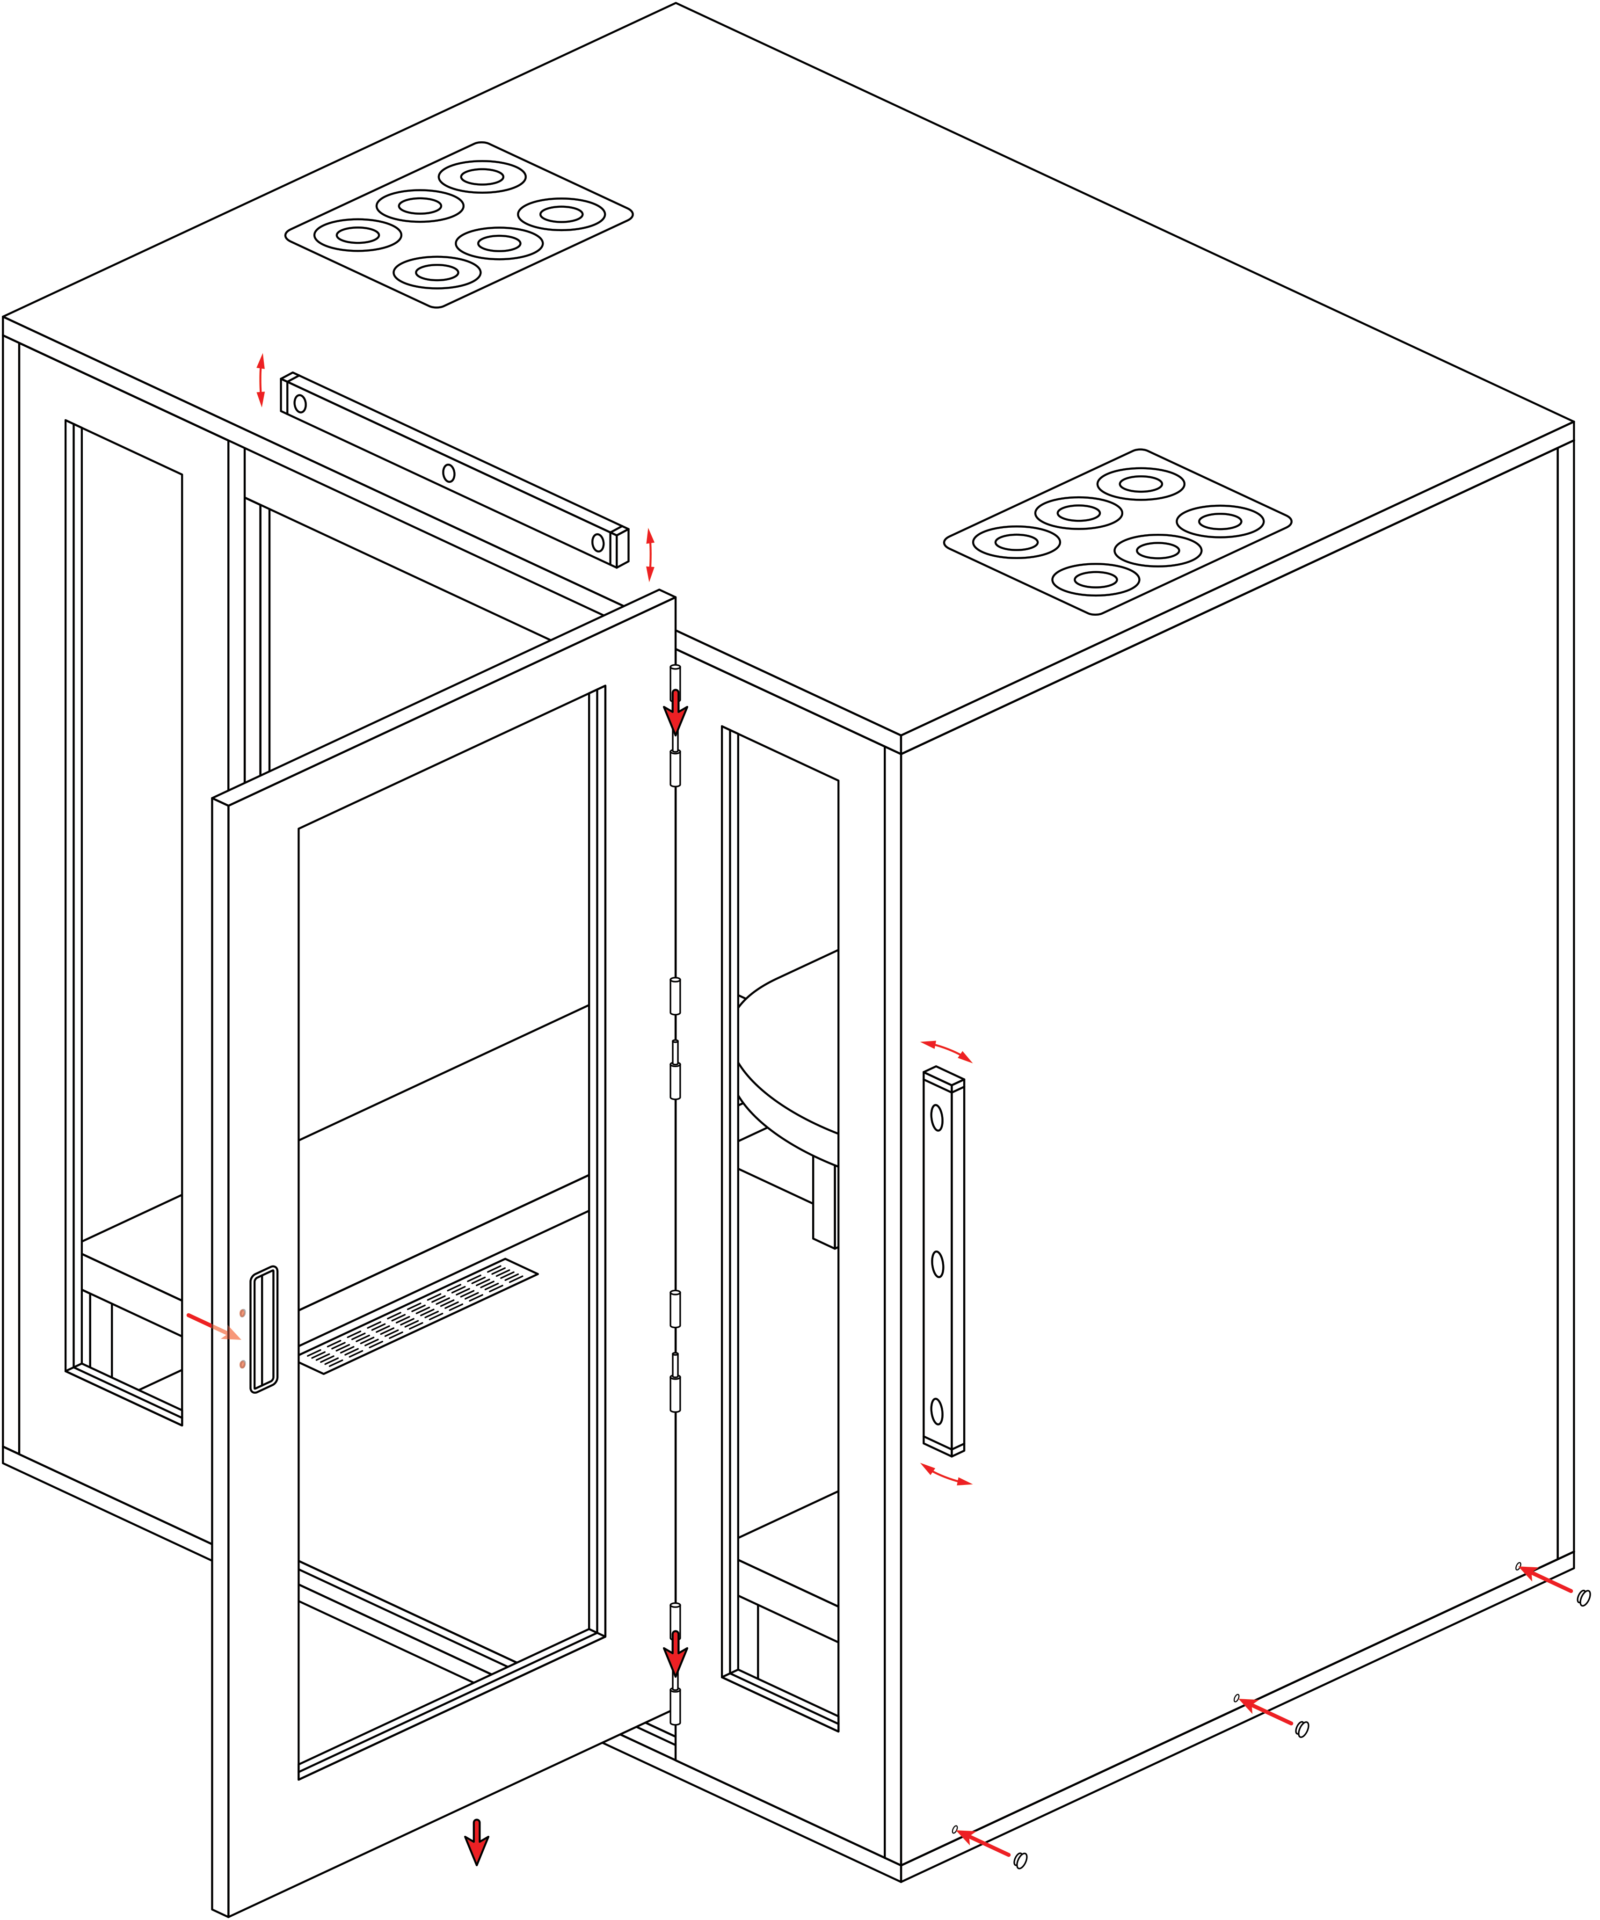
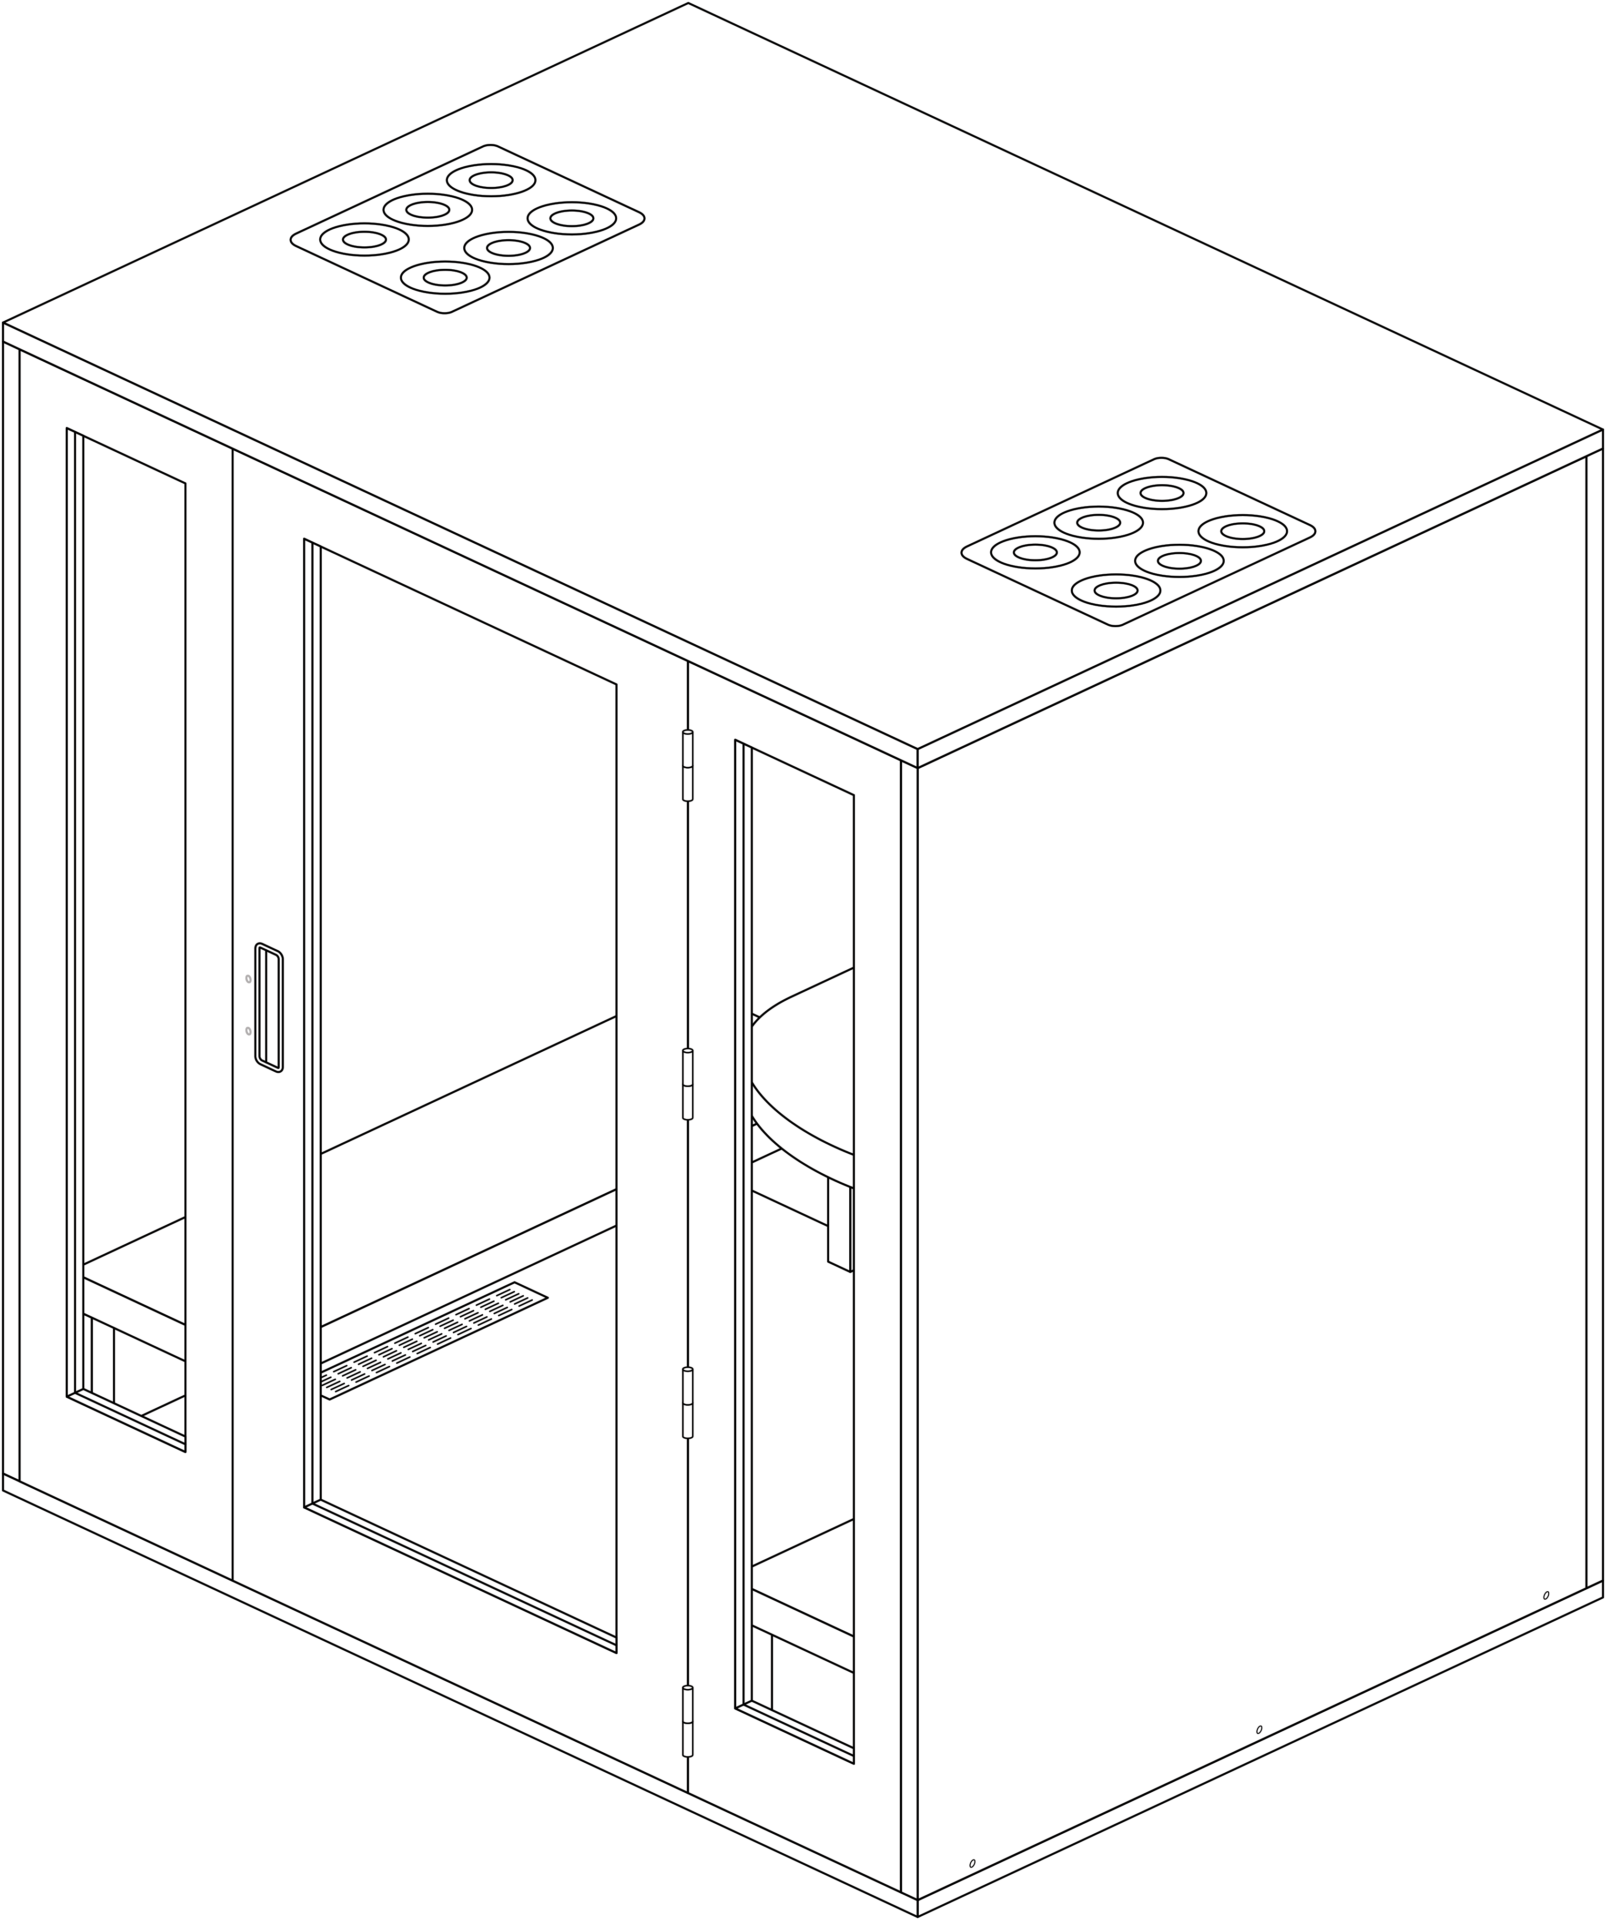
Download your Soho Phone Booth Type B Owner’s Manual and follow the steps to complete the installation.

WORKSTATION
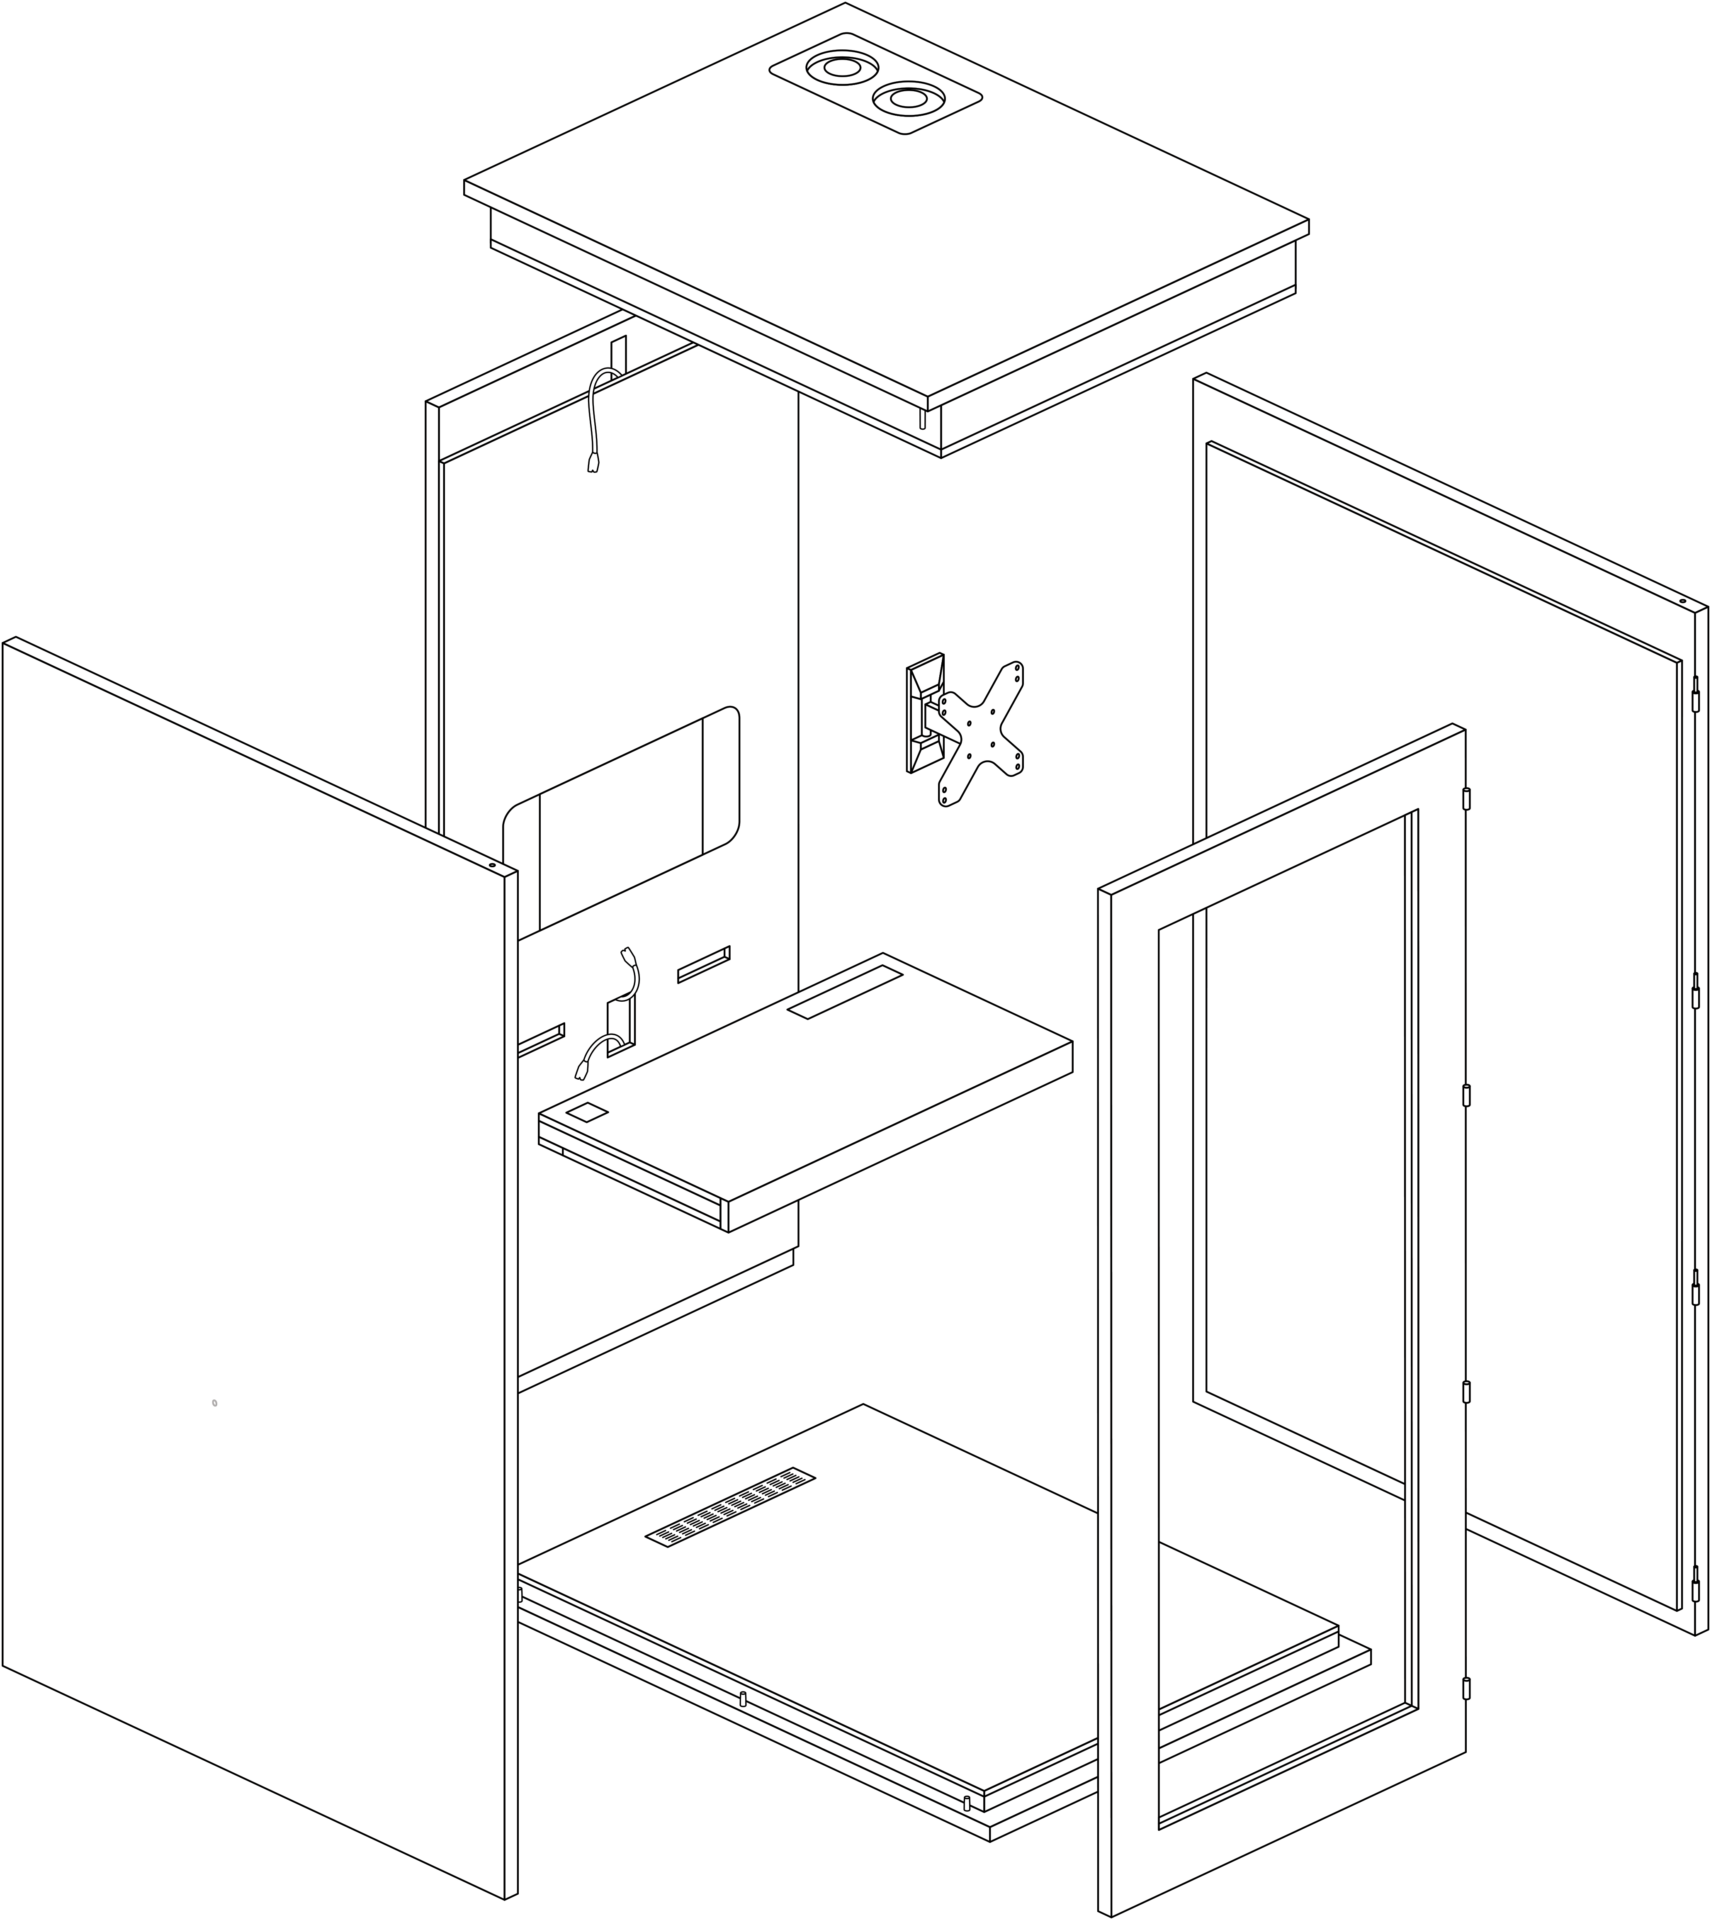
Download your Soho Workstation Owner’s Manual and follow the steps to complete the installation.

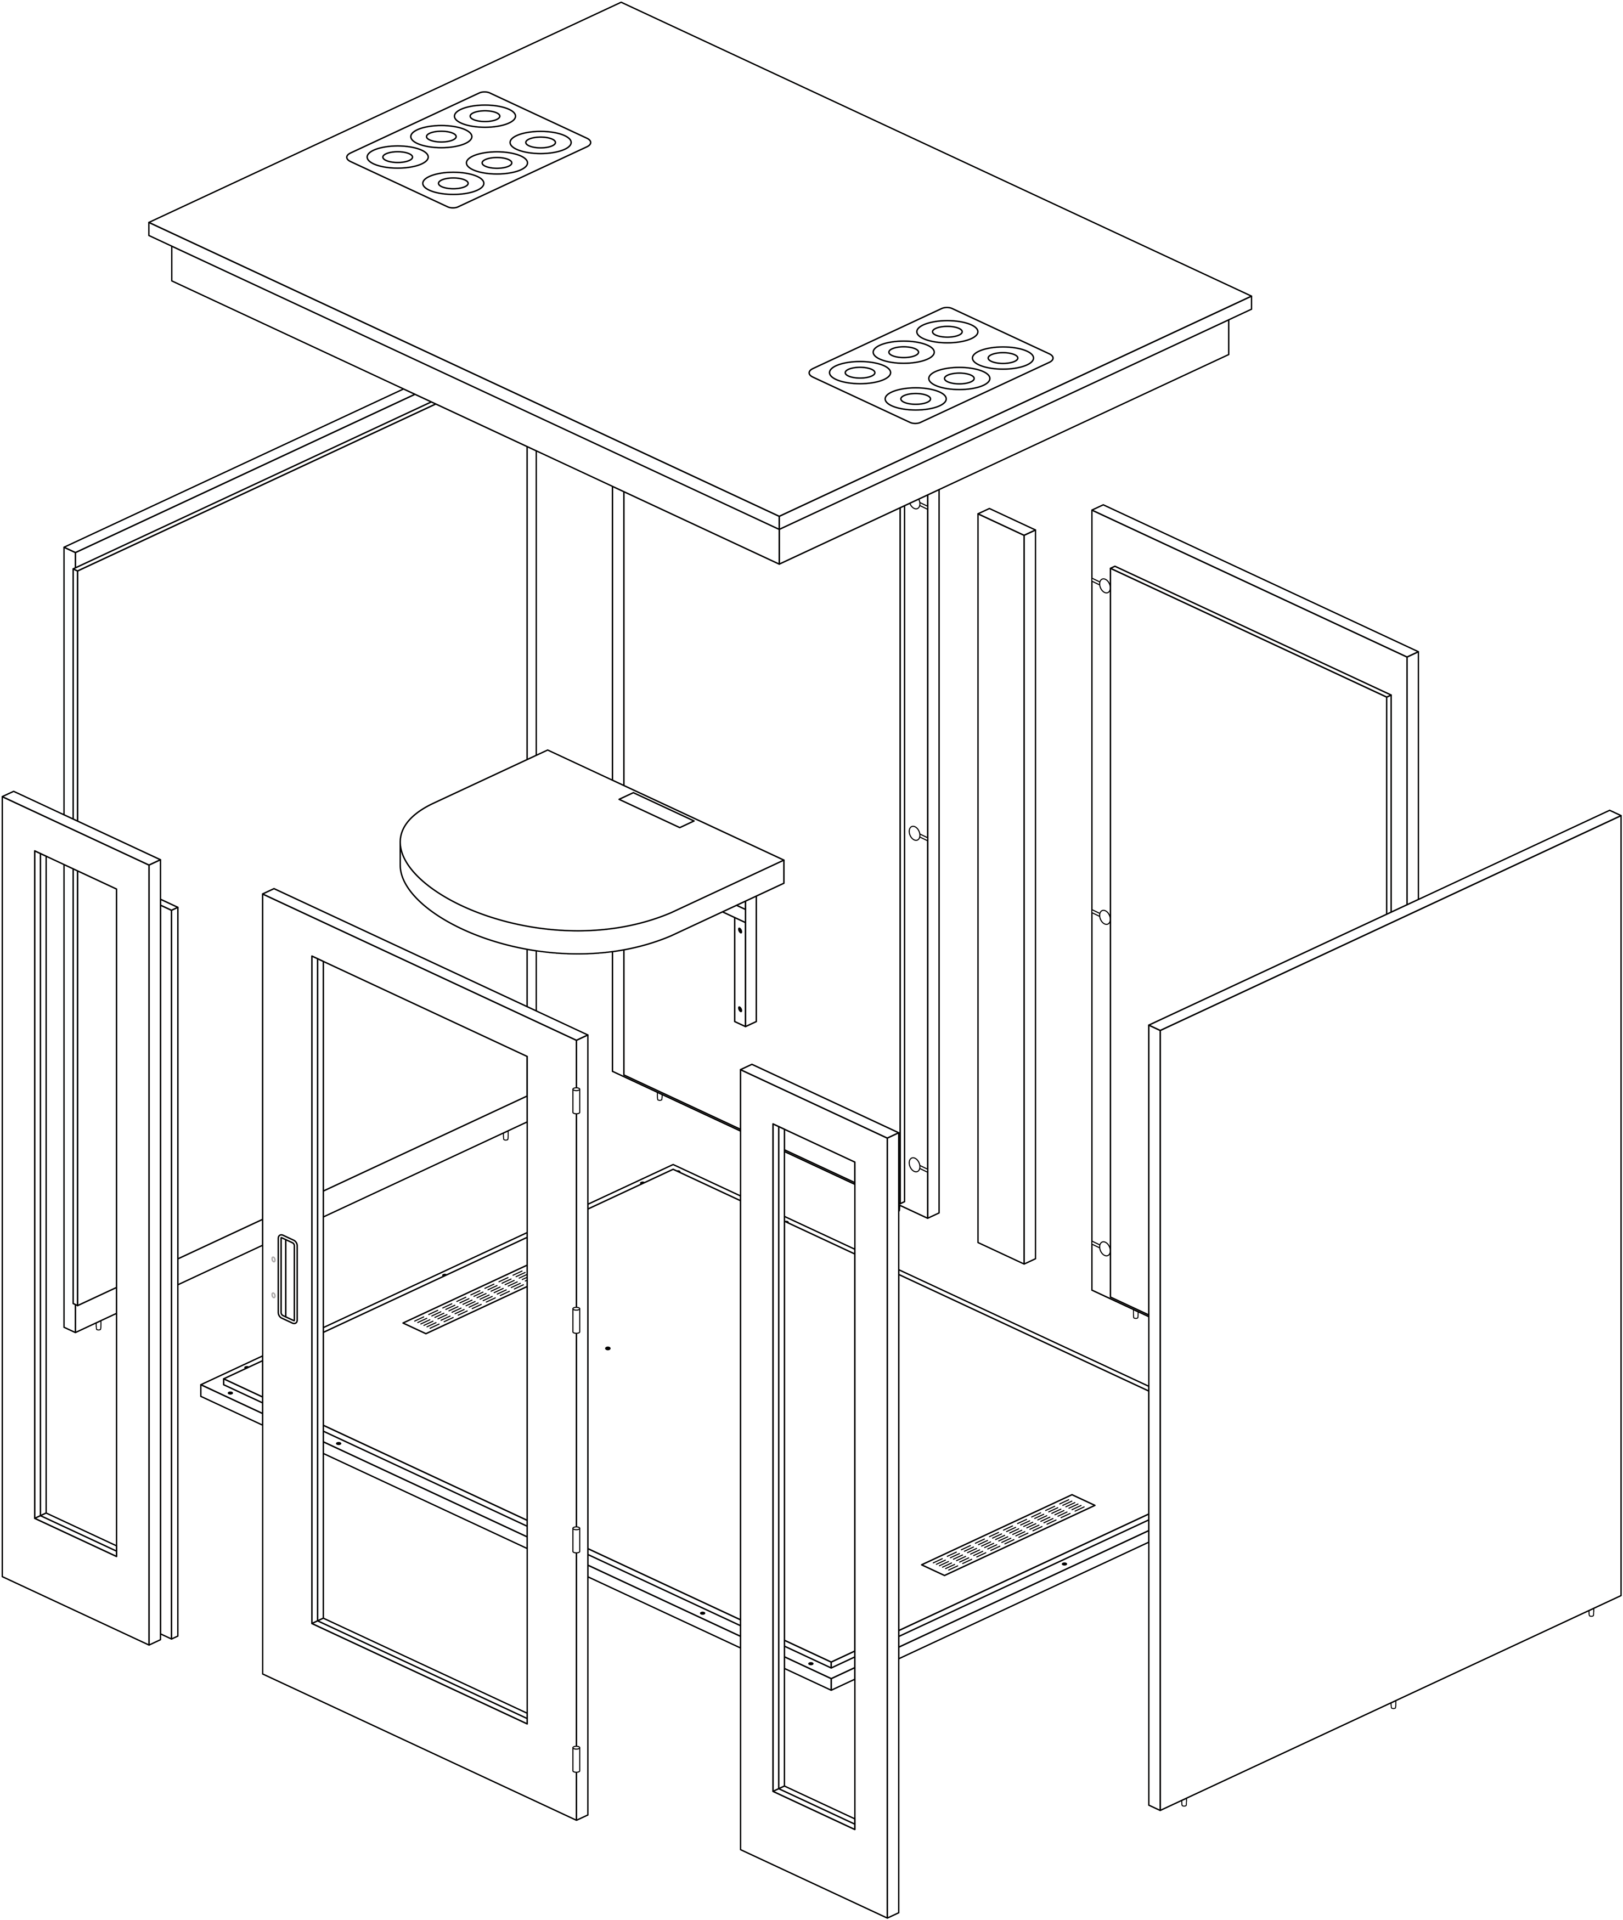
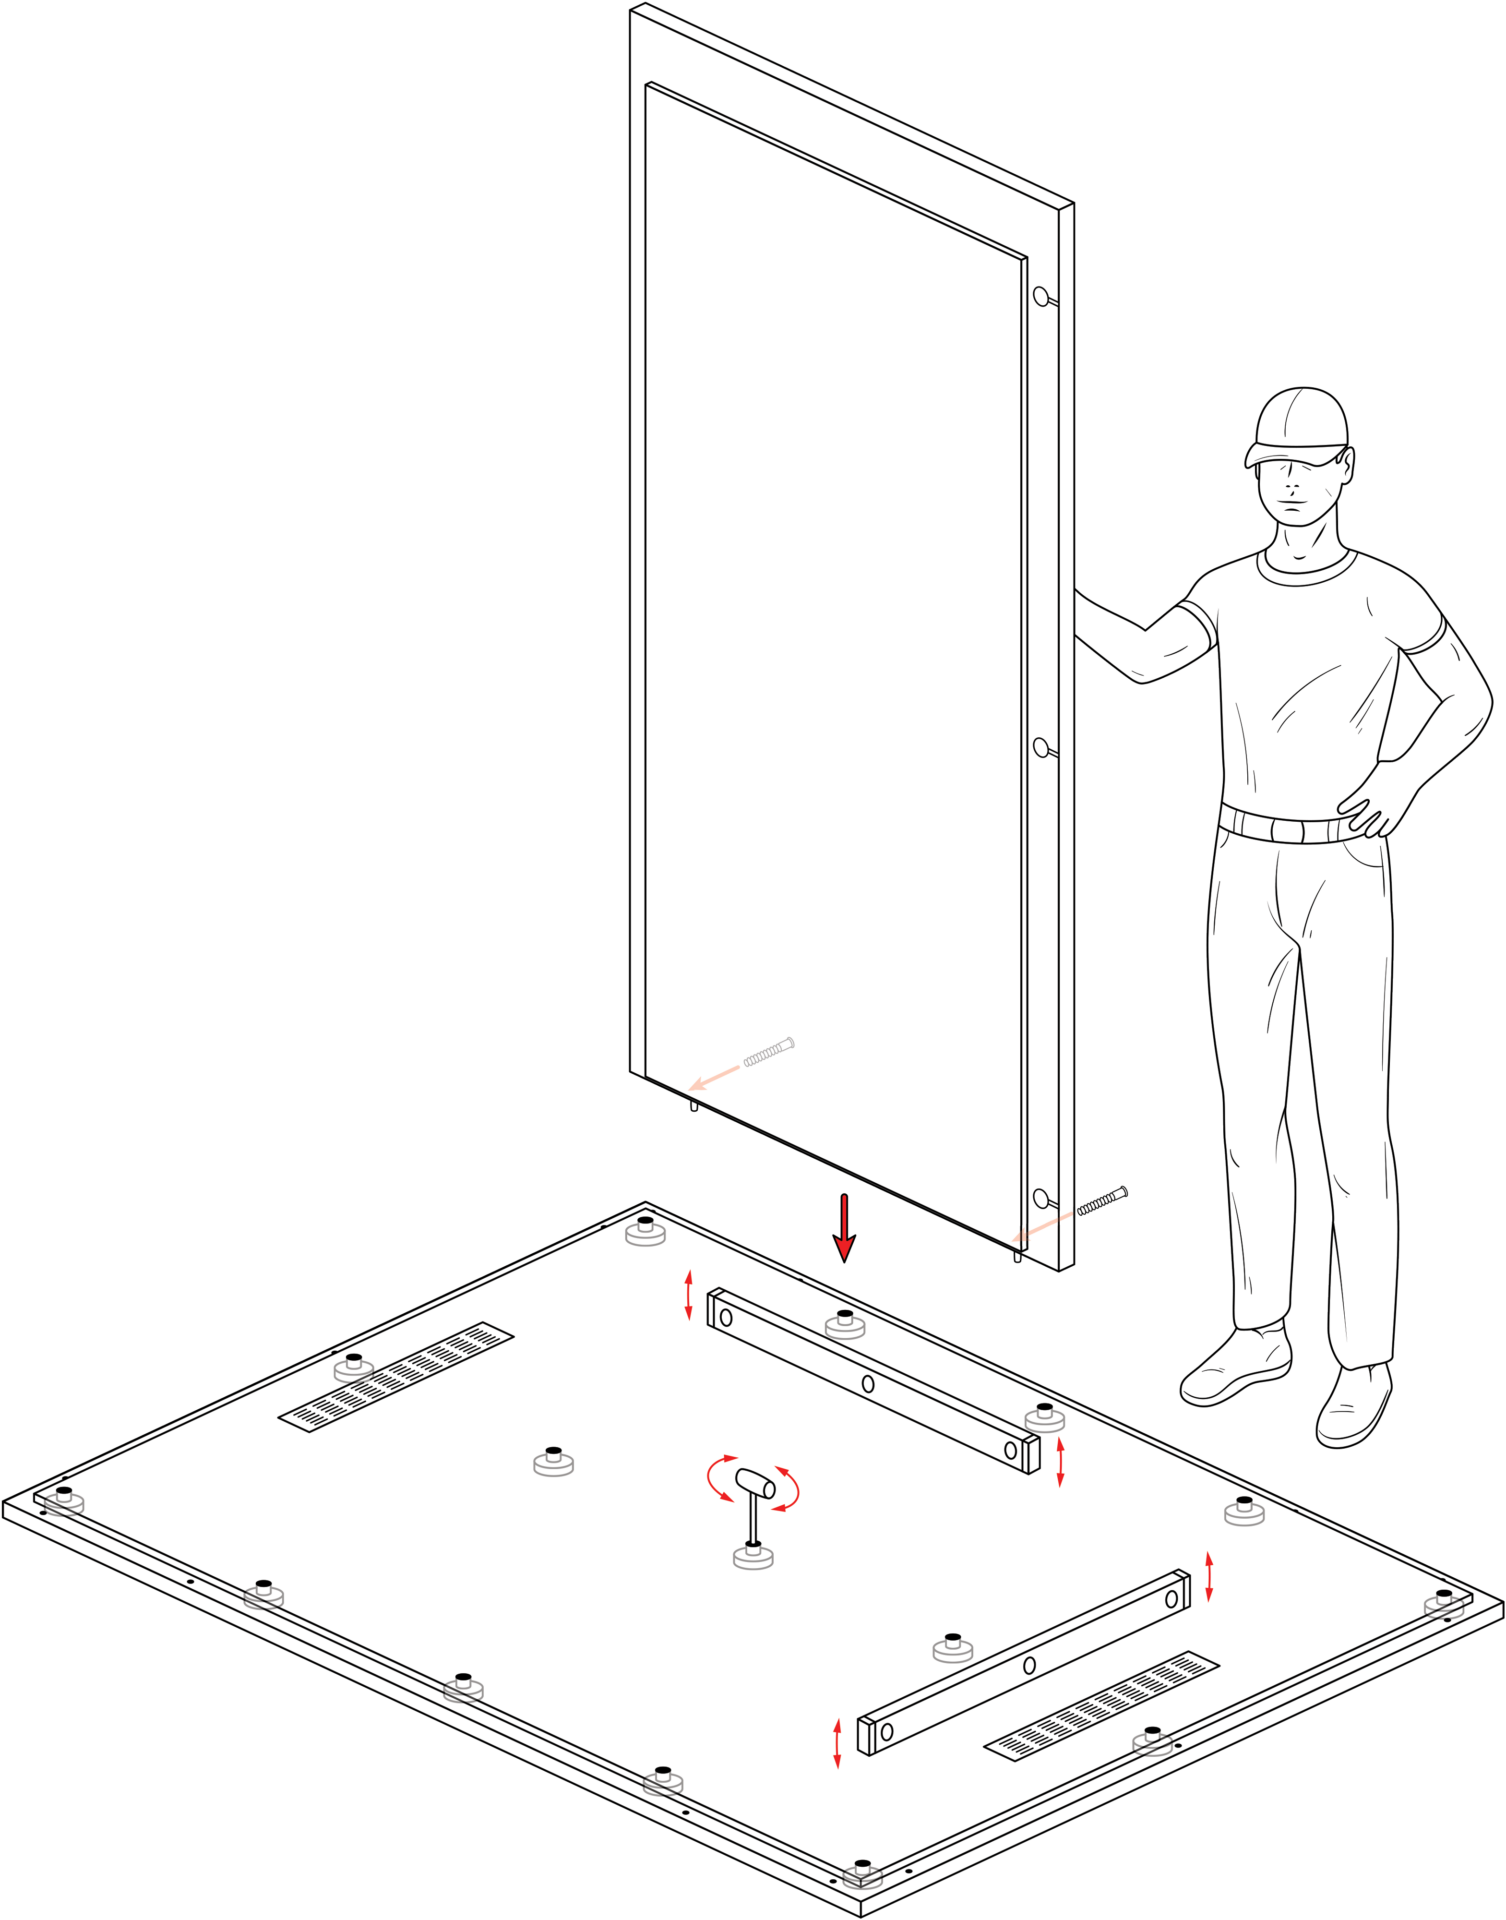
CAMDEN
Follow the fully described and illustrated assembly manual below and install your Meeting Pod.


Helping you be productive

5 reasons to choose MEAVO office phone booths
Choosing the right office phone booth or meeting pod can enhance privacy, reduce noise, and boost productivity. At MEAVO, we offer top-quality, customisable, and sustainable solutions trusted by leading companies.
Comprehensive guide to office phone booths soundproofing according to ISO 23351-1:2020
The ISO 23351-1:2020 standard provides a framework for categorising office phone booths and meeting pods according to their sound-reducing capabilities.

Office Phone Booths and Meeting Pods Comparison Guide
Choosing the Right Office Phone Booth or Meeting Pod: A Detailed Comparison. If you’re on the lookout for the ideal phone booth or meeting pod to enhance privacy and productivity in your office, you’re not alone.
