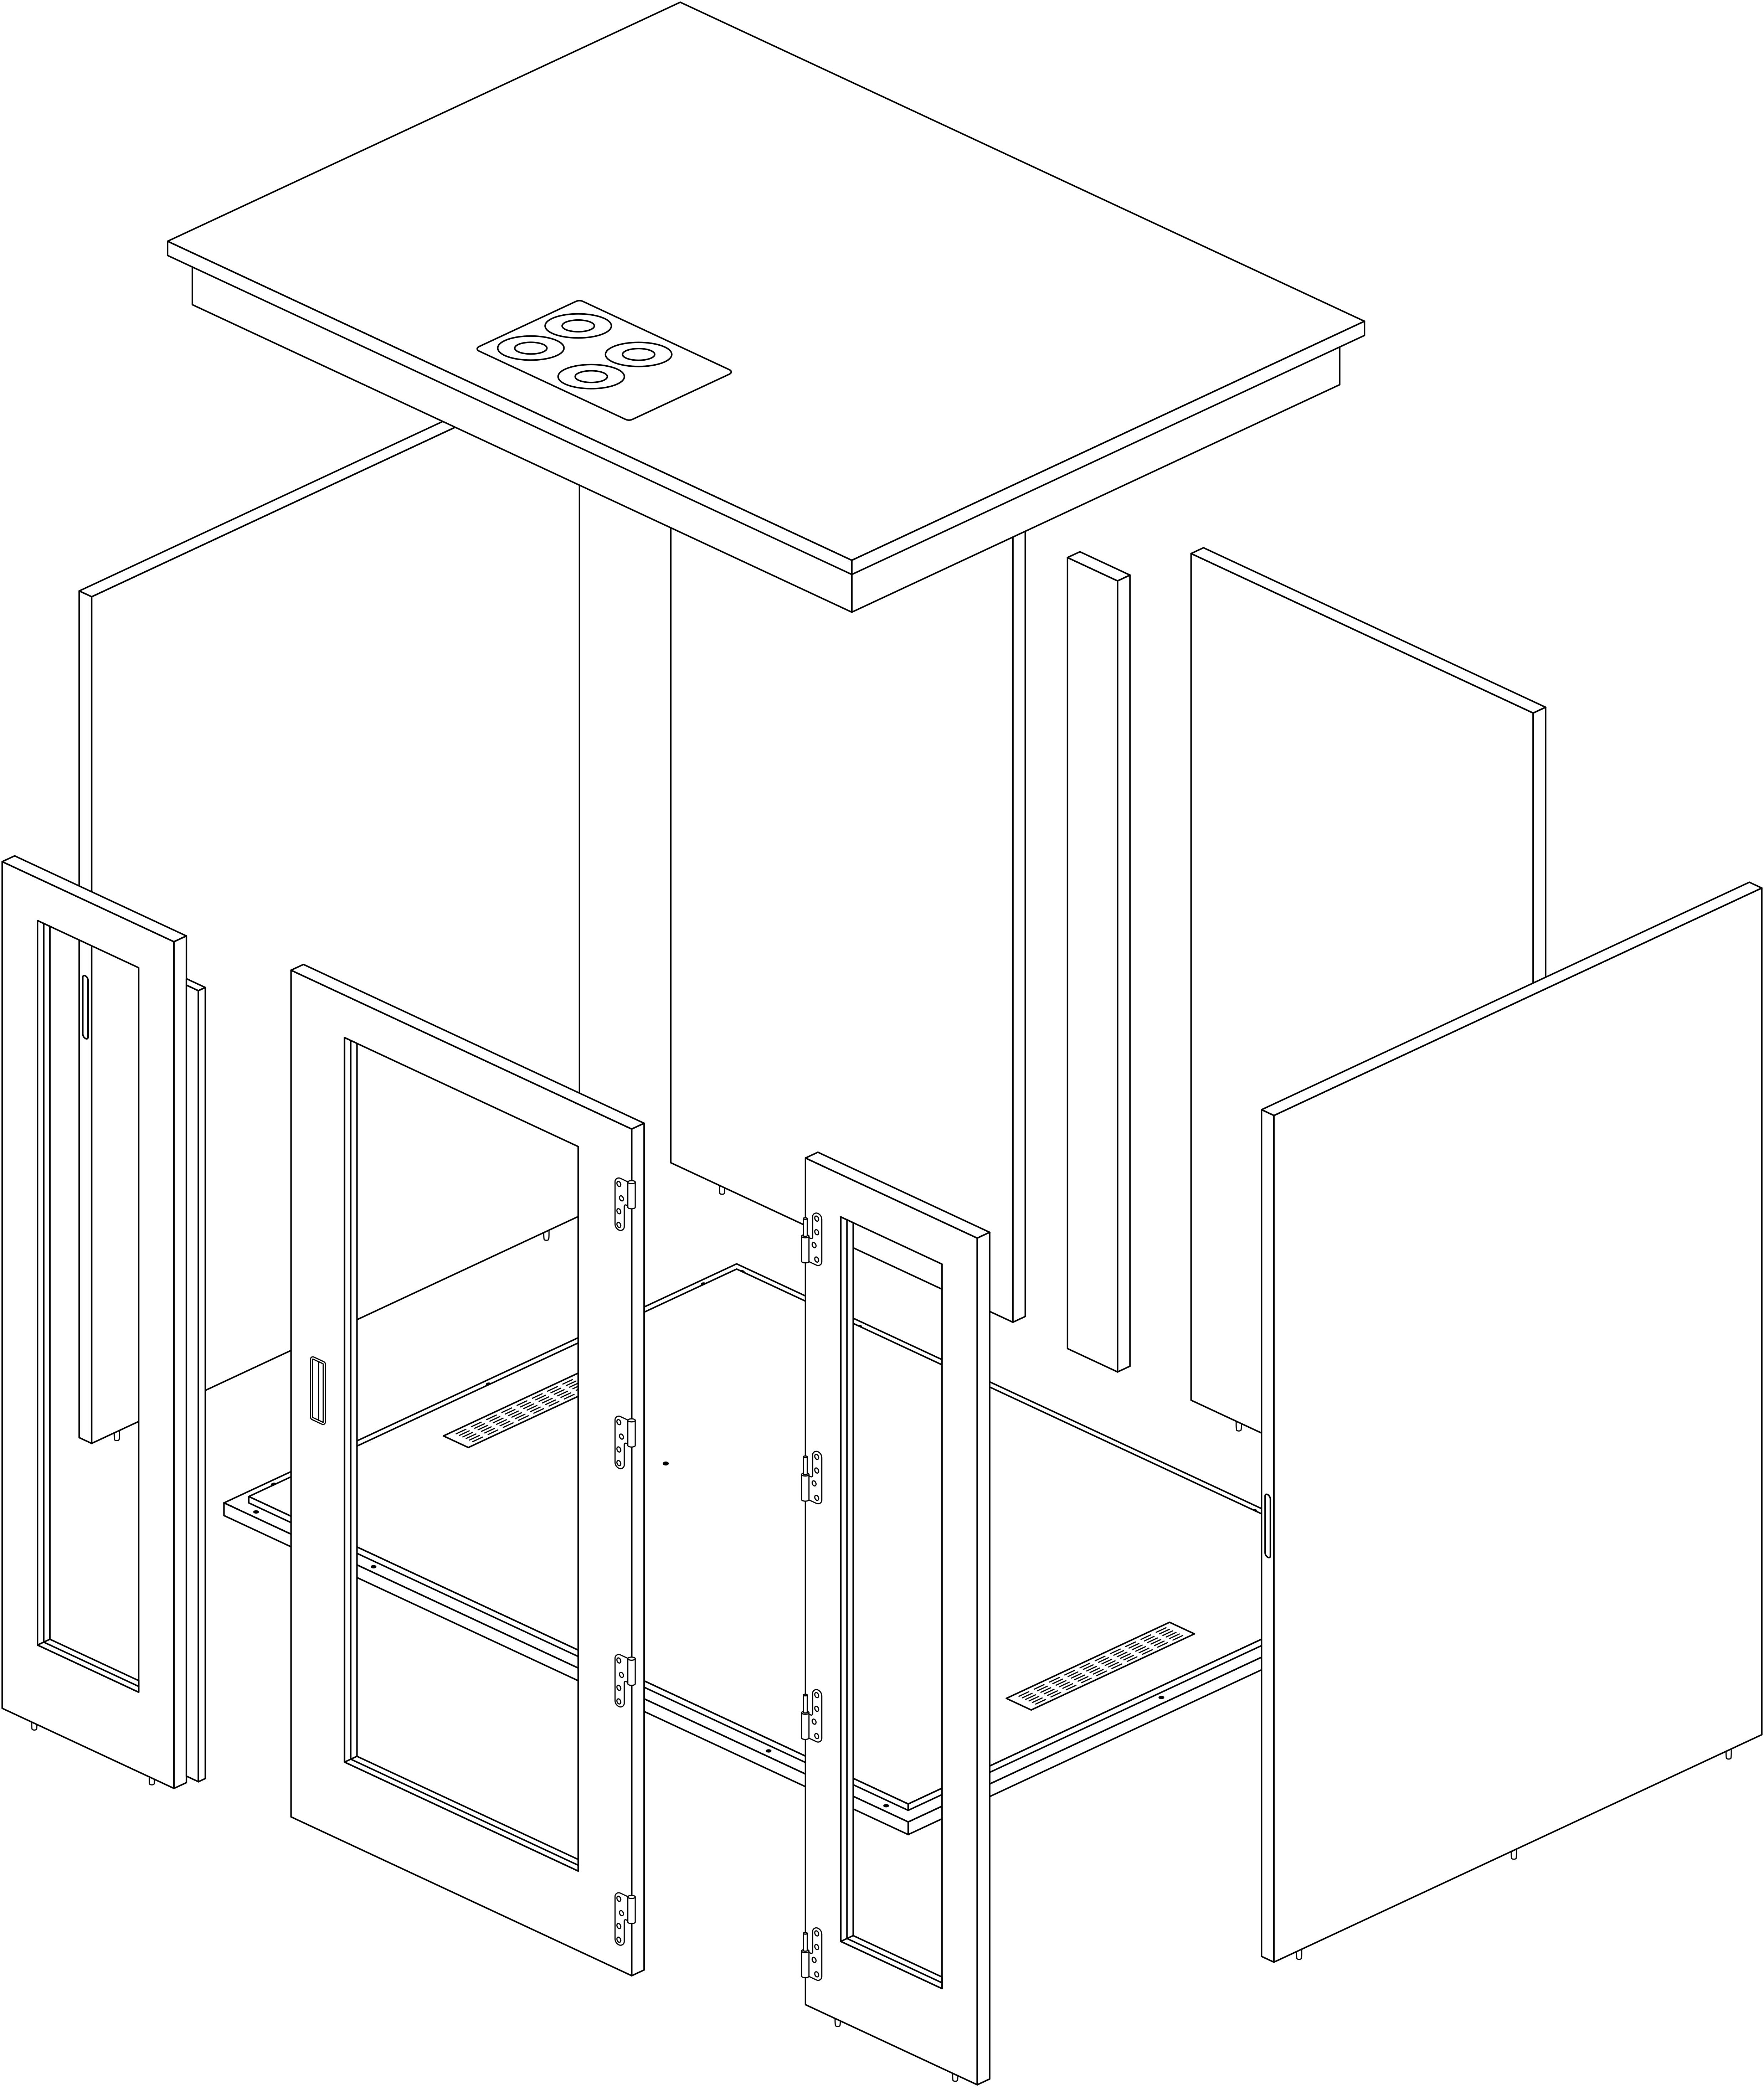
The assembly is easy – no special tools needed. However, please keep in mind: – This thing is heavy! Use the help of three colleagues, teamwork rocks! (4 people required).
Use a level and adjust the 15 height-adjustable feet. Turn clockwise to increase and counter-clockwise to decrease the height. Add the left side panel. Insert two screws at the bottom.
Hold it firmly until step 2 is completed!
Step 2
Add the left back side panel. Insert two screws at the bottom, one at the top and one in the middle.
You can now let go of the left side panel.
Step 3
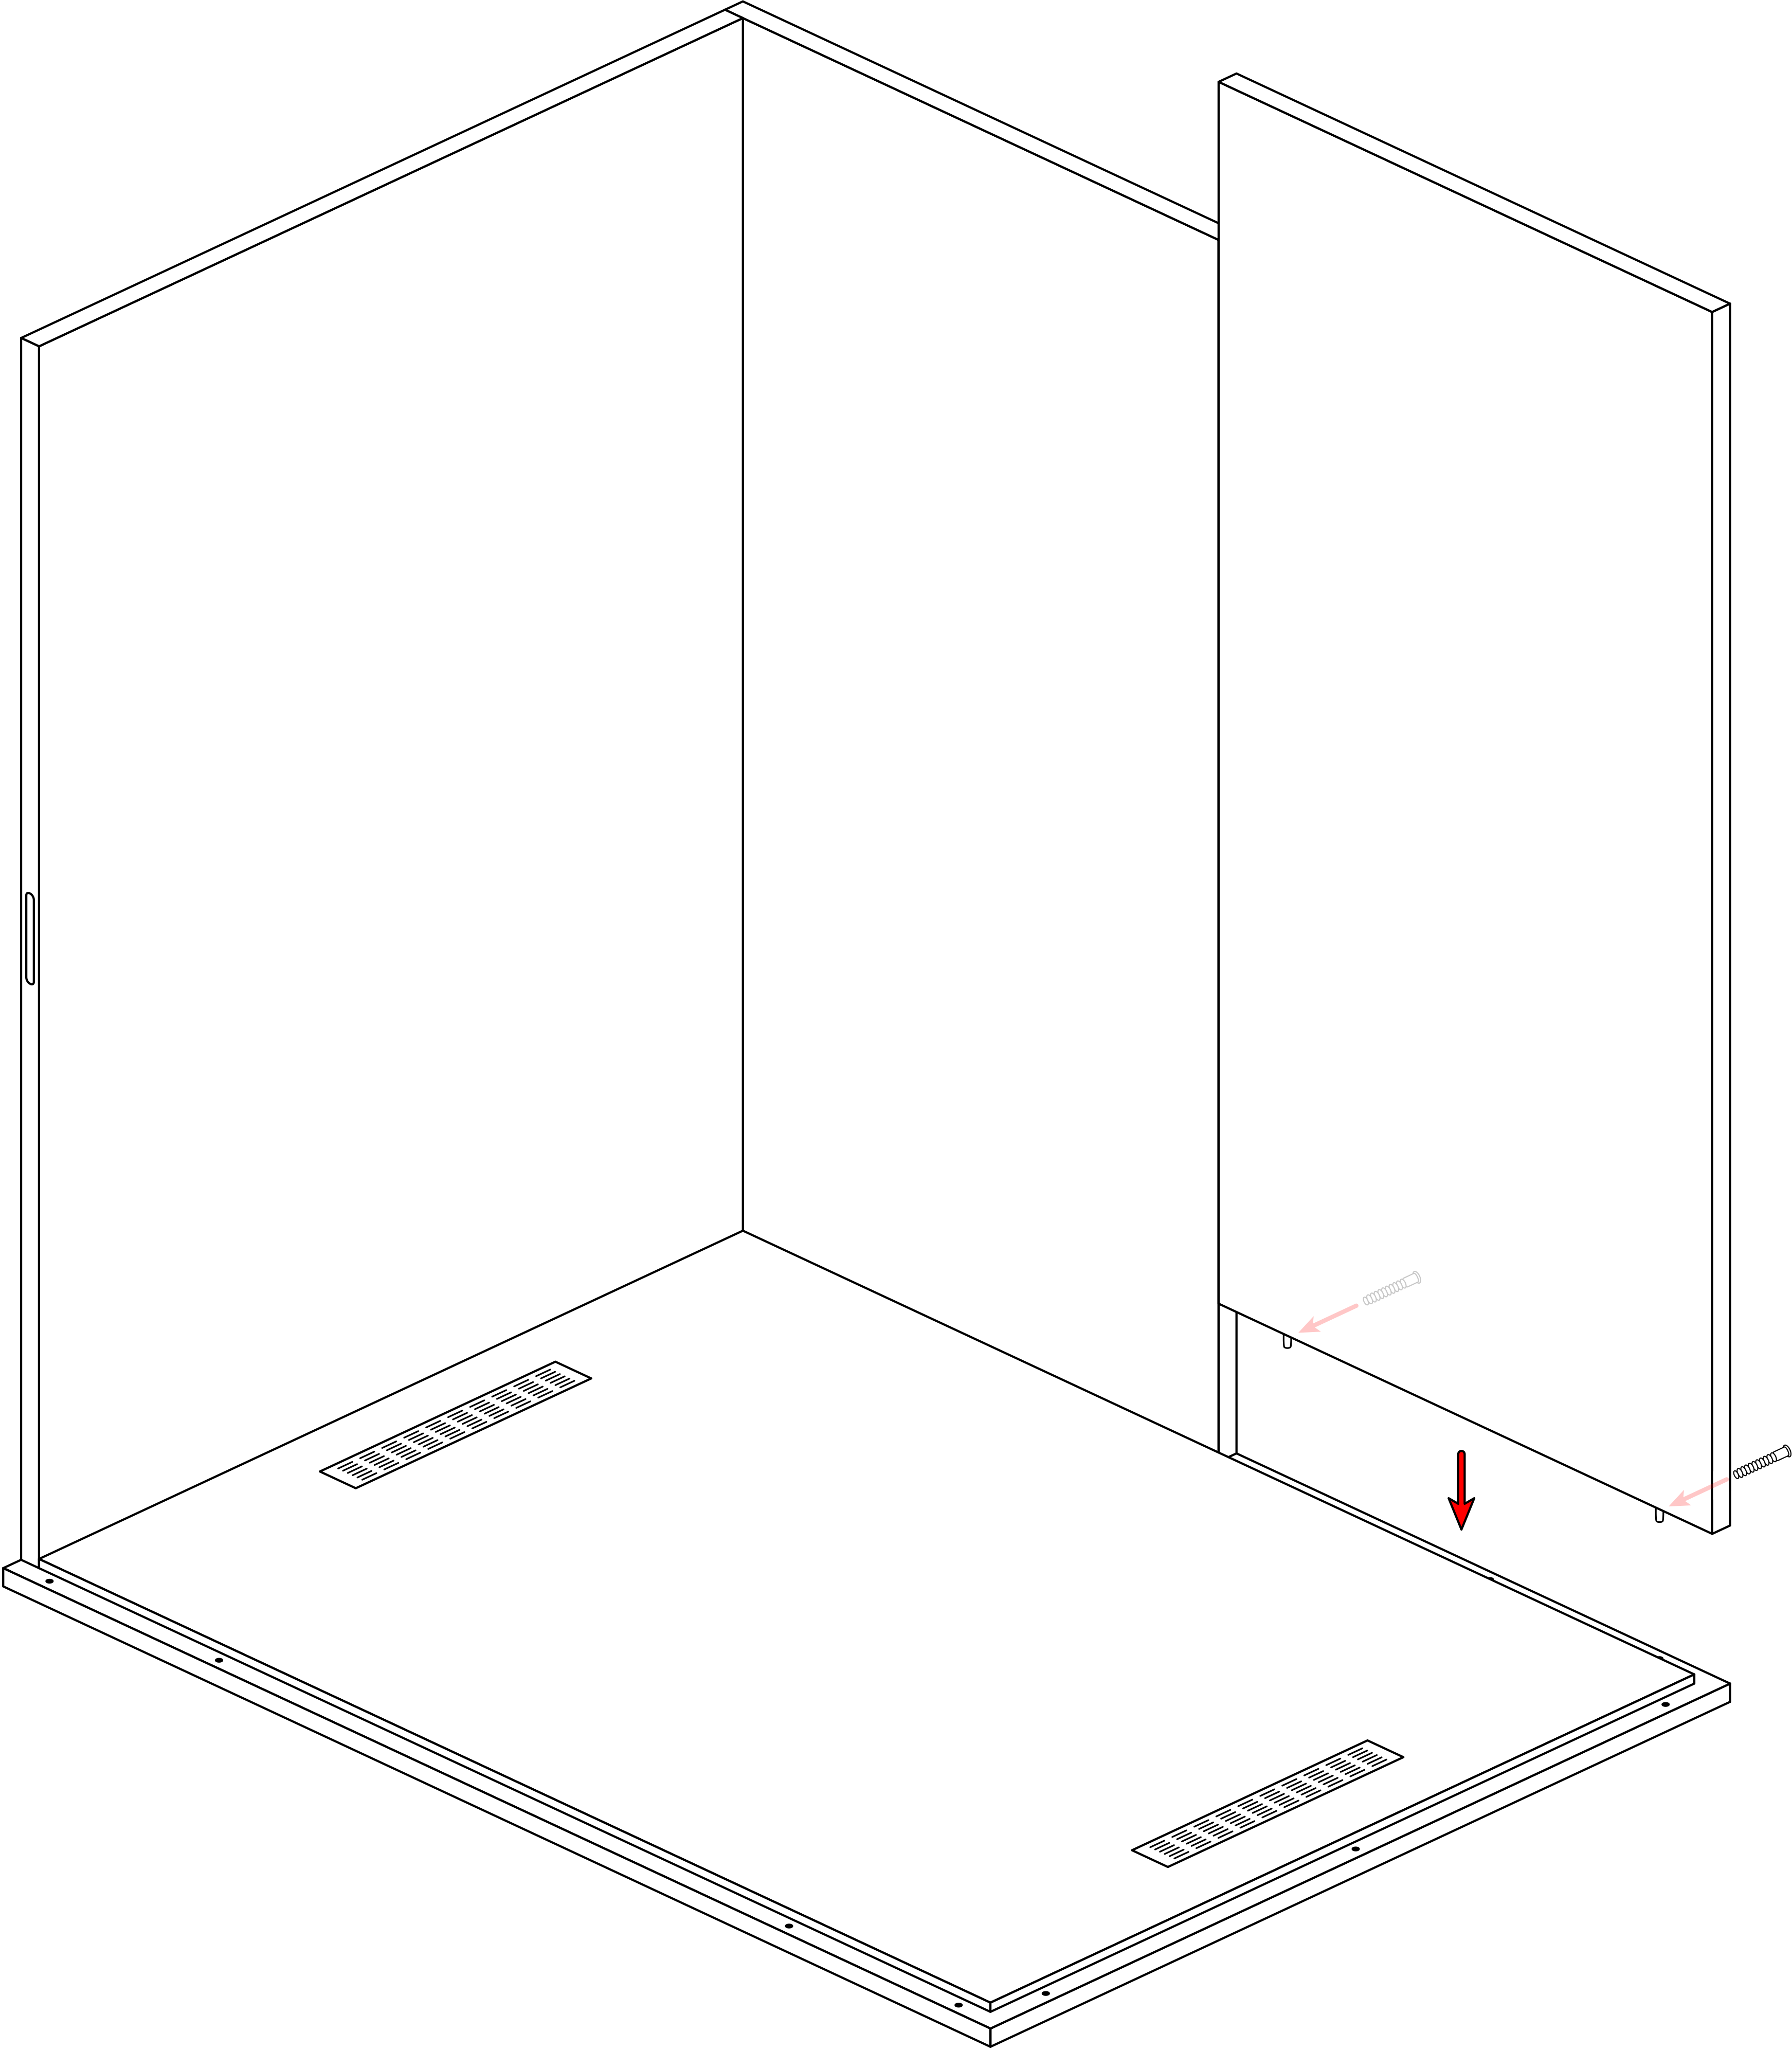
Add the right back panel. Insert two screws at the bottom.
Step 4
Add the right side panel. Insert two screws at the bottom, one at the top and one in the middle.
Step 5
Place the pillar in the middle of the back side. Insert 6 screws from the back.
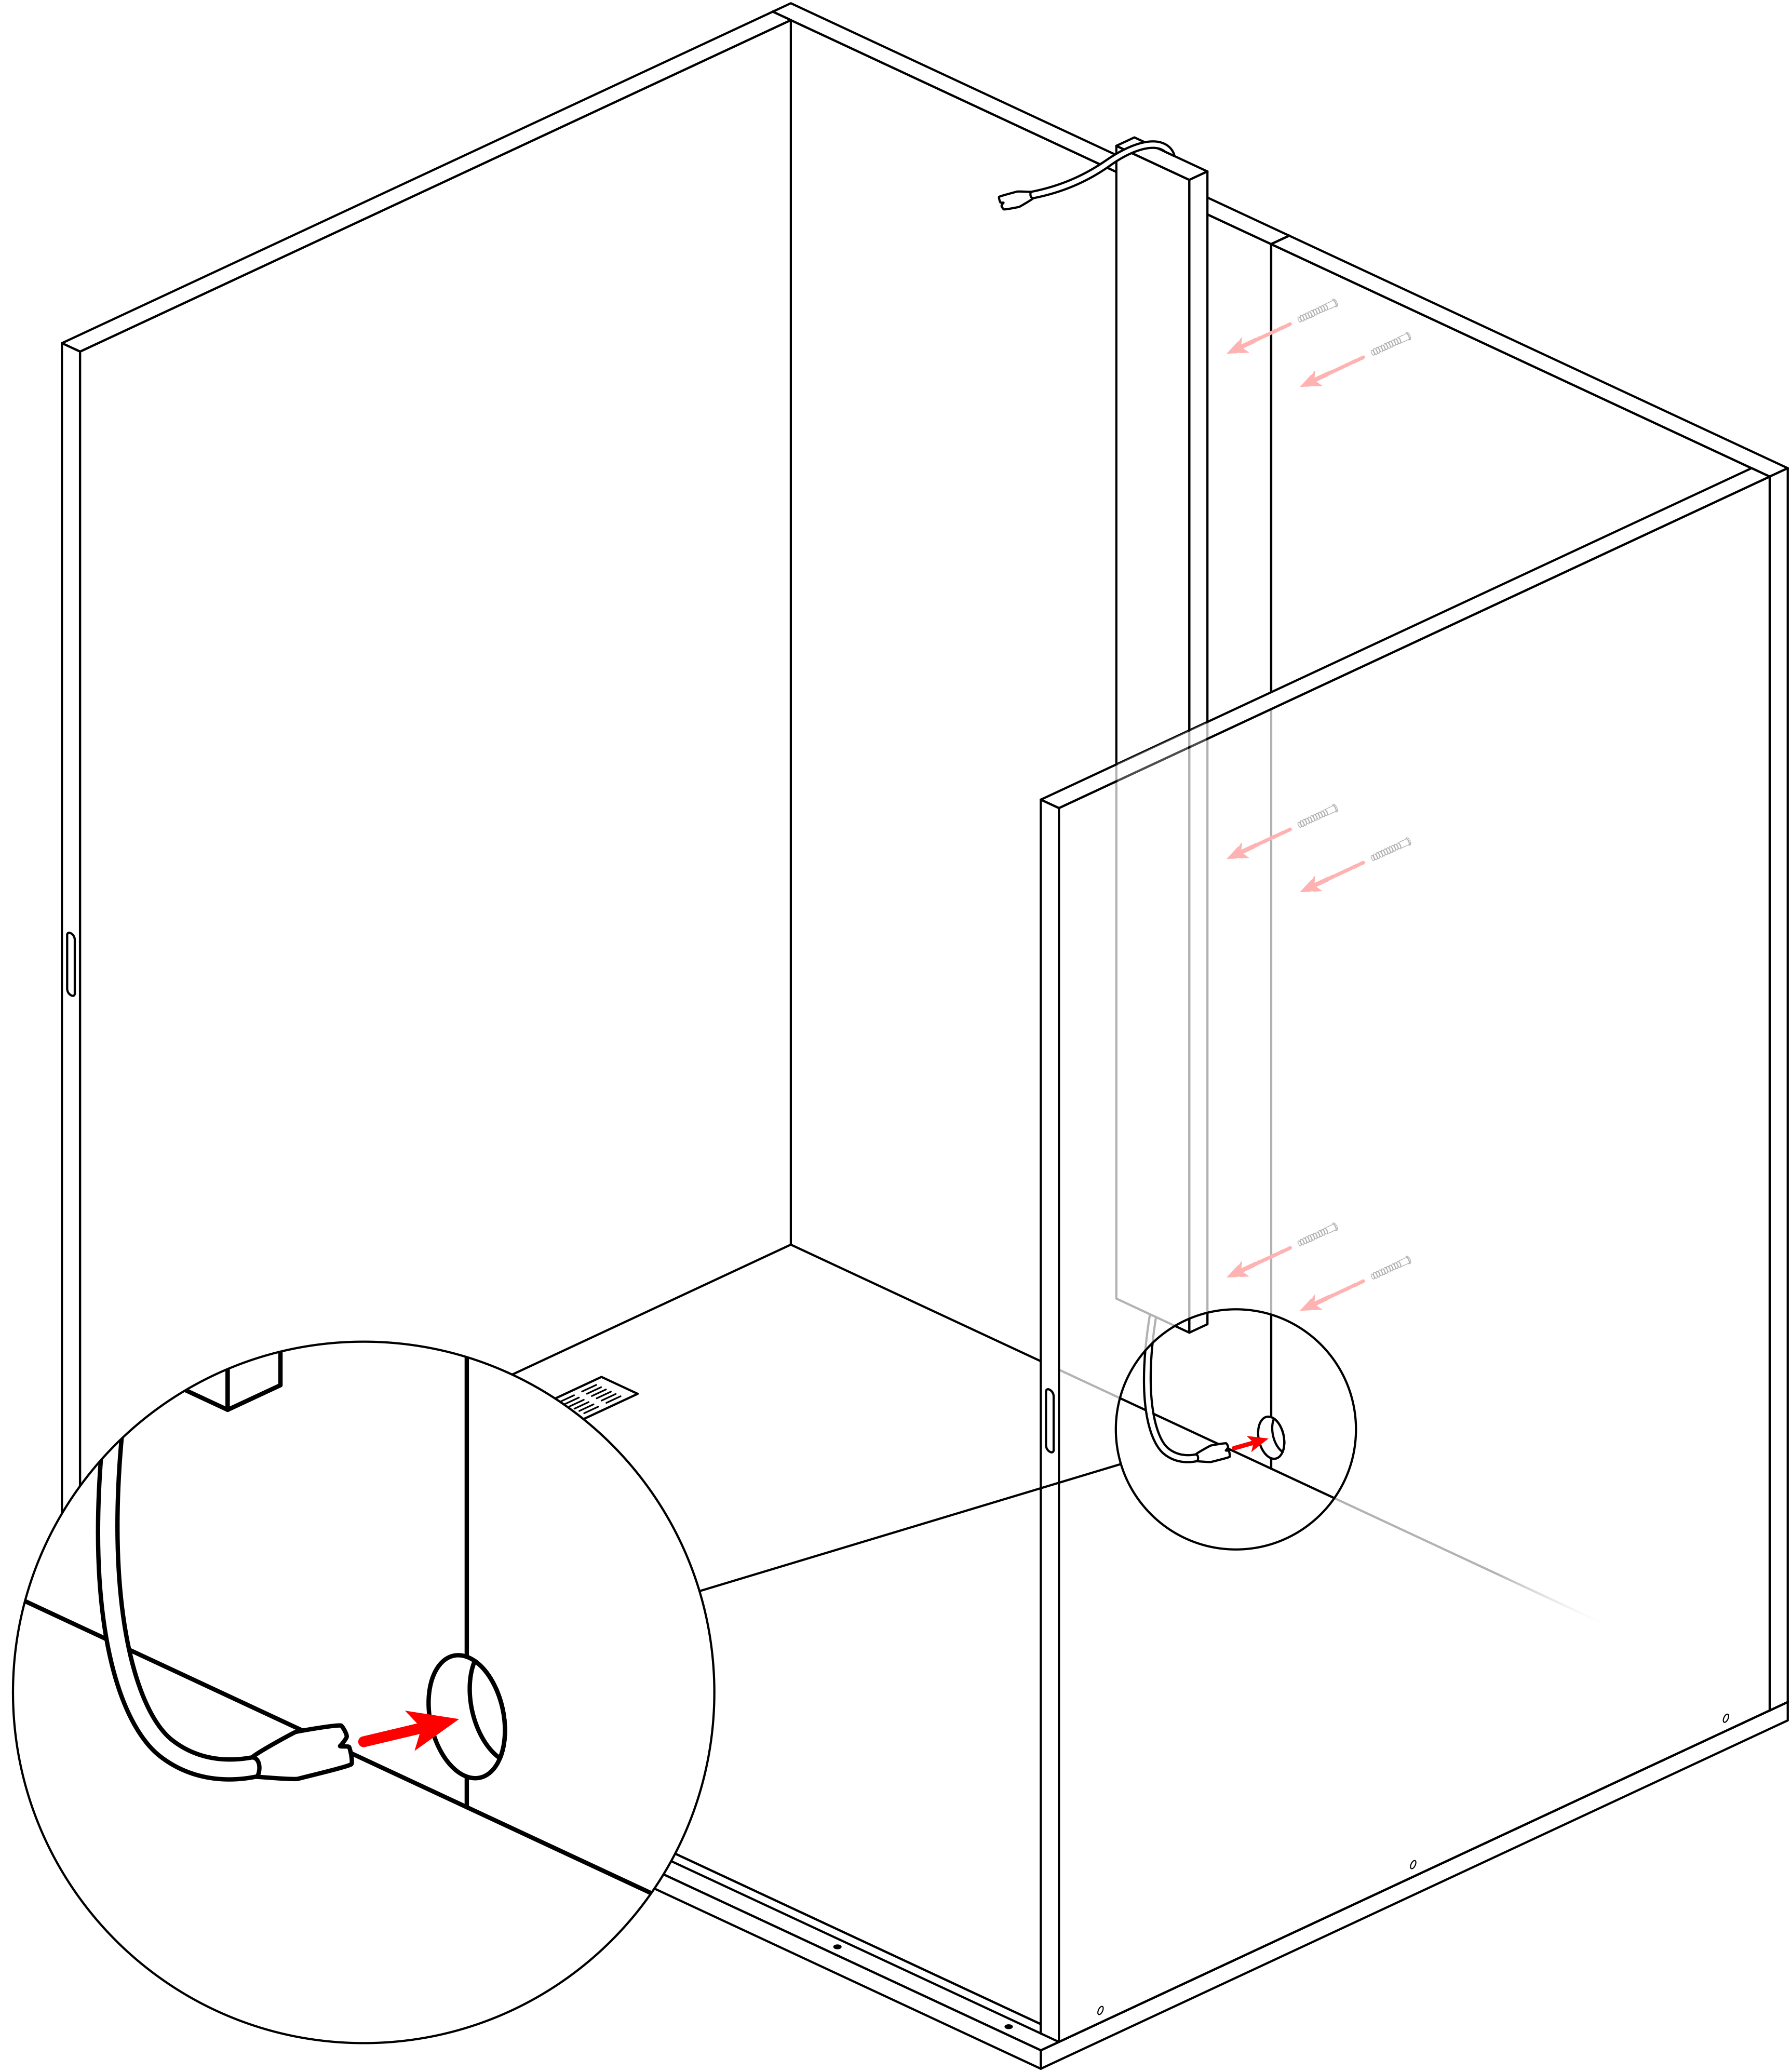
Step 6
Put the ceiling panel on top of the booth in a resting position just before it fits into place. Connect the cables coming from the pillar and the ceiling panel.
Finish sliding on the ceiling panel (don’t insert any screws from the top yet).
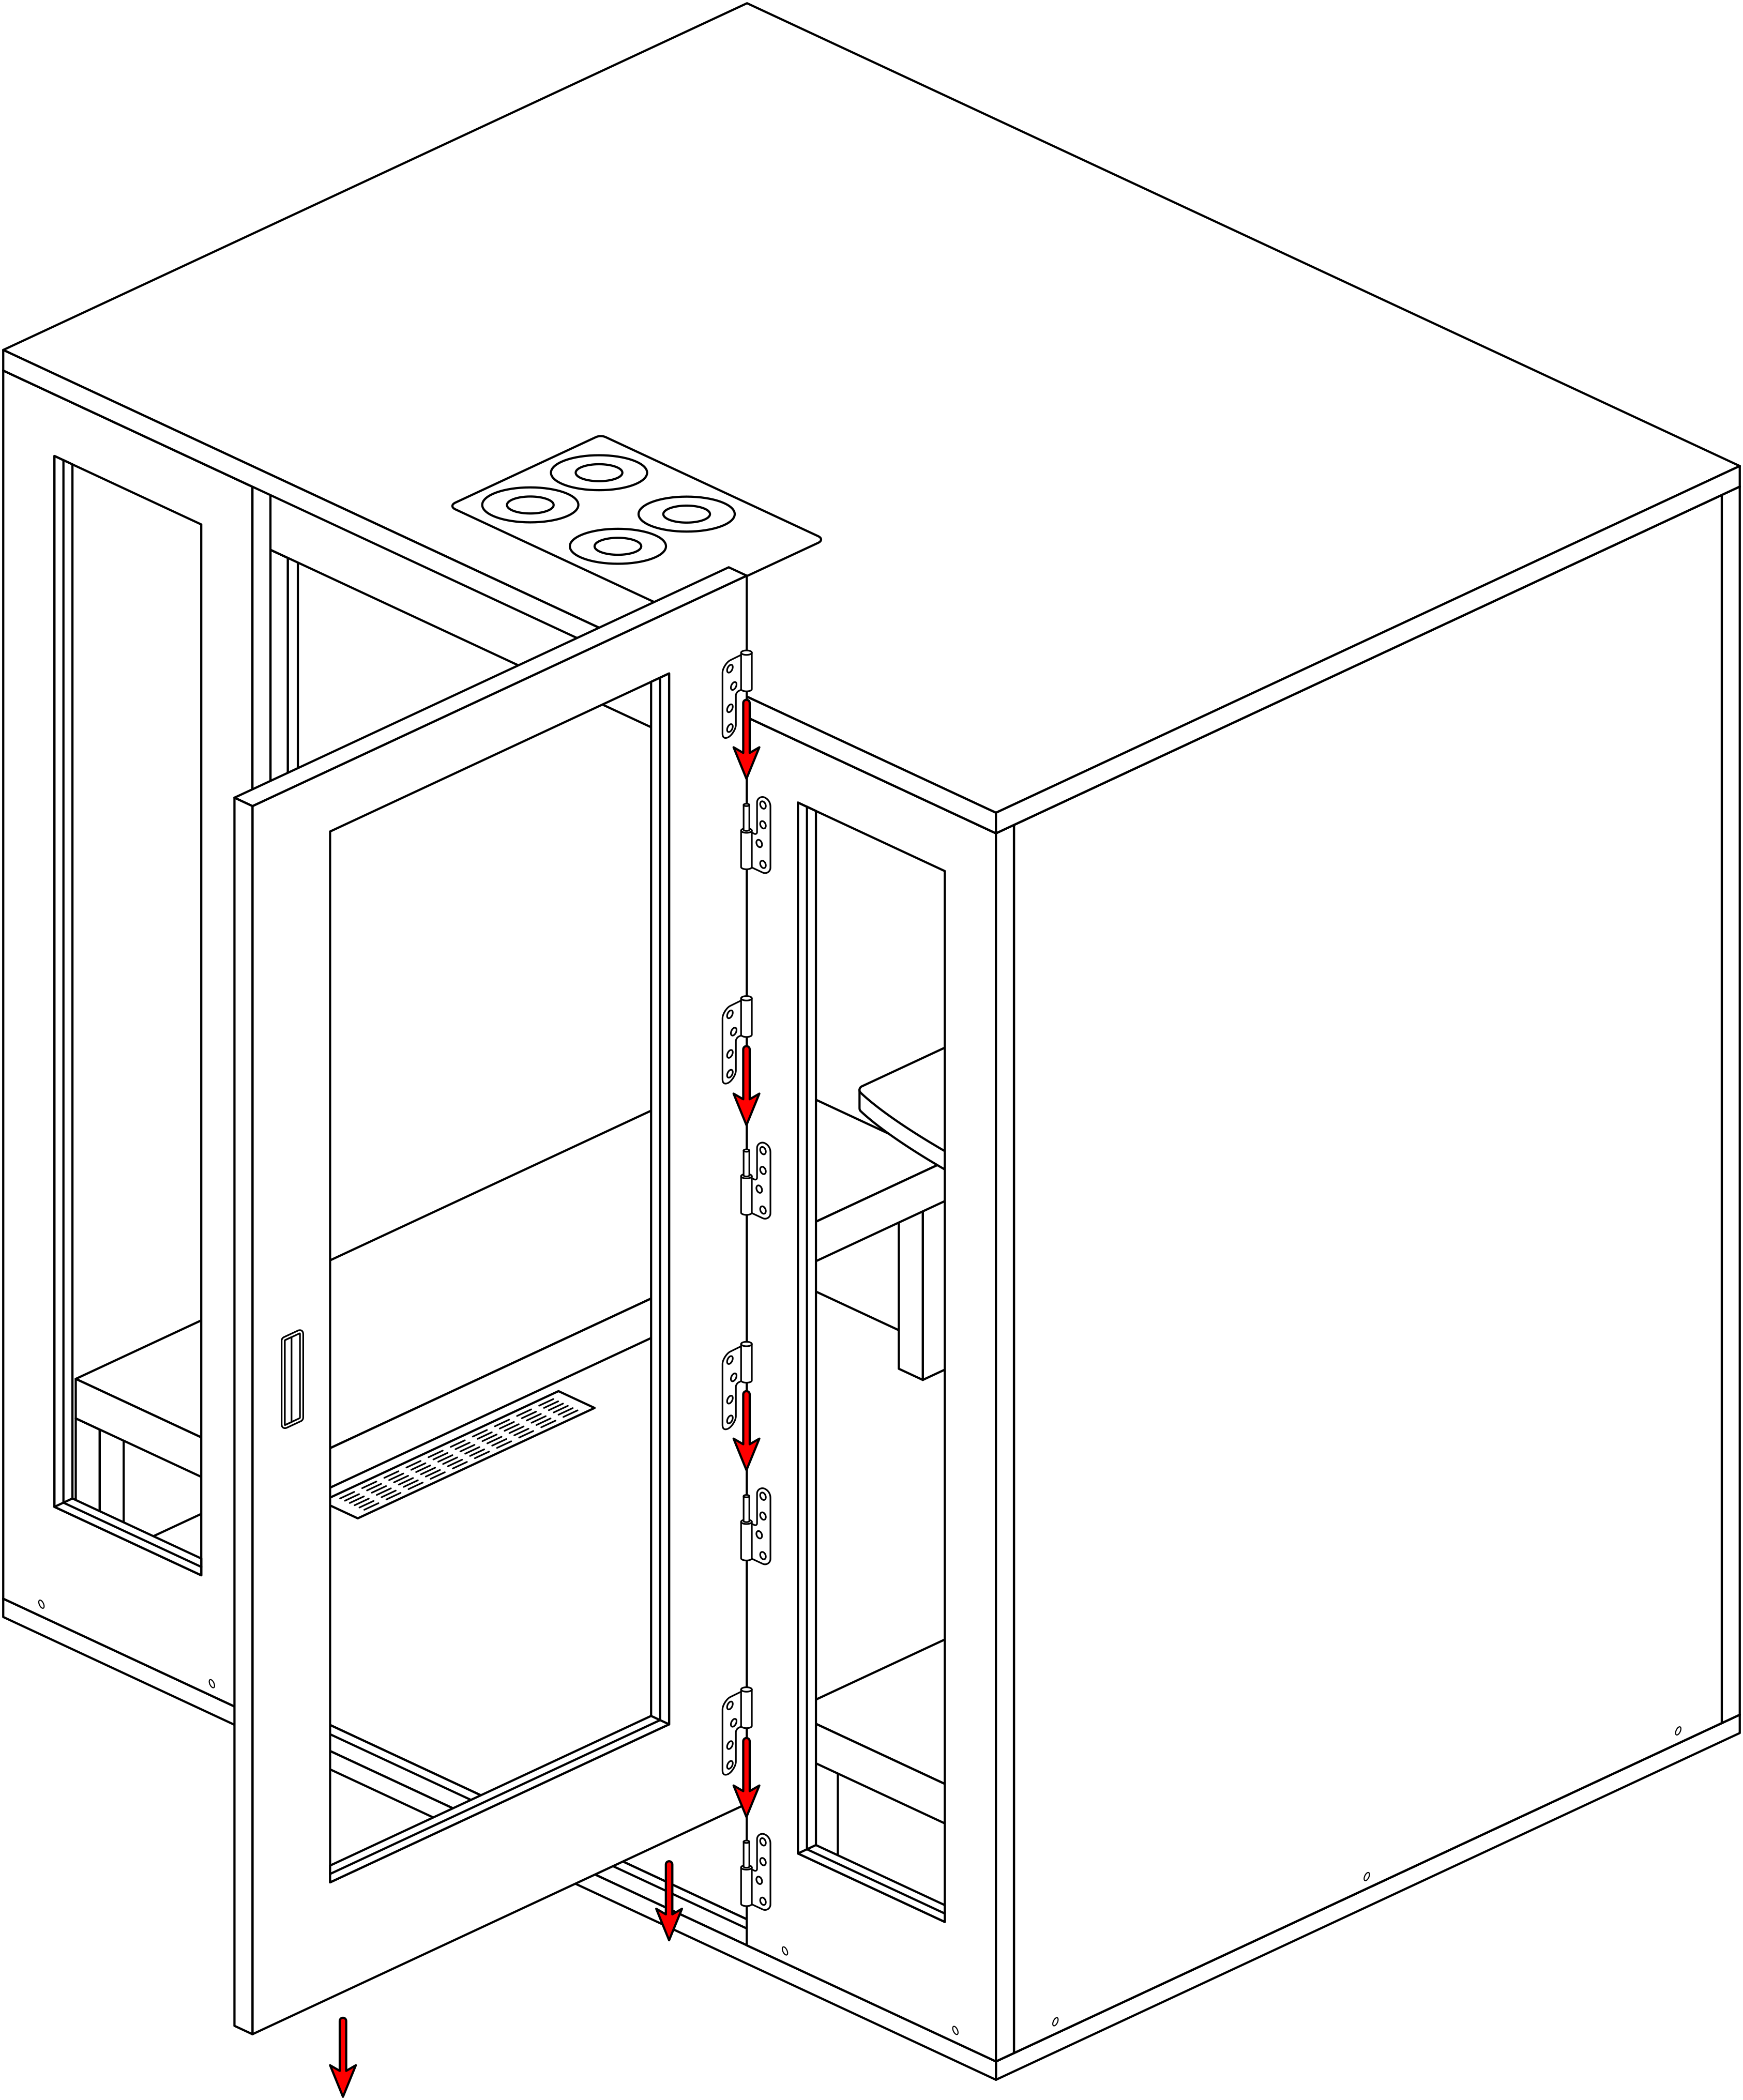
Step 7
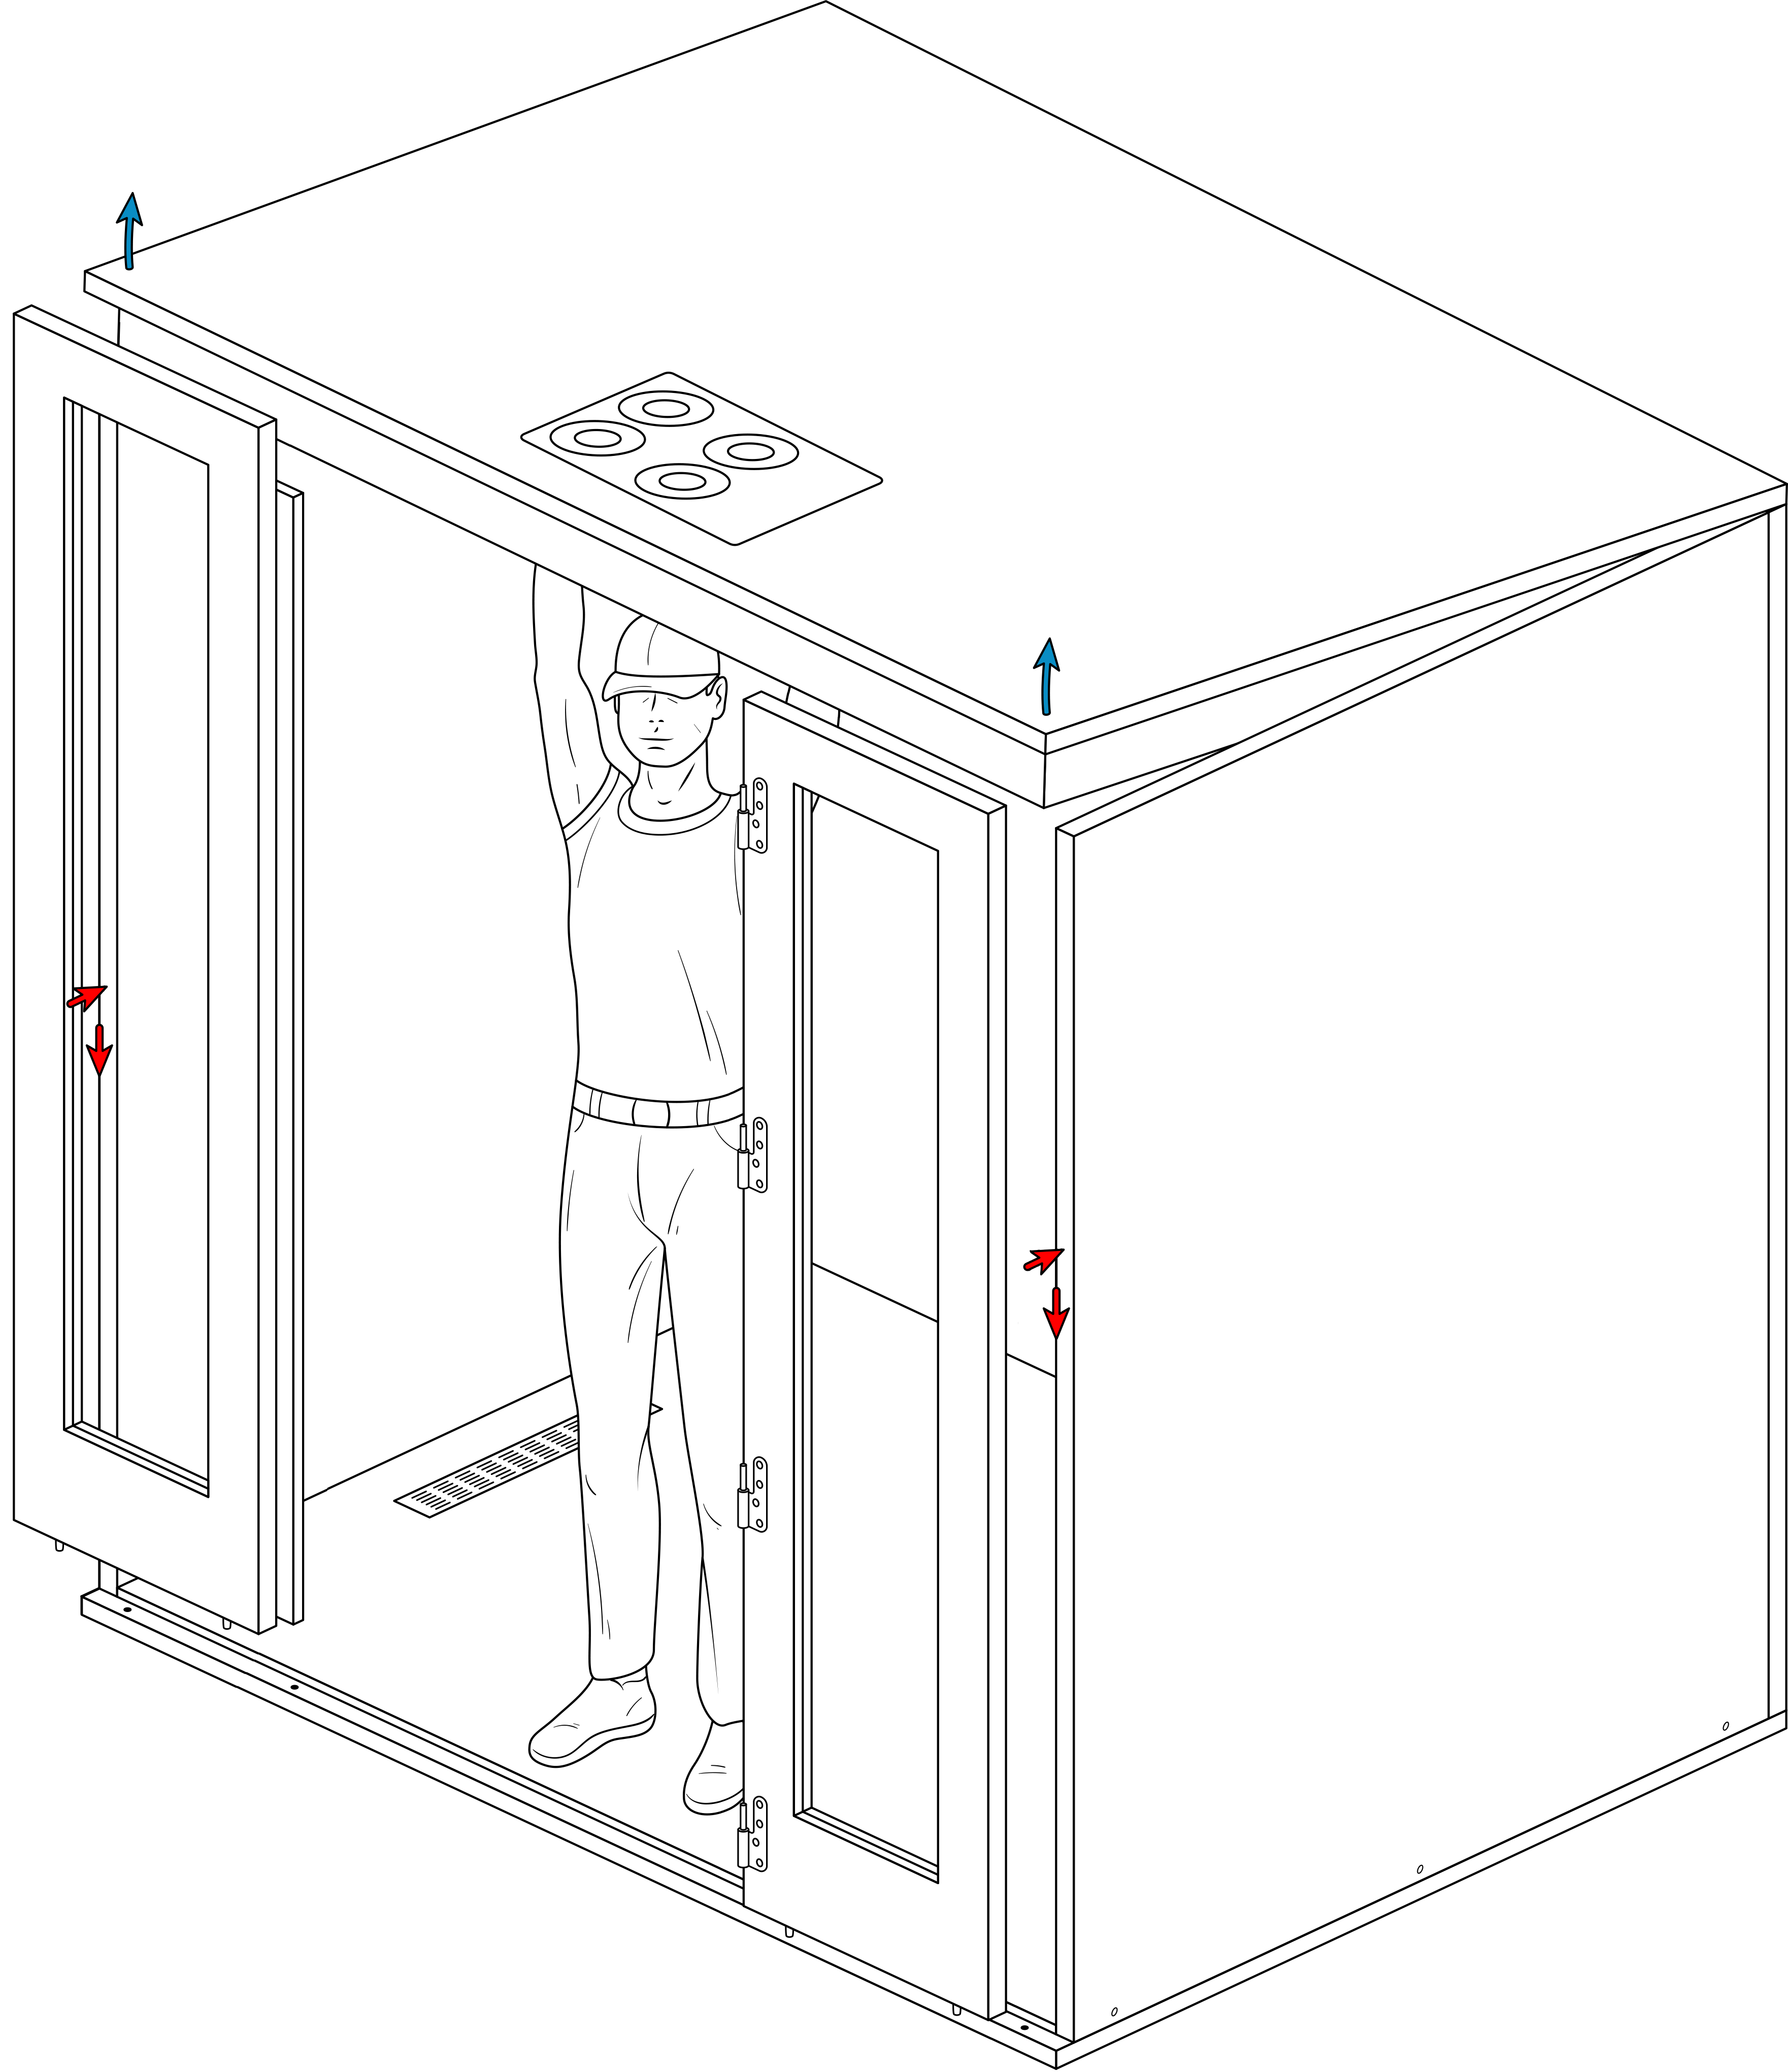
Lift the front side of the ceiling and hold it in that position. Place the left and right front panels.
Slowly lower the ceiling and put it in place.
Step 8
Tighten all screws from the top and the front. Place the two benches insite the booth.
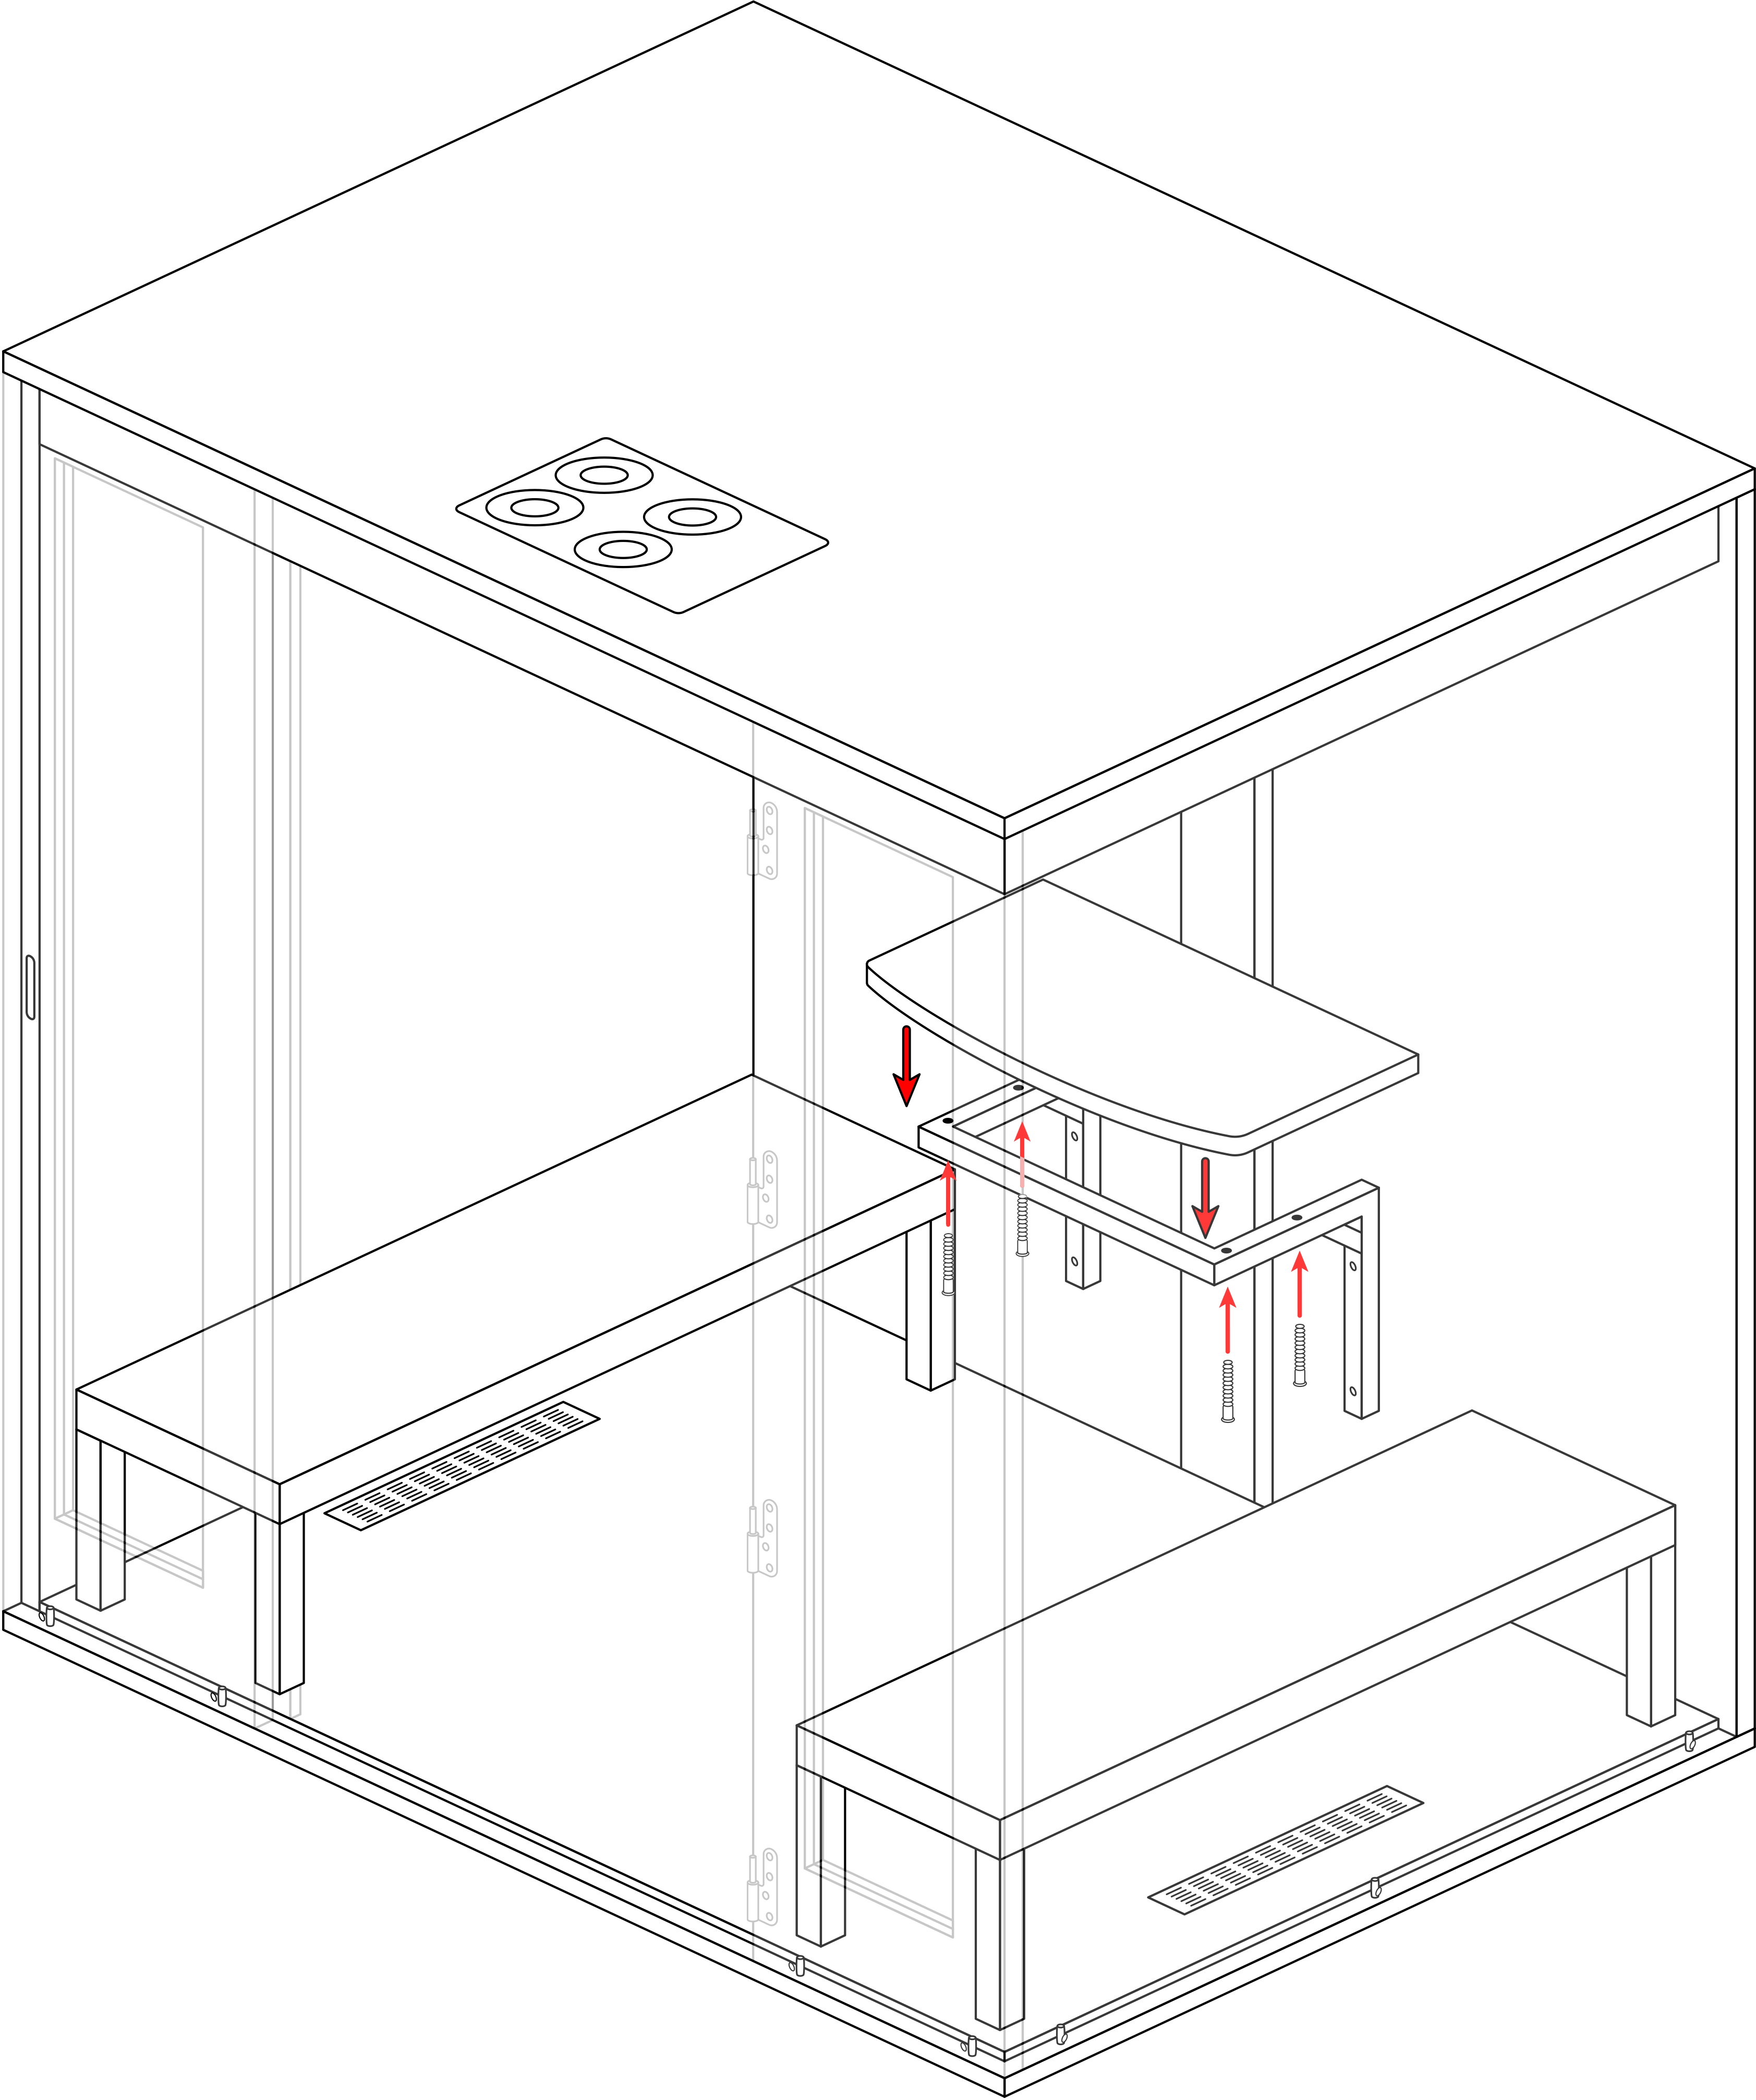
Step 9
Attach the table frame (4 small screws with a flat tip).
Step 10
Attach the table plate (4 small screws with a sharp tip).
Step 11
Move the booth to its final position and check again that all height-adjustable feet below the base touch the floor.
We use cookies on our website to give you the most relevant experience by remembering your preferences and repeat visits. By clicking “Accept”, you consent to the use of ALL the cookies. However you may visit Cookie Settings to provide a controlled consent.
This website uses cookies to improve your experience while you navigate through the website. Out of these cookies, the cookies that are categorised as necessary are stored on your browser as they are essential for the working of basic functionalities of the website. We also use third-party cookies that help us analyse and understand how you use this website. These cookies will be stored in your browser only with your consent. You also have the option to opt-out of these cookies. But opting out of some of these cookies may have an effect on your browsing experience. You can read more about our cookie use here.
Necessary cookies are absolutely essential for the website to function properly. This category only includes cookies that ensures basic functionalities and security features of the website. These cookies do not store any personal information.
These cookies are not strictly necessary for the website to function and are used specifically to enhance the user experience via analytics, personalisation and ads.